Circuit 9 from Outer Space: Photoresistor Documentation

Building things is fun!
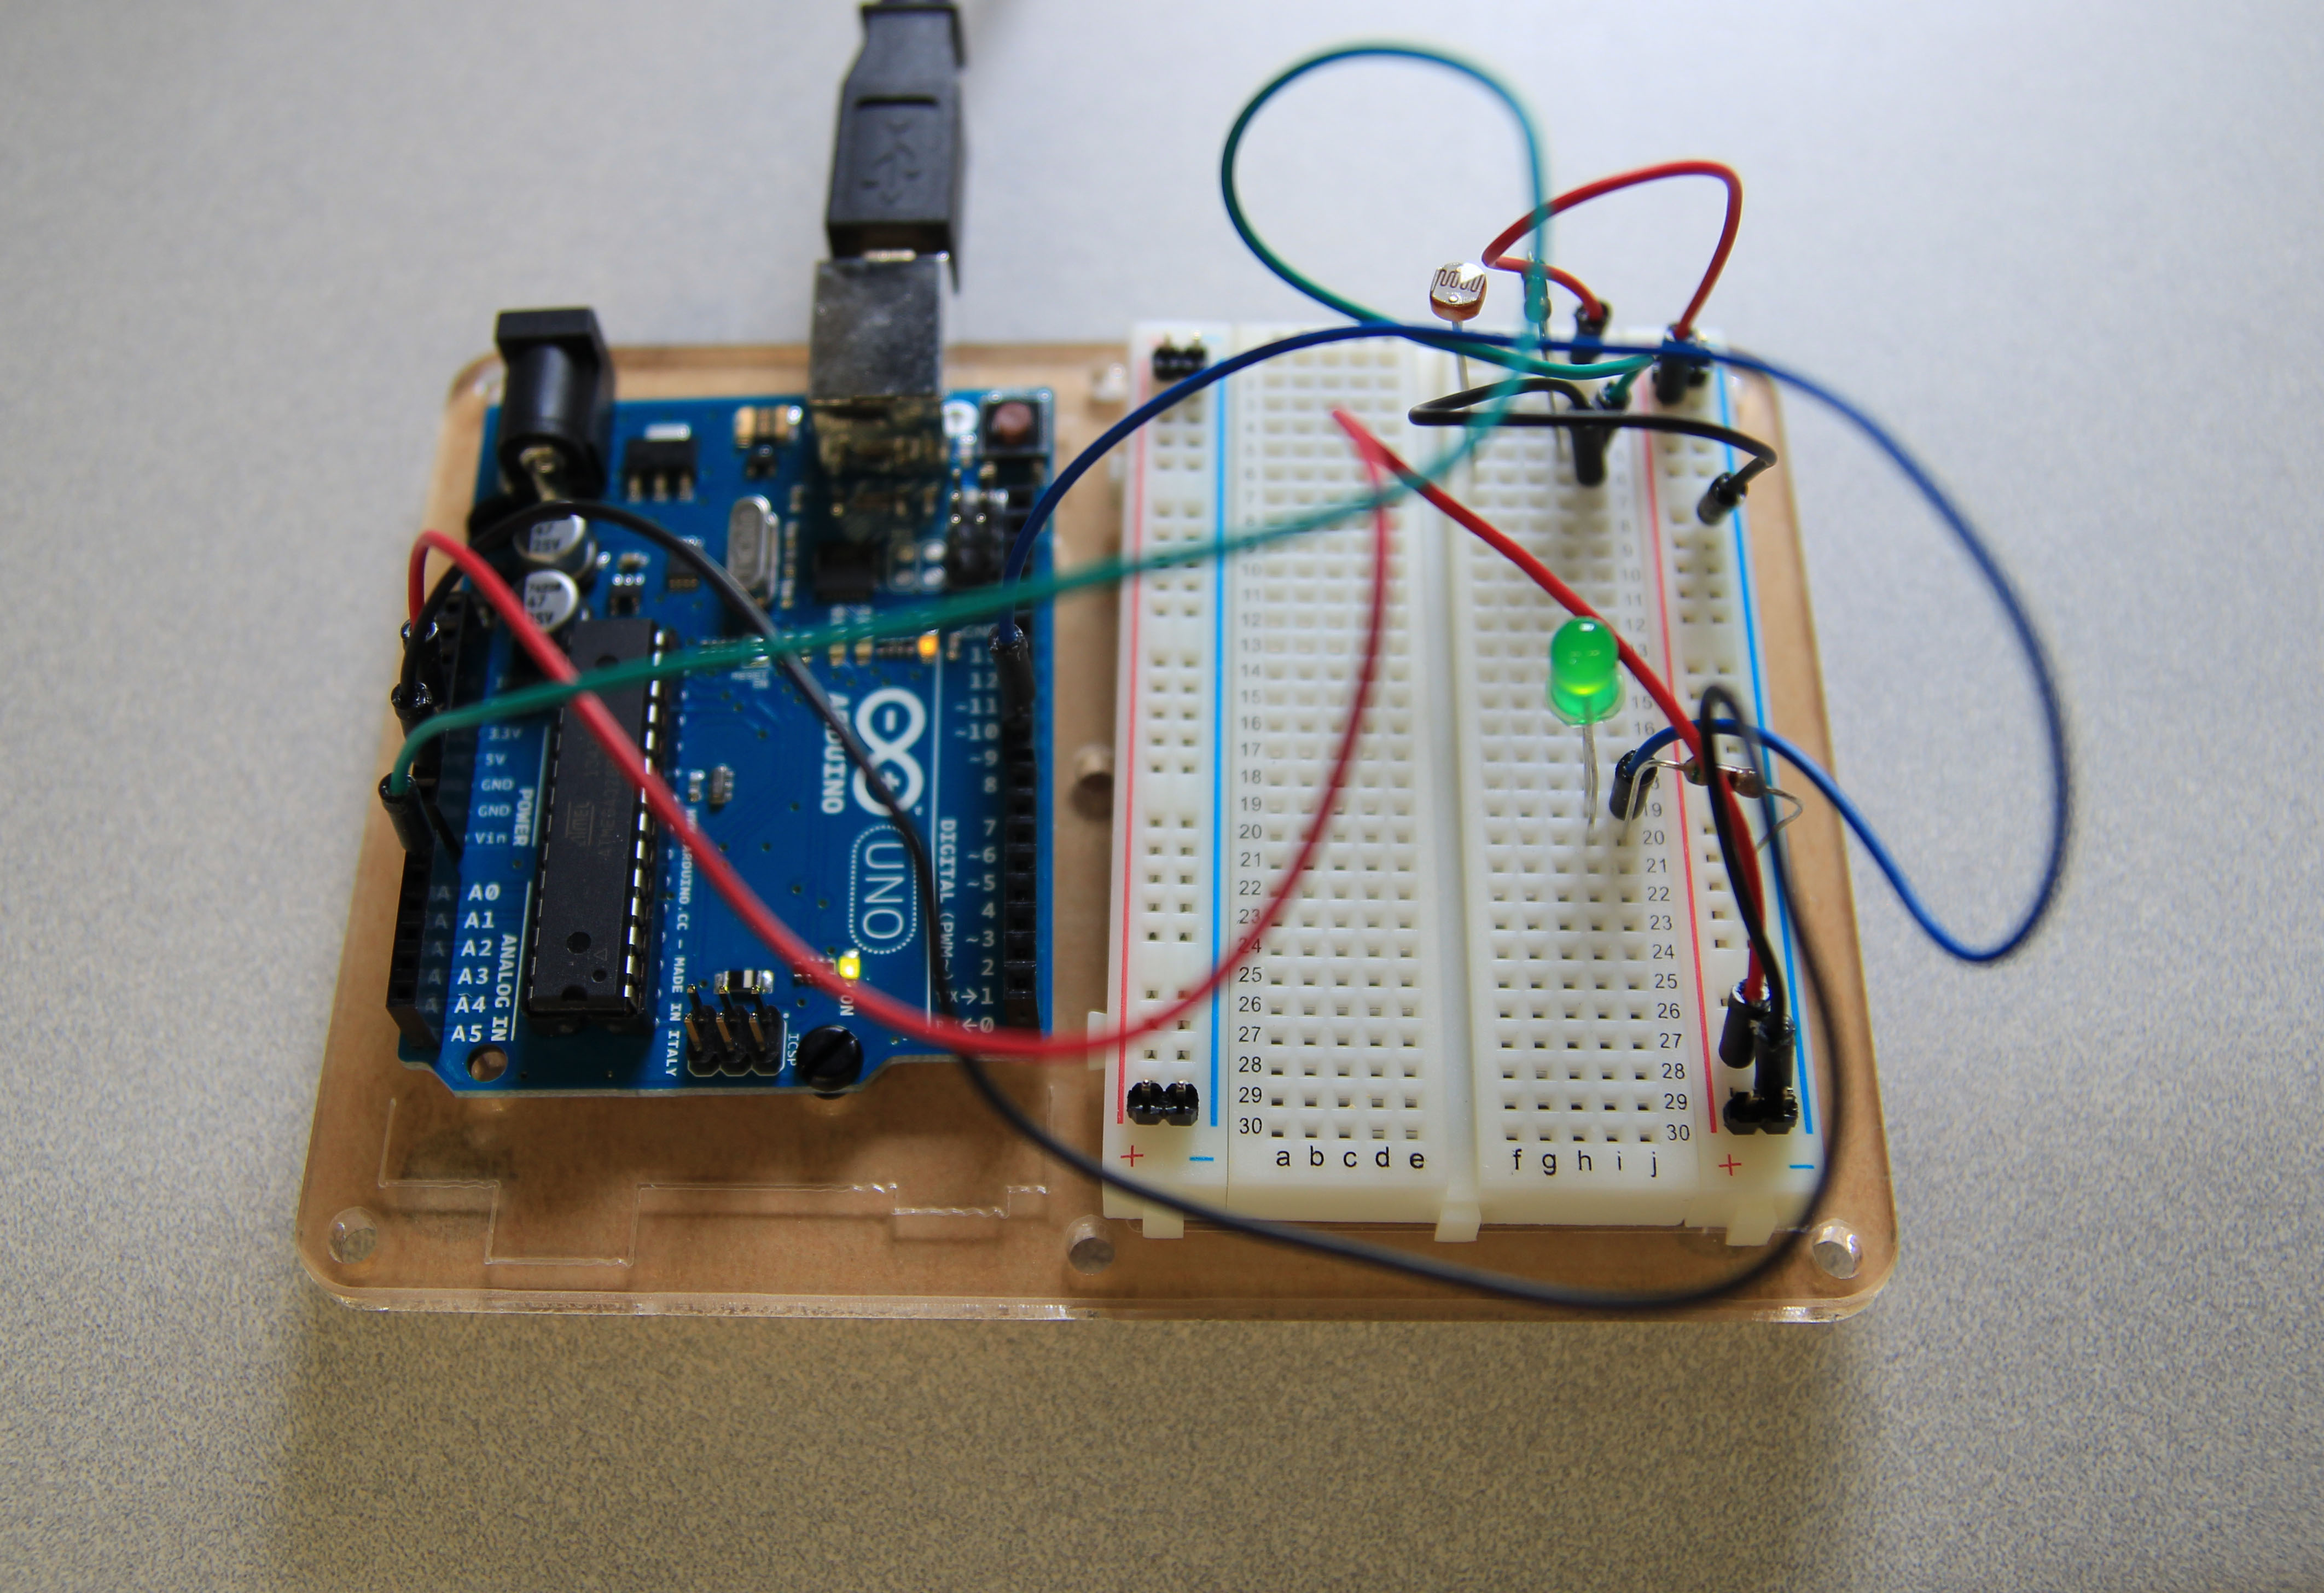
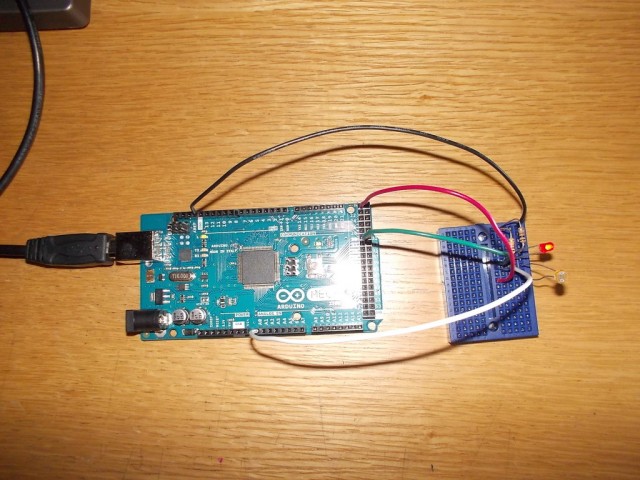
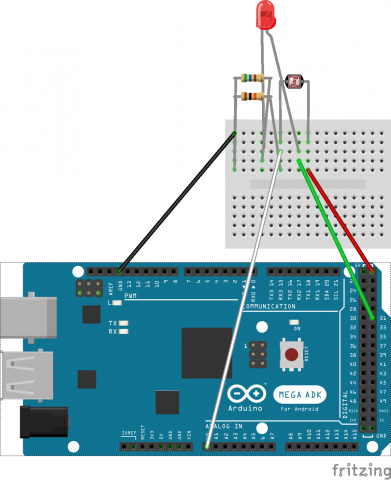
CIRC_9_FullRezolutionI found it useful that the instructions for building CRIC-9 (the photoresistor) showed multiple views of the components’ place on the breadboard. I now understand why each of the columns and rows have their own designation. The only point of frustration was that the wires kept getting in the way of the smaller components, in both assembly and documentation. CIRC9 Fritzing Diagram_bbAs for the Fritzing diagram, I’m not entirely sure if I used the proper object for the two-pin headers (and I’m still not entirely sure what they do), but the process of creating the diagram is straightforward, if a bit tedious.
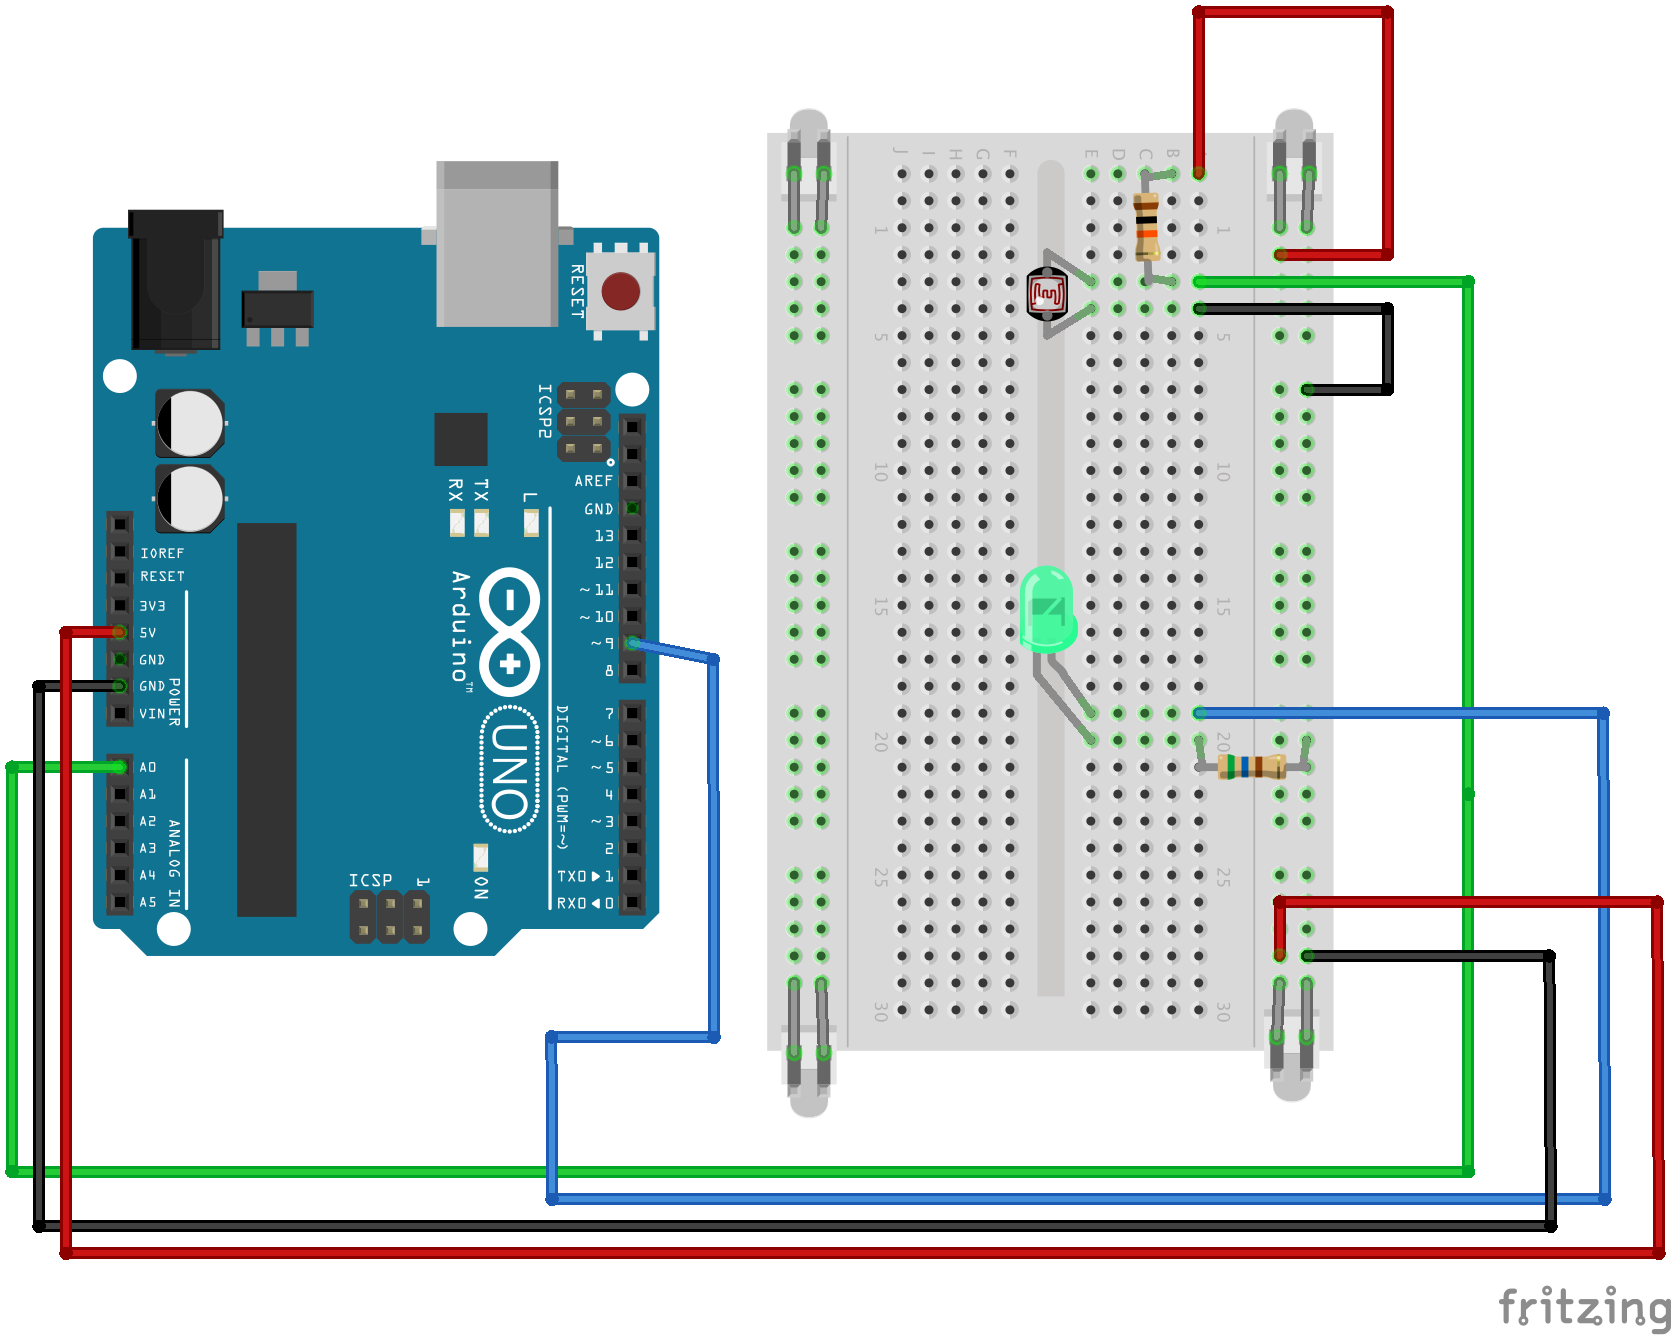
/*
 * A simple programme that will change the intensity of
 * an LED based  * on the amount of light incident on 
 * the photo resistor.
 * 
 */

//PhotoResistor Pin
int lightPin = 0; //the analog pin the photoresistor is 
                  //connected to
                  //the photoresistor is not calibrated to any units so
                  //this is simply a raw sensor value (relative light)
//LED Pin
int ledPin = 9;   //the pin the LED is connected to
                  //we are controlling brightness so 
                  //we use one of the PWM (pulse width
                  // modulation pins)
void setup()
{
  pinMode(ledPin, OUTPUT); //sets the led pin to output
}
 /*
 * loop() - this function will start after setup 
 * finishes and then repeat
 */
void loop()
{
 int lightLevel = analogRead(lightPin); //Read the
                                        // lightlevel
 lightLevel = map(lightLevel, 0, 900, 0, 255); 
         //adjust the value 0 to 900 to
         //span 0 to 255


 lightLevel = constrain(lightLevel, 0, 255);//make sure the 
                                           //value is betwween 
                                           //0 and 255
 analogWrite(ledPin, lightLevel);  //write the value
}
PixyCam by CMU (yes!) and Servo Shield by Adafruit

Well I’m certainly happy. My idea for this Arduino project was to have my RC car follow me around like a pet, fast if I’m running, slow if I’m walking, backwards if i’m walking towards it. And I’ve found the perfect sensors. First, is PixyCam by CMU labs! Yes, homegrown here in Carnegie Mellon. This camera is really impressive, crunching huge amounts of data into really simple color-tracking signals. It allows a “weak” computer like Arduino to use a complicated sensor like a camera (millions of pixels) at 50fps(!) to track the location, distance and number of objects, color coded, to create sight-following bots or robot-followers etc. This is amazing! Just what I needed to make my rc car a pet. The other, more simply, is a shield provided by Adafruit to more accurately control more motors than just the simple Arduino board. Although I dont need this since the board is sufficient for my two-servo need.

Links:

https://www.adafruit.com/product/1906

https://www.adafruit.com/products/1438

Written by Comments Off on PixyCam by CMU (yes!) and Servo Shield by Adafruit Posted in LookingOutwards

RC Plane with Autopilot (Arduino)

This was a really cool project I found online, seeing as I’m interested in controlling my RC car with an Arduino. I’ve been learning how to control servos and motors with an Arduino and plan to have many different projects with it. This Looking Outwards assignment let me find other projects with similar goals, ambitions and various successes. This specific project has a really cool goal of making a plane fly on its own. Although this was also a school project, its’ still impressively done. They used an arduino and many sensors including accelerometers and gyroscopes to control the pitch/roll of the plane. They even have a landing sequence.

MAJ: Looking Outwards #6

PIR Motion Sensor

proximity_pirsensor

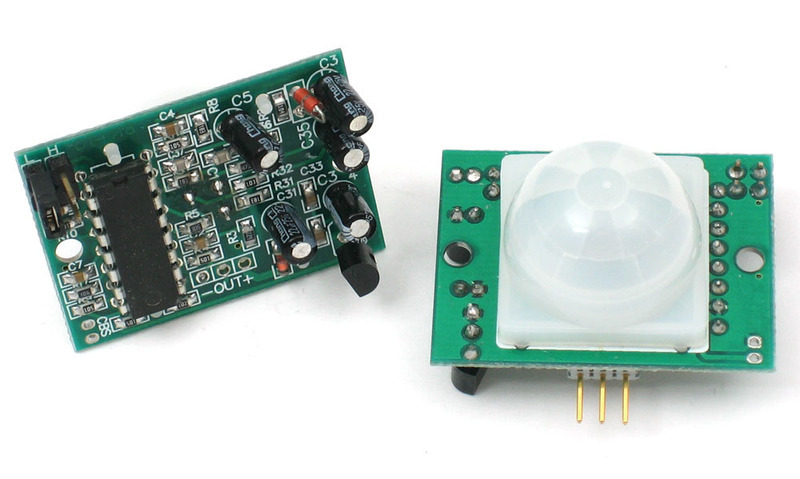
The PIR Motion Sensor, as its name suggests, is able to sense motion. According to Adafruit’s description, this sensor is typically used to tell if a human has moved into or out of the sensor’s range. I think it would be interesting to create a room with an object in the middle having elements that are triggered by multiple PIR Motion Sensors. As one approaches the object, the lighting would change, and as they got closer to the object, ominous music would begin to play. Such a setup could make something as harmless as a bowl seem threatening.

TTL Serial Camera

camera_TTL_Serial_Camera

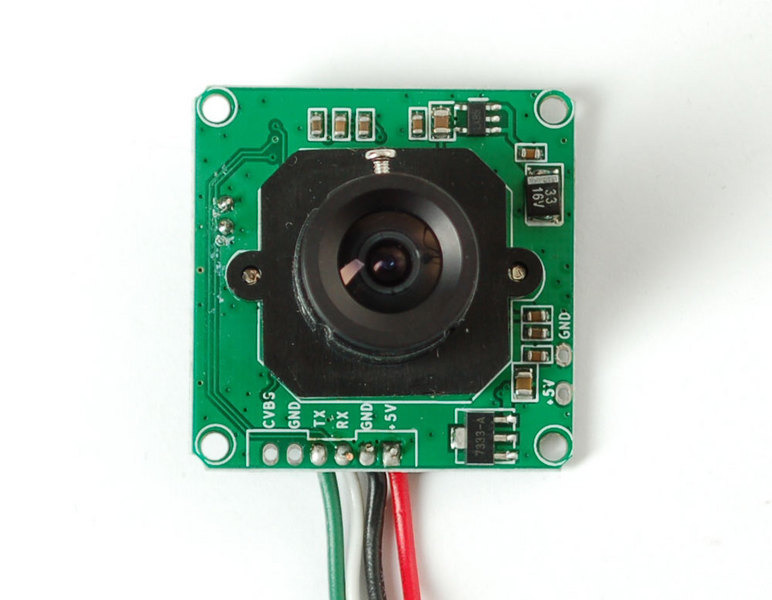
The TTL Serial Camera is both a snapshot and a video camera, capable of capturing images at resolutions up to 640×480. I’d love to hook this up to a robot or display that uses face tracking to identify when someone is looking at the object (display/robot), and have the object move around wildly when not observed. Essentially, one has to spy on the object to be able to observe its true nature. As the TTL Serial Camera can also be used as a motion detector, one could make the previously mentioned object act wildly only when it senses that no one is watching and nothing is moving.

While the PIR Motion Sensor and the TTL Serial Camera are capable of similar feats when it comes to sensing motion, it seems that the PIR Motion Sensor would be best for something binary, such as if someone has entered or exited a threshold, while the TTL Serial Camera might be better for something with a relatively infinite amount of possibilities, such as where someone is and how close they are relative to the camera.

(I acknowledge I have no experience implementing these devices, thus my assumptions regarding their capabilities may be incorrect.)

Assignment 9 – Testing out a Light Sensitive Resistor

photoresistorled

assignment9circuit9

/*
 * A simple programme that will change the intensity of
 * an LED based  * on the amount of light incident on 
 * the photo resistor.
 * From ARDX Tutorial Circuit and Arduino Code
 */

//PhotoResistor Pin
int lightPin = 0; //the analog pin the photoresistor is 
                  //connected to
                  //the photoresistor is not calibrated to any units so
                  //this is simply a raw sensor value (relative light)
//LED Pin
int ledPin = 31;   //the pin the LED is connected to
                  //we are controlling brightness so 
                  //we use one of the PWM (pulse width
                  // modulation pins)
void setup()
{
  pinMode(ledPin, OUTPUT); //sets the led pin to output
}
 /*
 * loop() - this function will start after setup 
 * finishes and then repeat
 */
void loop()
{
 int lightLevel = analogRead(lightPin); //Read the
                                        // lightlevel
 lightLevel = map(lightLevel, 0, 900, 0, 255); 
         //adjust the value 0 to 900 to
         //span 0 to 255


 lightLevel = constrain(lightLevel, 0, 255);//make sure the 
                                           //value is between 
                                           //0 and 255
 analogWrite(ledPin, lightLevel);  //write the value
}
Looking Outwards – Sparkfun and Adafruit

Adafruit MPR121 12-Key Capacitive Touch Sensor ($7.95)

sensors_1982iso_ORIG

https://www.adafruit.com/products/1982

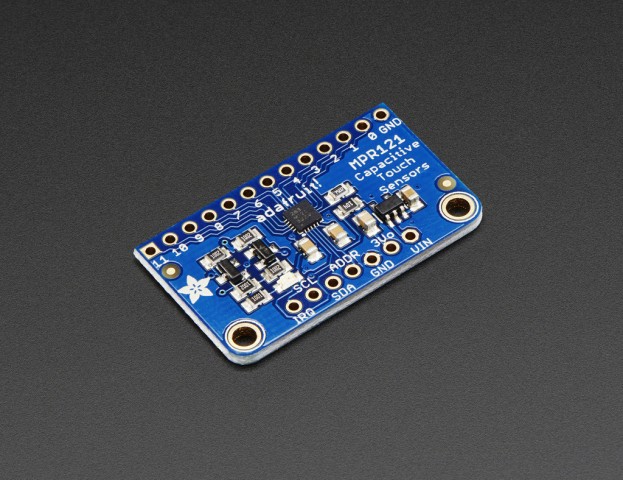
This is a sensor that has 12 capacitive touch inputs for Arduino. A capacitive touch sensor is basically a device that detects when a small amount of capacitance is passing through an object – e.g. when an electrically conductive object meets another electrically conductive object. Turns out that the human hand is electrically conductive, making this 12-input capacitance sensor ideal for detecting human touch against some other object with electrical conductance, such as metal, salt water, graphite and plants. In addition to the somewhat obvious idea of treating various conductive objects as buttons, I think this sensor could also be used to implement a nervous system for an artificial lifeform, such as a motile robot covered with plants, or a potatoBot.

EasyVR Shield 2.0 – Voice Recognition Shield ($49.95)

12656-01

https://www.sparkfun.com/products/12656

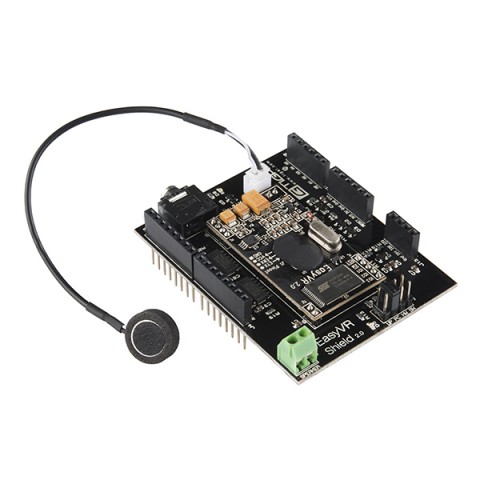
This is a system that makes it rather easy to make an Arduino-based device respond to voice commands. The shield does all the voice processing within range of its microphone, and presumably sends signals to the Arduino’s inputs depending on what voice command was interpreted. This shield will probably make building voice-controlled robots a lot easier, as well as making them self contained (no large computers need to be hooked up to do the voice processing). For this, I’m thinking of a machine placed in a public area that detects the frequencies of certain words and writes down what it hears in big plain text for all to see. This shield could also potentially be used to take orders at a restaurant, and culinary hilarity may ensue from misinterpretation of speech.

Looking Outwards

Aposematic Jacket from Shinseungback Kimyonghun on Vimeo.

Aposematic Jacket is a recent piece by artist duo Shinseungback Kimyonghun. The piece is a modified suit embedded with cameras that, when a user presses a button, records the surroundings of the user in 3d. The title of the work is a reference to Aposematism, the coloration of some poisonous animals that gives off the warning signal of “I can poison you”, while the Aposematic Jacket gives off the warning signal of “I can record you”. I thought it was incredible how the the piece shows that today, a camera lens can feel as threatening as a primitive biological reaction.

update: apparently this is actually made using a Raspberry Pi, the article I read was wrong

A Toast to Observation from Ben Haworth on Vimeo.

A Toast to Observation is a project created by UCL students. I found this project interesting because it takes the ordinary gesture of tapping a spoon against a glass to to call for a toast during a meal and transforms it into a surreal robot-controlled performance. The very human gesture becomes almost uncanny when repeated in a non-human way.

Kinect, Computational Media, Physical Computing from luisa covaria on Vimeo.

I’ve recently been more interested in projects that transform sound after being introduced to Max, so although this project is still in sort of a demo stage, it caught my attention because the idea of “remixing” the sound of breaking glass in real time can definitely be expanded upon, and I could see all sorts of weird generative musical instruments that could be invented from it.

Looking Outwards – Physical Computing

Hyper-Matrix

In this colossal piece by Jonpasang, a Seoul based media arts group, thousands of blocks move back and forth on a wall creating a moving surface. I like the size of it. To have something that covers the walls of such a large room move is stunning.  It reminds me of pin art on a very large scale. I appreciate that the display is made for generating an image from the texture of the landscape of blocks. I feel that they made a good choice by not projecting color onto it, as this would distract from the texture. However, I would have liked more to have seen this with an interactive component and with a higher resolution. I don’t necessarily appreciate the incredibly pixelated feel of it.

Aerosol

Florian Born created Aerosol, a physical interpretation of a virtual particle system. I find this piece interesting because it takes something that is so ingrained into the culture of computer generated graphics, particle systems, and makes a physical interpretation. Originally, I thought that this was an attempt at displaying a virtual particle system’s particles with a physical system, but after reading more thoroughly, I found that the piece is meant to look like a virtual particle system but be made and controlled by physical components (no virtual particles simulated). I thought that this could have possibly looked better if it used moving pins rather than a set grid. In this way it could move attractors and repellers around, demonstrating the particle reactions. Also, maybe emitters and destroyers could have been implemented with tubes that dispersed the balls or consumed them.

Light Barrier

Using a projector and curved mirrors, Kimchi and Chips, made a system called Light Barrier which projects 3D images into the space filled with smoke above it.

I like that this works more towards the type of displays I always wanted which could be found only in SciFi movies. I would be interested in seeing this project done with many projectors projecting colored images into 3D space rather than just white light. As far as the displayed scene and audiovisual portion of this project, I found that it was stunning and impressive to look at, but didn’t really evoke anything other than that. It seemed to be nothing more than a simple demo of a fancy display. I would have appreciated something more evocative.

Written by Comments Off on Looking Outwards – Physical Computing Posted in LookingOutwards

Looking Outwards: Arduino

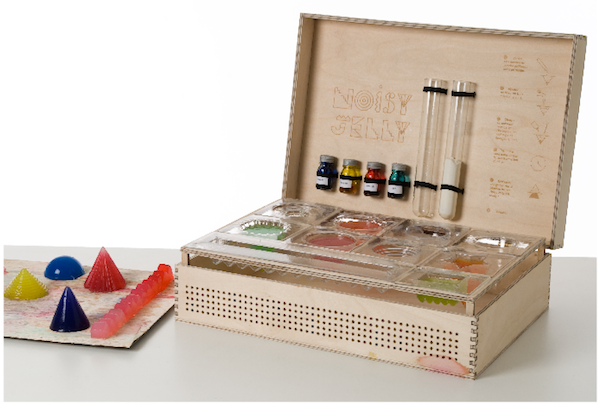
jelly2

This is a project I love because of how playful and not electonic jello is
Paris artists Marianne Cauvard and Raphaël Pluvinage created Noisy Jello, which is a“noisy chemistry lab” kit that comes with jello and uses an arduino and max/msp to create different sounds based on the way the jello is touched or “played”.


Do We Have Milk? Weight sensor that texts you when you’re low on milk and shows you the nearest place to get it. This is a cute little versatile project that has a wide range of applications I think. Like lauren and Kyle’s PPLKPR automates your social life, I want this to send an order for milk totally automating your groceries as well.


This project is one that I would want to see in a larger instillation. It reminds me of installations in children’s museums but i like that it doesn’t rely on physical touch but instead the light on the sensor.

Looking outwards

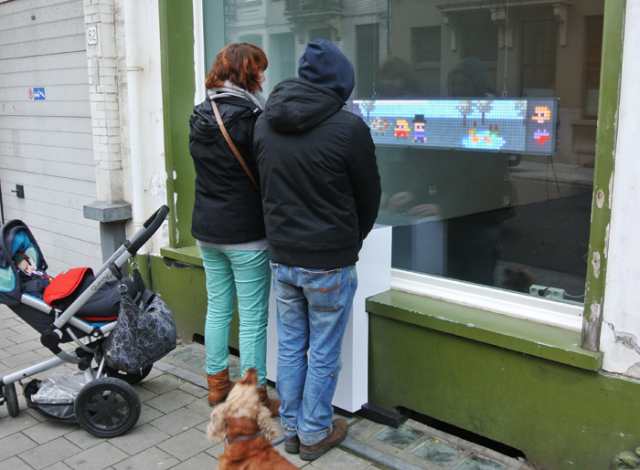
arduino_game_ledScreen (1)

The piece called Arduino Video Game for the Neighborhood is by artist Kris Temmerman. For the piece Kris created an installation in which passersby could play video games on their way past his store. All the information for the game is stored on the Arduino and he uses C++ to generate classes from bitmaps for the character images. As I mentioned before in my last piece about Max, I really like pieces that interact with communities and the public in simple and engaging ways. Overall, conceptually I don’t think this piece is very revolutionary. I think that maybe if Kris was to make the actual video game somehow relate to the neighborhood itself (like making characters in the game actual characters from the neighborhood).

https://www.creativeapplications.net/games/arduino-video-game-for-the-neighbourhood/


Sonic body

Sonic body is an audio installation which seeks to make the human body an orchestra. Developed by four interdisciplinary artists and a heart surgeon the piece uses interactive elements to create an environment in that stimulates the human body. Inside it’s filled with sculptural fabric forms that mimic the internal contours of the body. As the viewer moves and interacts with the structure, a symphony of spatialized sounds are triggered. What I really like about this piece is how structural it is. As someone who really has an affinity to sculpture. I like how organic the shapes how much they seem to resemble parts of the human body. I also wouldn’t have thought that pieces made by circuit boards would be so aesthetically pleasing. I think one of the things I would say about the piece however is that the sounds it emits when a person interacts with them is prerecorded. If there was a way to make the piece real time, by potentially mic-ing up the participants and then emitting the sounds from said mics, I think that would add another interesting layer to the piece.


The piece 27MHz

The piece 27MHz: Common Ground by Jonas Halfmeyer and Daniel Wessolek is an installation of nine kinetic structures which all operate on 27MHZ. People interact with the nine installations through the use of spotlights. By directing a spotlights into designated holes in the peace. Each hole represents a kinetic installation and by covering them with spotlights, it activates an matching installation to spread out through a common 27MHz frequency. I think this piece can be improve maybe aesthetically, because, as it stands it looks kind of incomplete.