Fish in a Pond Documentation

Dave Final Project – Fish in a Pond

title

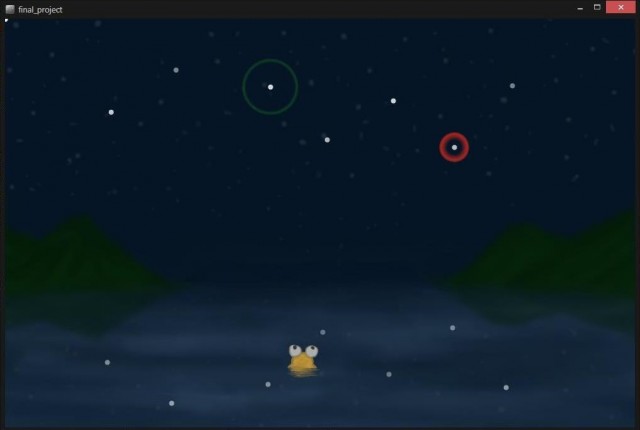
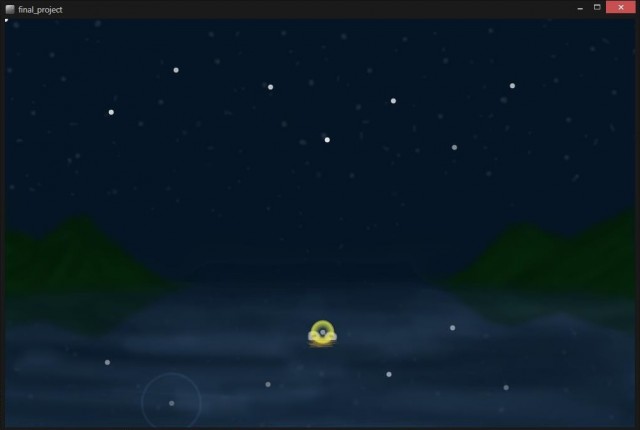
A fish which can learn what kind of melody the user likes via machine learning and plays them.

I was inspired by my research professor’s project “Simstudent”, in which a human student walks a computer Simstudent through the steps of algebra problems, from which the Simstudent will learn via machine learning. While I was testing it, I found I greatly enjoyed teaching and watching my Simstudent succeed on the problems that once baffled it. Thus, I started off looking for ways to use machine learning as the backend of my project. Music seemed like a good idea, so I went for it, despite having zero experience.

I used Weka’s implementation of the ADTree algorithm as my backbone. I represented a melody as an array of 10 notes, which is limited to 7 pitches, as recommended by Professor Richard Randall. The user can either rate a melody played by either the fish or the user as favorable or unfavorable, from which the fish learns. My thoughts on what the frontend looks like revolved around a fish, because they don’t seem like creatures that will likely be playing music, so I implemented it as such.

In hindsight, music is probably not the best thing for me to do;. I do not have the skills to hear the musical structures in the melodies that were created, and along with the fact that whether melodies are good or bad to a user is highly subjective, caused me to be unable to statistically confirm whether the algorithm is robust. I did however have a musically gifted friend play around with it, and after around 15 trials, he claimed that the fish picked up on a structure that he had played. I also managed to train my fish to know that it must play the last note at a low pitch, which if that means good melodies in my heart, then I am successful.

Source code can be found in this repository:

Rachel-Interactive Development Environment


 photo TIDE_zps1ac62372.jpg
The Interactive Development Environment: bringing the creative process to the art of coding.
TIDE is an attempt to integrate the celebrated traditions of the artistic process and the often sterile environment of programming. The dialogue of creative processes exists in the process of coding as frustration: debugging, fixing, and fidgeting over details until the programmer and program are unified. TIDE attempts to turn this frustration into the exhilaration of dialogue between artist and art.
The environment uses a Kinect to find and track gestures that correspond to values. Processing code is written with these values and saved in a .txt file. The result code creates a simple shape on screen. I want to expand this project to be able to recognize more gestures and patterns, allowing for much more complicated systems to be implemented. Ironically, I found the process of implementing and testing this project generating the very frustration and sterility I was trying to eradicate with the intuitive, free flowing motions I could get with the Kinect.
 

 photo Sketches9a_zps66e2853c.jpg

 photo FinalTxtFileScreen_zpsc25421bb.jpg
 photo FinalProcessingFileScreen_zps52cd8bed.jpg

"""
Rachel Moeller
EMS2 Asignment 9 
The Interactive Development Environment
"""
from pykinect import nui
from pykinect.nui import JointId, SkeletonTrackingState

import pygame
from pygame.color import THECOLORS
from pygame.locals import *
import os
import random

KINECTEVENT = pygame.USEREVENT


def writeFile(filename, contents, mode="wt"):
    #Got this from Kosbie's 15-112 Class
    fout = None
    try:
        fout = open(filename, mode)
        fout.write(contents)
    finally:
        if (fout != None): fout.close()
    return True

def post_frame(frame):
    """Get skeleton events from the Kinect device and post them into the PyGame event queue"""
    try:
        pygame.event.post(pygame.event.Event(KINECTEVENT, skeletons = frame.SkeletonData))
    except:
        # event queue full
        pass

def commitWidth(data):
    """This function adds the width to the file contents."""
    width=data.sizeWidth
    data.contents+=str(width)+","

def commitLength(data):
    """This function adds the width to the file contents."""
    length=data.sizeLength
    data.contents+=str(length)+");\n}\nvoid draw()\n{"

def commitShape(data):
    """This function adds the type of shape to the file contents."""
    data.contents+="\n"
    if(data.shape=="ellipse"):
        data.contents+="ellipse("
        data.shape="ellipse"
    elif(data.shape=="rect"):
        data.contents+="rect("
        data.shape="rect"

def commitShapeLoc(data):
    data.contents+=str((data.sizeWidth/2)-data.radius)+","+str((data.sizeLength/2)-data.radius)+","

def commitRadius(data):
    """This function adds the radius in to the shape definition."""
    radius=data.radius
    data.contents+=str(radius)+","+str(radius)+");\n}"
    data.isComplete=True

def computeShapeLoc(data,r):
    """This function figures out where to begin drawing the shape away from the center
       of the screen."""
    c=data.shapeColor
    x=400-r
    y=300-r
    data.shapeX=x
    data.shapeY=y

def drawShape(data):
    """This function draws the shape into the interface."""
    c=data.shapeColor
    if(not data.hasRadius):
        r=getRadius(data)
        computeShapeLoc(data,r)
    else:r=data.radius
    if(data.shape=="ellipse"):
        pygame.draw.ellipse(data.screen,c,[data.shapeX,data.shapeY,r,r])
    if(data.shape=="rect"):
        pygame.draw.rect(data.screen,c,[data.shapeX,data.shapeY,r,r])

def commitColor(data):
    """Sets the color in the file contents."""
    if(data.color=="red"):
        data.contents+="\nfill(255,0,0);\n"
    if(data.color=="green"):
        data.contents+="\nfill(0,255,0);\n"
    else:
        data.contents+="\nfill(0,0,255);\n"

def commitBG(data):
    """Writes the background command to the file contents."""
    data.contents+="\nbackground(255);\n"

def initBools(data):
    """This funtion inits the boolean variables controlling when
       code pieces are written."""
    data.hasWidth=False
    data.hasLength=False
    data.hasSetup=False
    data.hasBackground=False
    data.hasColor=False
    data.hasShape=False
    data.hasLocation=False
    data.hasRadius=False
    data.isComplete=False

def initJoints(data,skeleton):
    """Defines the Kinect Joints."""
    data.head=skeleton.SkeletonPositions[JointId.Head]
    data.rightHand=skeleton.SkeletonPositions[JointId.HandRight]
    data.leftHand=skeleton.SkeletonPositions[JointId.HandLeft]
    data.hip=skeleton.SkeletonPositions[JointId.HipCenter]

def init(data):
    data.contents="/*TIDE shape*/\nvoid setup()\n{\nsize("
    data.x=10
    data.y=10
    data.space=20
    data.font=pygame.font.Font(None,20)
    data.typeWords=["void"]
    blue=0,0,255
    green=0,255,0
    data.typeColors=[blue,green]
    data.plainTextColor=0,0,0
    data.lineNums=2
    data.sizeWidth=500
    data.sizeLength=500
    data.shapeColor=0,0,0
    data.shape=None
    data.backgroundColor="white"
    data.tracked=False
    data.frameCount=0
    data.headThresh=0.8
    data.displayText="User not detected"
    data.radius=100
    initBools(data)

def redrawAll(data):
    """This function handles display screens"""
    c=255,255,255
    pygame.draw.rect(data.screen,c,[0,0,800,600])
    c=0,0,0
    msg=data.displayText
    font=pygame.font.Font(None,28)
    text=font.render(msg,True,c)
    data.screen.blit(text,[20,20])
    if(data.hasShape):
        drawShape(data)
    pygame.display.flip()

def checkForComplete(data):
    """This function checks to see if every checkpoint in the code has been reached."""
    return data.hasWidth and data.hasLength and data.hasSetup and data.hasBackground and data.hasColor and data.hasShape and data.Location and data.hasRadius


def getBGColor(data):
    """This function sets a background color"""
    data.backgroundColor="white"


def getRadius(data):
    """This function gathers radius information from the kinect."""
    if(not data.hasRadius):
        data.radius=200*abs(data.hip.y-data.head.y)
        data.hasRadius=True
        return 200*abs(data.hip.y-data.head.y)

def getColor(data):
    picker=random.randint(0,4)
    print picker
    if(picker==1):
        data.hasColor=True
        data.shapeColor=255,0,0
        data.color="red"
    if(picker==2):
        data.hasColor=True
        data.shapeColor=0,255,0
        data.color="green"
    else:
        data.hasColor=True
        data.shapeColor=0,0,255
        data.color="blue"

if __name__ == '__main__':
    WINSIZE = 800, 600
    pygame.init()
    class Struct: pass
    data = Struct()
    init(data)
    data.screen = pygame.display.set_mode(WINSIZE,0,16)    
    pygame.display.set_caption('Interactive Environment.')
    data.screen.fill(THECOLORS["white"])

    with nui.Runtime() as kinect:
        kinect.skeleton_engine.enabled = True
        kinect.skeleton_frame_ready += post_frame
        # Main game loop    
        while True:
            e = pygame.event.wait()
            frame = kinect.skeleton_engine.get_next_frame()
            for skeleton in frame.SkeletonData:
                if skeleton.eTrackingState == nui.SkeletonTrackingState.TRACKED:
                    data.tracked=True
                    initJoints(data,skeleton)
                    data.displayText="Need a Shape"
                    if(not data.hasShape):
                        getColor(data)
                        if(data.head.y

Kristinophone

Initially, I wanted to create a fairly traditional violin, where only the strings were essentially electronics. During the project discussion, however, it was pointed out to me that this had already been done — several times over. I was advised to make an instrument which was truly my own, and I have now done so:

Electric Violin Photo

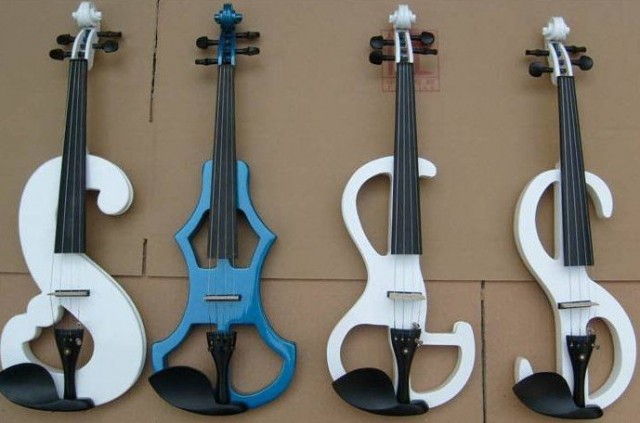
Here are some electronic violins I considered using as a starting point.

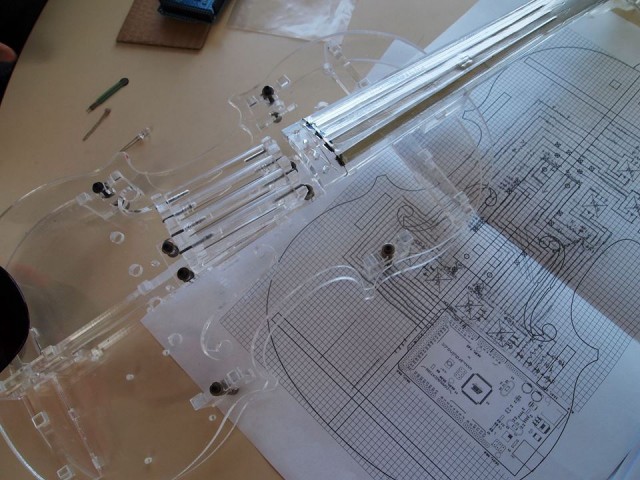
Unfortunately, CMU students are overacheivers and someone got here first:   942745_513514998723665_1692590458_n They didn’t have LED lights in their acrylic violin, but it was too close to emulate.


Here was my first mockup. (You know how most people do drafts in their sketchbook? I couldn’t close mine after this one.)1474426_717771071574164_1198692958_n


Ta-dah! IMG_8966IMG_8983


This is my project to date. Thanks!


Face Seismograph

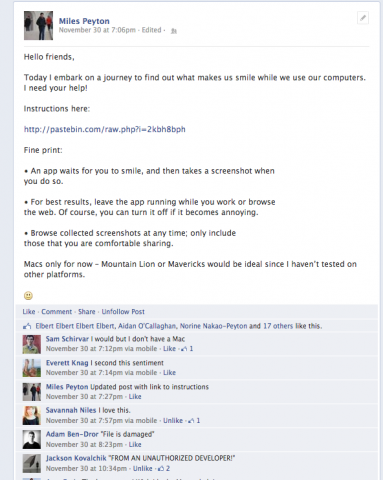
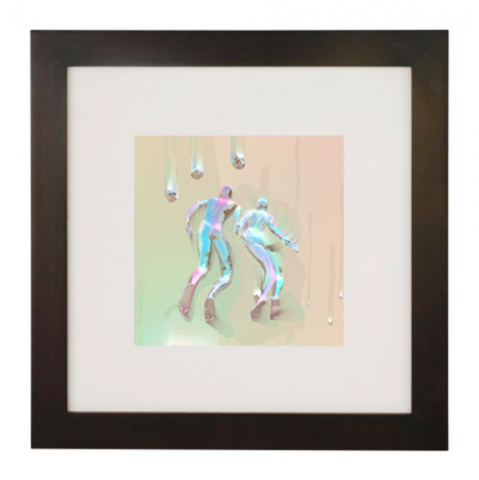
Screen Shot 2013-12-05 at 12.21.44 PM Soliciting participants on Facebook – my original scheme for the final project Screen Shot 2013-12-05 at 12.43.57 PM I planned to print screenshots out and frame them like so

As is often the case in art, my project to capture the things that make us smile turned out to have been implemented a year before by Brooklyn artist Kyle McDonald. The embarrassing part of this is that I – unknowingly – used Kyle’s library to make my project.

In any case, this initial attempt/failure emboldened me to try something more nuanced with faces. I wanted to consider a continuum of expressions as opposed to a binary smile-on smile-off.

Face Seismograph 

Screen Shot 2013-12-05 at 8.50.50 AM

Screen Shot 2013-12-05 at 8.51.20 AM

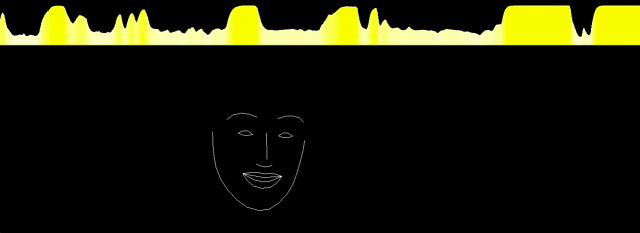
Face Seismograph is a tool for recording and graphing states of excitement over time. It was written in OpenFrameworks using Kyle McDonald’s ofxFaceTracker addon.

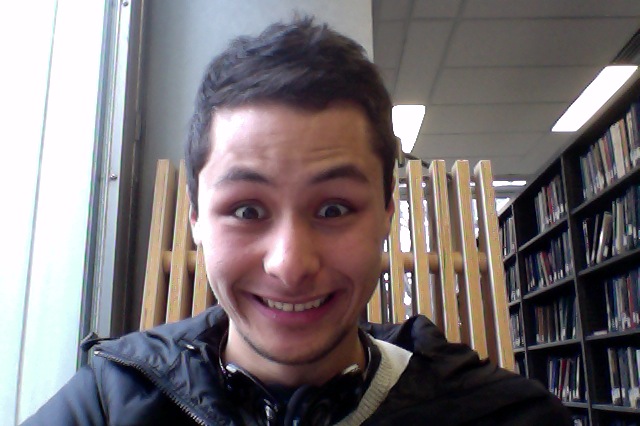
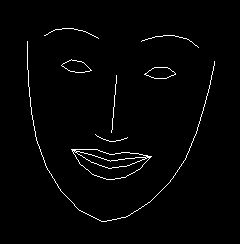
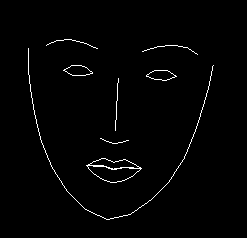
excitement1 Excited? So excited Excited!

The seismograph measures excitement by tracking the degree to which one smiles or moves their eyebrows from a resting state.

One limitation of this approach is that in practice, internal states of excitement or arousal may not have corresponding facial expressions.

So excited Genuinely excited Doesn't get it Depressed

I staged a casual conversation between myself and a friend. While we chatted about life, two instances of Face Seismograph approximated and recorded the intensity of our excitement. Viewing the history of our facial expressions, I began to notice surprising rhythms of expression.

Screen Shot 2013-12-05 at 12.32.42 PM Screen Shot 2013-12-05 at 12.32.53 PM Screen Shot 2013-12-05 at 12.33.00 PM Screen Shot 2013-12-05 at 12.33.45 PM Screen Shot 2013-12-05 at 12.34.23 PM

To present this conversation, I play each recording on a separate iMac. The two recordings are synchronized via OSC. A viewer can scrub through the video on both computers simultaneously.

In a future iteration of this project, I’d like to highlight the comparison of excitement signatures with greater clarity. Also, I need to label my axes.


Swetha- Final Project

“Manjal Neerattu Vizha” By Swetha Kannan

The project, “Manjal Neerattu Vizha”, uses an arduino and an ultrasonic distance sensor in order to activate an artificial period. The period is activated inside a doll which wears the traditional indian woman’s garment, the sari. The project is as much a look into indian culture as it is a look into feminism.

In india, and more specifically in Tamilnadu, when a young girl first gets her period, there is a celebration that is held that can be considered a sort of ‘coming of age’ ceremony. It is also at this time that the girl is first allowed to wear a ‘sari’, until then she was probably wearing ‘churidars’ or other small dresses.  My own such ceremony left a large impression on me because of the grand amount of people that attended the celebration, the large amount of money that went into preparing the ceremony, and above all else the awkwardness of letting everyone know that I was on my period and, essentially, on display because of it. This project does not seeks to undermine the ceremony since I have many fond memories of participating in it. The project instead seeks to explore this ceremony and let the viewer become a participant in a re-contextualized version of the ceremony. I am deeply interested in menstruation as being part of a ‘display’ for people to see. in order to explore this concept, I have created a menstruation that is triggered by the arrival of people and which performs for the viewer until he/she moves on . By the end of the performance, the sari is drenched with blood on the tails of its skirt and the blood has spread over the ground.

Video:


Fritzing:

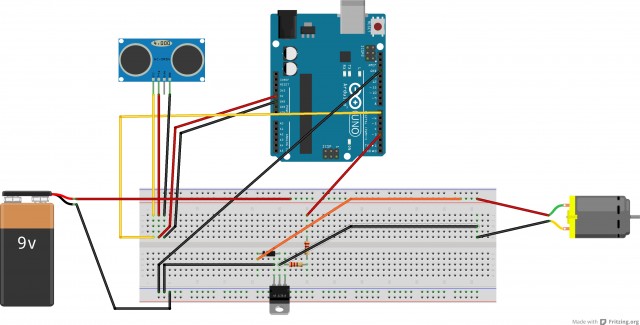
For the diagram, I used a 9v battery instead of a 12v like it should be. And Please ignore the fourth prong on the ultra magnetic sensor. Mine only had three and I don’t yet know hoe to edit parts on fritzing.

pumpWithSensor_bb


Code:

int TIP120pin = 3; 
int sensorPin = 7;
void setup()
{
pinMode(TIP120pin, OUTPUT); // Set pin for output to control TIP120 Base pin
pinMode(sensorPin, INPUT);

analogWrite(TIP120pin, 255); // By changing values from 0 to 255 you can control motor speed
Serial.begin(9600);
}

void loop()
{
  int sensorValue = analogRead(sensorPin);
  Serial.println(sensorValue);
  
  sensorValue = map(sensorValue,0, 100, 0, 255);
  Serial.println(sensorValue);
  
  analogWrite(TIP120pin, sensorValue);
  
  
}


Rachel-Final Project

The Interactive Development Environment: bringing the creative process to the art of coding.

TIDE is an attempt to integrate the celebrated traditions of the artistic process and the often sterile environment of programming. The dialogue of creative processes exists in the process of coding as frustration: debugging, fixing, and fidgeting over details until the programmer and program are unified. TIDE attempts to turn this frustration into the exhilaration of dialogue between artist and art.
The environment uses a Kinect to find and track gestures that correspond to values. Processing code is written with these values and saved in a .txt file. The result code creates a simple shape on screen. I want to expand this project to be able to recognize more gestures and patterns, allowing for much more complicated systems to be implemented. Ironically, I found the process of implementing and testing this project generating the very frustration and sterility I was trying to eradicate with the intuitive, free flowing motions I could get with the Kinect.
 photo Sketches9a_zps66e2853c.jpg

 photo FinalTxtFileScreen_zpsc25421bb.jpg
 photo FinalProcessingFileScreen_zps52cd8bed.jpg

Little Wonders

IMG_5081

IMG_5082 IMG_5083

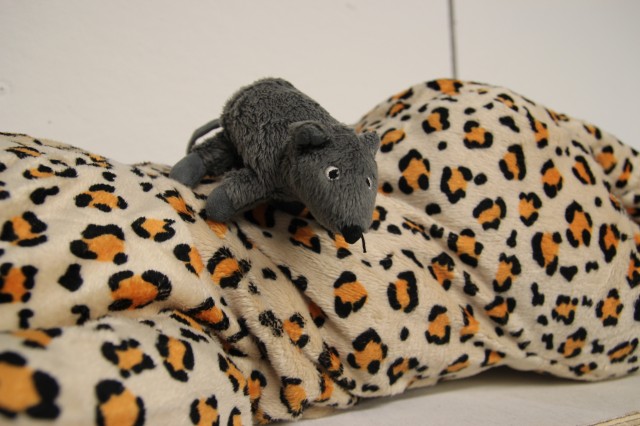
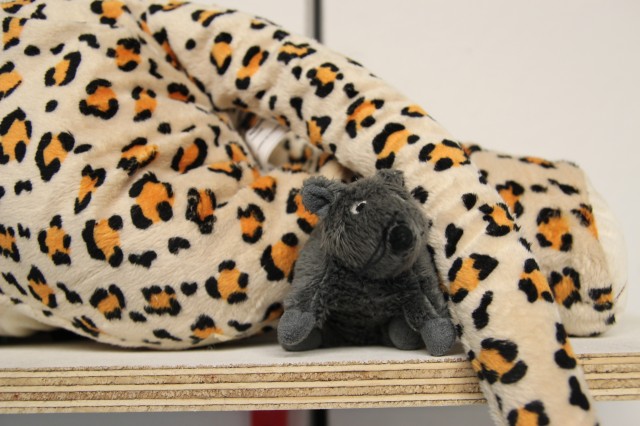
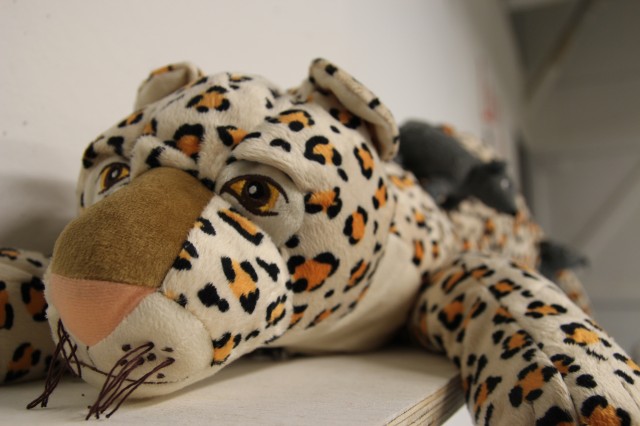
Ever since I was a kid, I’ve always been fascinated by the idea of our stuffed animals and toys coming to life, quite similar to the various toys from Toy Story. Having that vision in mind and after discussing my idea to a few classmates, I decided to bring some of Toy Story to life. My inspirations came from revisiting old children movies where all the objects and creatures were personified.

“Little Wonders” explores the idea of objects moving and interacting when we aren’t there to see the interactions exchanged. I loved the idea that we existed in a world with a more fantastical side that we may never be able to fully unveil.

Some of the technical challenges included trying to create a realistic interpretation of the “creatures'” movements. I wanted the movements to appear subtle so people would second guess themselves, but at the same time smooth enough so that they don’t appear as robotic as the servos. I added an easing effect to help ease the changes in movements. Another challenge was connecting the power chord to the teensy while keeping it hidden. In the end, I placed the shelf slightly between the two doors so that the chord can slip behind the shelf and between the doors inconspicuously.

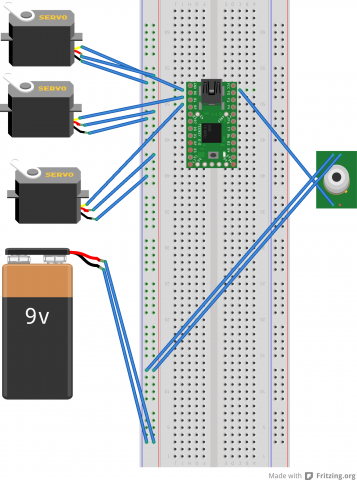
fritzing_bb


#include 
int duration = 3500;

// metros 
Metro mouse1 = Metro (duration);
Metro mouse2 = Metro (duration);
Metro jaguar = Metro (duration);

//servos 
Servo sMouse1; 
Servo sMouse2; 
Servo sJaguar; 

// destinations 
int dm1_0; 
int dm2_0; 
int dj0; 
// destinations to be smoothed
int dm1_0_sh; 
int dm2_0_sh; 
int dj0_sh; 

float easing[] = {
  0.09,0.08,0.03};

const int motionPin = 0; 
int noMotion; 
int mouse1Motion = 0; 
int motionLevel; 

void setup(){
  Serial.begin(9600);

  // pin 5 missing 
  sMouse1.attach(0); 
  sMouse2.attach(1);
  sJaguar.attach(2); 

  // intial destinations 
  dm1_0 = 0; 
  dm2_0 = 90; 
  dj0 = 135; 
  // intial destinations to be smoothed
  dm1_0_sh = 0; 
  dm2_0_sh = 90; 
  dj0_sh = 135; 

  noMotion = 0;
}

void loop(){
  motionLevel = analogRead(motionPin); 
  motionLevel = map(motionLevel,0,656, 0,100); 
  motionLevel = constrain(motionLevel, 0,100); 

  //motionLevel = 0;

  if (motionLevel < 20 ){     noMotion ++;      if (noMotion >= 100){

      if (mouse1.check() == 1){
        dm1_0 = random(0,180);

        mouse1.interval(random(200,800)); 
        mouse1Motion ++; 
      }
      dm1_0_sh = dm1_0_sh *(1.0 - easing[0]) + dm1_0 * easing[0];
      sMouse1.write(dm1_0_sh);

      if (noMotion >= 120){
        if(mouse1Motion >= 10){
          if (mouse2.check() == 1){
            dm2_0 = random(0,180); 

            mouse2.interval(random(300,800)); 
          }
          dm2_0_sh = dm2_0_sh * (1.0 - easing[1]) + dm2_0 * easing[1];
          sMouse2.write(dm2_0_sh);
        }
      }

      if (noMotion >= 150){
        if (mouse1Motion >= 14 ){
          if (jaguar.check() == 1){
            dj0 = random(90,180); 

            jaguar.interval(random(500,2000));
          }
          dj0_sh = dj0_sh * (1.0 - easing[2]) + dj0 * easing[2];
          sJaguar.write(dj0_sh);
        }
      }
    }
  }
  else{
    noMotion = 0; 
  }
  //Serial.print("motion: ");
  Serial.println(motionLevel);
  //Serial.println(dj0_sh);

  delay(25);
}


Prezi-tation

Some images from the presentation:

Revolving Games_bb

door

//Revolving Games by Michelle Ma

#include 
#include 
#include "RTClib.h"
#include "Adafruit_LEDBackpack.h"
#include "Adafruit_GFX.h"
#include 
#include 

Adafruit_7segment matrix1 = Adafruit_7segment();
Adafruit_7segment matrix2 = Adafruit_7segment();
Adafruit_ADXL345 accel = Adafruit_ADXL345(12345);

RTC_DS1307 RTC; // Real Time Clock

const int chipSelect = 10; //for data logging
const int distancePin = 0; //A0 for IR sensor

const int threshold = 100; //collect data when someone near
const float radius = 0.65; //radius of door in meters
const float pi = 3.1415926;

File logfile;

int highScore;

void setup() {
  Serial.begin(9600);
  SD.begin(chipSelect);
  createFile();
  accel.begin();
  matrix1.begin(0x70);
  matrix2.begin(0x71);
  
  if (!RTC.isrunning()) {
    RTC.adjust(DateTime(__DATE__, __TIME__));
  }
  
  accel.setRange(ADXL345_RANGE_16_G);
  
  highScore = 0;
}

void createFile() {
  char filename[] = "LOGGER00.CSV";
  for (uint8_t i=0; i<100; i++) {
    filename[6] = i/10 + '0';
    filename[7] = i%10 + '0';
    if (!SD.exists(filename)) {
      logfile = SD.open(filename, FILE_WRITE);
      break;
    }
  }
  
  if (!logfile) {
    Serial.print("Couldn't create file");
    Serial.println();
    while(true);
  }
  Serial.print("Logging to: ");
  Serial.println(filename);
  
  Wire.begin();
  
  if (!RTC.begin()) {
    Serial.println("RTC error");
  }
  logfile.println("TimeStamp,IR Distance,Accel (m/s^2),RPM");
}

void loop() {
  
  DateTime now = RTC.now();
  sensors_event_t event; 
  accel.getEvent(&event);
  
  float distance = analogRead(distancePin);
  float acceleration = event.acceleration.z;
  float rpm;
  
  if (distance > threshold) {
    rpm = computeRpm();
  } else {
    rpm = 0;
  }
  
  if (rpm > highScore) {
    highScore = rpm;
  }
  
  logData(now, distance, acceleration, rpm);
  serialData(now, distance, acceleration, rpm);
  writeMatrices(int(rpm), int(highScore));
  
  Serial.println("Saved...");
  logfile.flush();
}

float computeRpm() {
  float velocity = computeVelocity();
  float result = abs(60.0*velocity)/(2.0*pi*radius);
  return result;
}

float computeVelocity() {
  float acceleration;
  float sum = 0;
  int samples = 100;
  int dt = 10; //millis
  for (int i=0; i