Sensor Christmas Looking Outwards

The geophone picks up low frequency ground vibrations. I’ve used regular microphones to translate voices and strikes into other outputs, but this sensor presents a subtler way to read viewer’s presence. Though it is intended for seismic use, I’d like to use it to sense footsteps or finger drumming or other sublties. Measuring the frequencies of vibrations and pauses could indicate hesitation or excitement/interest in a viewer, and could provide the art work insights on the viewer’s personality and motivations.

I find the color detector interesting not only because of its use, but its shape. Numerous color detectors could be compiled into a interactive form capable of reacting to a person based on their clothes or even race. The work could also be self interactive, or interactive with another form composed of color detectors, forming dialogues and relationships dynamically with each other or a passing viewer.

The Liquid Flow Meter has especially peaked my interest. Lately I’ve been thinking about totally immersive single or double human capsule environments in which art as experience is constructed by viewer and art object together. I want to use water in these environments, actively flowing and interacting with the viewer, adding layers of depth to the experience. This sensor measures the amount of water passing through it, and with that data I could send signals to valves to constrict or expand water flow based on environmental changes in the work.

LookingOutwards – Sparkfun

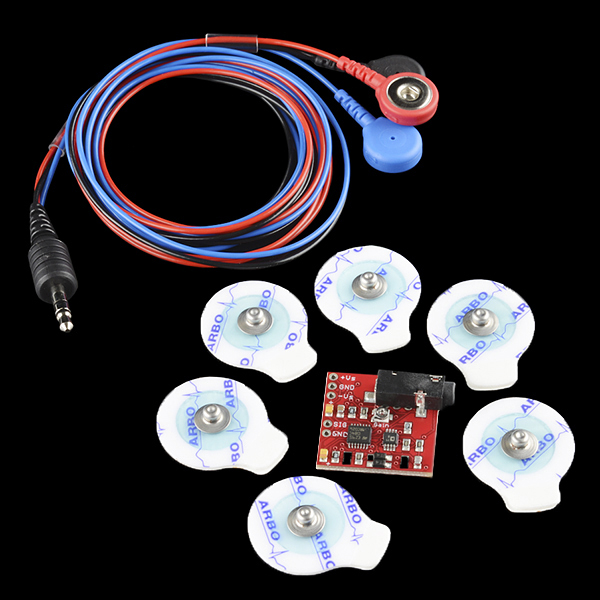
1 – Muscle Sensor

This kit allows us to measure muscle movements. This allows us to actuate things with just the use of our muscles. It uses a method called EMG – electromyography

Old spice supposedly used this technique in this video although I suspect some of it was faked –

https://www.youtube.com/watch?v=yZ15vCGuvH0

2 – Geiger Counter

This kit allows us to measure radiation using a Geiger tube.

3 – Wind Sensor

measures wind – think outside or measure someone blowing.

Looking Outwards: Sensors and Actuators

Discovery 1: IR Distance Sensor

IR distance sensor includes cable (10cm-80cm)


This SHARP distance sensor bounces [infrared light] off objects to determine how far away they are. It returns an analog voltage that can be used to determine how close the nearest object is.

This IR sensor seems like it has interesting possibilities because it would let you have virtual creations respond to the proximity of their viewers. Since personal space is a pretty meaningful social cue, allowing virtual creations to respond to it seems like it would have evocative potential. Some ideas off the top of my head for how to use this would be:

  • A virtual creature which shys away depending on how the viewer approaches it (this would be similar to my creature/ecosystem design but use actual proximity of a viewer rather than mouse proximity)
  • A virtual siren who would sing and beckon viewers closer.
  • A mobile robot-creature that would change its behavior depending on how near it was to a person. (e.g., interacting with that person when they are within a foot or less of him or her.)

Discovery 2: Coin Acceptor

Coin Acceptor - Programmable 1 Coin Type


When a valid coin is inserted, the output line will pulse for 20-60ms (configurable)

This coin acceptor seems interesting because using it in a project would let you play with the dynamics of payment, and what people are willing to pay for, etc. Some quick ideas for possible uses are:

  • Submitting 25 cents to get access for a few seconds to a webcam somewhere interesting. One example would be having a “viewfinder” (like the kind they have on top of the Empire State Building or the Space Needle) that is somewhere else, but that would show you a view from somewhere else in the world.
  • A social commentary piece where you put in coins and then they “trickle down” through a bunch of obstacles and end up being distributed unevenly at the bottom. (mockery of trickle-down economics) Alternatively, you could let people interact with it and control where things trickle down with a knob or knobs representing economic variables.


Discovery 3: Toy Motor


Gear motors allow the use of economical low-horsepower motors to provide great motive force at low speed such as in lifts, winches, medical tables, jacks and robotics. They can be large enough to lift a building or small enough to drive a tiny clock. (src)


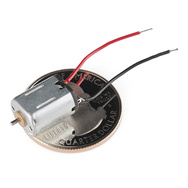
This toy motor seems interesting 1. because it is cheap, so using many of them together would not be expensive to do, and 2. because its small size opens up interesting possibilities for hiding the motor itself. Some ideas for this motor are:

  • Making everyday objects move. Maybe recreating the “Be Our Guest” scene from Beauty and the Beast with standard dishware (this might not be feasible, and definitely echoes Adam’s Pixar lamp project)
  • Doing animatronics with small dolls or stuffed animals. Maybe you could have a version of the Sims in which people control actual dolls.
Written by Comments Off on Looking Outwards: Sensors and Actuators Posted in LookingOutwards

Confetti? (Lasercut Screen)

Screen

./wp-content/uploads/sites/2/2013/10/frame-0070.pdf
Confetti Screen 1

./wp-content/uploads/sites/2/2013/10/frame-0082.pdf
Confetti Screen 2

Description

This screen design was mostly just an interesting mistake that came about while I was working on my original screen concept. The basic way that the sketch works is that a set of uniform particles are placed at random locations in the window. Then, a repulsive force between the particles gradually pushes them apart. The particles draw their own trails as paths, and the stroke outliner helper function turns those paths into wider strokes. The sketch stops when the user presses ‘d’ and is recorded when the user presses ‘r’.

Code

Main

import oscP5.*;
import netP5.*;
import processing.pdf.*;

ArrayList myParticles;
boolean doneDrawing = false;

int margin;
boolean record = false;

void setup() {
  size(864, 864);
  myParticles = new ArrayList();

  margin = 50;

  for (int i=0; i<900; i++) {
    float rx = random(margin, width-margin);
    float ry = random(margin, height-margin);
    myParticles.add( new Particle(rx, ry));
  }
  smooth();
}

void mousePressed() {
  noLoop();
}
void mouseReleased() {
  loop();
}
void keyPressed() {
  if (key == 'd') {
    doneDrawing = true;
  }
  if (key == 'r') {
    record = true;
  }
}

void draw() {
  if (record) {
    // Note that #### will be replaced with the frame number. Fancy!
    beginRecord(PDF, "frame-####.pdf");
  }

  // background (255);
  float gravityForcex = 0;
  float gravityForcey = 0.02;
  float mutualRepulsionAmount = 3.0;

  if (doneDrawing == false) {
    // calculating repulsion and updating particles
    for (int i=0; i 1.0) {

          float componentInX = dx/dh;
          float componentInY = dy/dh;
          float proportionToDistanceSquared = 1.0/(dh*dh);

          float repulsionForcex = mutualRepulsionAmount * componentInX * proportionToDistanceSquared;
          float repulsionForcey = mutualRepulsionAmount * componentInY * proportionToDistanceSquared;

          ithParticle.addForce( repulsionForcex, repulsionForcey); // add in forces
          jthParticle.addForce(-repulsionForcex, -repulsionForcey); // add in forces
        }
      }
    }

    for (int i=0; i

Particle

class Particle {
  //float px;
  //float py;
  float vx;
  float vy;
  PVector currentPosition;
  ArrayList trail;
  int trailWidth;
  float damping;
  float mass;
  boolean bLimitVelocities = true;
  boolean bPeriodicBoundaries = false;

  // Constructor for the Particle
  Particle (float x, float y) {
    currentPosition = new PVector(x, y);
    vx = vy = 0;
    damping = 0.96;
    mass = 1.0;
    trail = new ArrayList();
    trailWidth = 5;
  }

  // Add a force in. One step of Euler integration.
  void addForce (float fx, float fy) {
    float ax = fx / mass;
    float ay = fy / mass;
    vx += ax;
    vy += ay;
  }

  // Update the position. Another step of Euler integration.
  void update() {
    vx *= damping;
    vy *= damping;
    limitVelocities();
    handleBoundaries();
    currentPosition.x += vx;
    currentPosition.y += vy;
    PVector logPosition = new PVector(currentPosition.x, currentPosition.y);
    trail.add(logPosition);
    println(trail.size());
  }

  void limitVelocities(){
    if (bLimitVelocities){
      float speed = sqrt(vx*vx + vy*vy);
      float maxSpeed = 10;
      if (speed > maxSpeed){
        vx *= maxSpeed/speed;
        vy *= maxSpeed/speed;
      }
    }
  }

  void handleBoundaries() {
    // wraparound
    if (bPeriodicBoundaries) {
      if (currentPosition.x > width - margin ) currentPosition.x -= width;
      if (currentPosition.x < margin     ) currentPosition.x += width;
      if (currentPosition.y > height - margin) currentPosition.y -= height;
      if (currentPosition.y < margin     ) currentPosition.y += height;
    }
    // bounce
    else {
      if (currentPosition.x > width - margin ) vx = -vx;
      if (currentPosition.x < margin     ) vx = -vx;
      if (currentPosition.y > height - margin) vy = -vy;
      if (currentPosition.y < margin     ) vy = -vy;
    }
  }

 /* I want my particles to draw their trails but can't figure out how. Thoughts? */
  void render() {
    drawStrokeOutline(trail, trailWidth);
  }
}

Simple Stroke Outliner

void drawStrokeOutline(ArrayList points, int strokeWidth) {
  noFill();
  stroke(0);
  strokeWeight(1);

  beginShape();
  // iterate over points in array going from to back, drawing shape
  for (int i=0; i < points.size(); i++) {
    PVector currentPoint = points.get(i);
    vertex(currentPoint.x, currentPoint.y);
  }
  endShape();

  beginShape();
  // then go backwards, and shift all points down by strokeWidth, 
  // continuing the same shape
  int lastIndex = points.size() - 1;
  for (int i=lastIndex; i >=0; i--) {
    PVector currentPoint = points.get(i);
    vertex(currentPoint.x - strokeWidth, currentPoint.y + (strokeWidth*0.5));
  }
  endShape();

  /* delete later
   stroke(0);
   PVector sPoint = points.get(points.size() - 1);
   line(sPoint.x, sPoint.y, sPoint.x - strokeWidth, sPoint.y + (strokeWidth*0.5));
  */

  if (doneDrawing) {  // draw start cap
    stroke(0);
    PVector startPoint = points.get(0);
    line(startPoint.x, startPoint.y, startPoint.x - strokeWidth, startPoint.y + (strokeWidth*0.5));

    // close line by drawing caps
    PVector endPoint = points.get(lastIndex);
    line(endPoint.x, endPoint.y, endPoint.x - strokeWidth, endPoint.y + (strokeWidth*0.5));
  }
}
Sensors!

Color Light Sensor – Sparkfun
https://www.sparkfun.com/products/10656

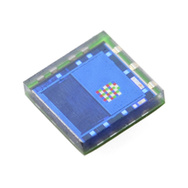
I had a strong bias to the cheaper sensors on each site, and this is one of my favorites. I can imagine this being used as the “eyes” of a robot to identify certain objects by color. I think it would be cool to make a robot that can analyze the colors of a simple painting, drawing, or graphic and try to duplicate that coloring by having several arms that reach into pigments, mix its own shades and then draw the shapes. I also think this project could be used in a cool way to identify the color schemes of a room, someone’s outfit, or etcetera because sometimes I walk into a room that has some awesome interior decorations and I want to know the exact colors they combined so well.

Piezo Vibration Sensor – Large with Mass – Sparkfun
https://www.sparkfun.com/products/9197

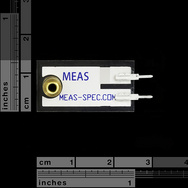
The most obvious application I can think of for this would be attaching it to musical instruments to sense sound vibrations. The vibration data can then be converted into some other sensory output. Depending on how sensitive this device is, it can also be used to detect a presence through footsteps or knocking on a door. I imagine it can be applied to anything with sound, actually.

Tilt Sensor – Sparkfun
https://www.sparkfun.com/products/10313

A tilt sensor is screaming for use in an interactive piece. It could be used with a controller, lever, or a ship wheel… Anywho, the tilt sensor kind of reminds me of a project like Dave’s bubble creature. It could measure the amount of someone’s OCD in a room of tilted objects…

Looking at the AdaFruit

1) 3D Printer creates Light-Weight Titanium Horse Shoes

The article highlights the power of 3D printing. Researchers from CSIRO created custom made titanium horse shoes from 3D printing as a means to explore new ways to use 3D printing. Printing a set of four horse shoes take less than 24 hours to create and costs a total of 600 dollars. Usually made from aluminum and weighing up to one kilogram, horse shoes can weigh the horse down. 3D printed shoes weigh half the weight of regular horse shoes so the horse can reach new speeds.

I’m not sure if the cost is worth the decrease in weight. Perhaps there is a better substitute. Although, the 3D printed shoes can be made faster and the 3D scanner is able to create custom shoes for every horse hoof it scans in, I don’t think such a benefit is necessary for every horse. Maybe if the enhanced shoes would boost a horse’s chance of winning a race, then owners should invest in them. But other than that, I don’t think it’s worth the cost of 3D printing.

http://www.abc.net.au/news/2013-10-17/an-horse-shoe-printed-by-3d-to-improve-racing-performance/5027306

2 .) PI-Bot –B (mobile robots with Raspberry Pi)

The PiBot-B is a small mobile robot that controlled by a Raspberry Pi. He moves on caterpillar tracks so that it can run on slightly uneven flooring. An image from a webcam video is transferred wirelessly to an IPhone with an application that controls the robot. If the robot is on autonomous mode, it can move by itself and uses sensors to detect obstacles. On the application, the top half shows the video stream while the bottom resembles a numpad, each controlling a different motion for the robot.

I think this is very cute and interesting project. Although it does seem like a common project involving an arduino and a webcam, it still fascinates me how a chip can be programmed to complete so many different tasks. The application numpad not only allows the robot to move forward and turn, but also rotate on the spot, which produces smooth curves. Having it move by itself when users aren’t in control produces an artificial intelligence effect.

http://translate.google.com/translate?hl=en&sl=de&tl=en&u=http%3A%2F%2Fwww.retas.de%2Fthomas%2Fraspberrypi%2Fpibot-b%2F

3) Robot Nail Art

Robot Nail Art by Charles Aweida involves the collaboration of several different programs, Kangaroo physics, Grasshopper3d, Rhino3d, fed into HAL(robotic control sweet) to fabricate the effects of wind on a piece of cloth frozen at a specific frame. The result of the capture results in a series of vector fields that simulate the representation of wind. The robot that receives these points is combined with an inverse kinematics solver with converts the planes into joint angles that serve as the instructions for the robot. The robot will then place these nails at these specific angles onto high density foam.
I found this project to be especially unique and interesting. Fabric simulation creates beautiful planes in the computer, once modeled out. To bring reality into the digital world and then back into reality describes the process of the project. It introduces a new way of capturing moment in time. The robotic arm plays a huge part in this project because it is able to accurately pinpoint each nail at every angle without conflicts or mistake.
A similar project I found that used robotic simulation also involved an ABB robot. It captured images of people in front of it with a camera and the robot would turn that captured image into a drawing using a black felt tip pen.

http://www.ensci.com/actualites/une-actualite/article/17574/

http://cka.co/projects/representing_wind/

nail art test 1 from charles aweida on Vimeo.

looking outwards (?)

VCNL4000 Proximity/Light sensor

I like how this is basically a cheap combination of two sensors. I actually built a tiny robot in high school freshmen year and had just a cheap touch sensor to work with in order for it to navigate through a maze. Why couldn’t I have this back then?

RGB Color Sensor

I really did not know that a color sensor had been developed, much less a pretty cheap one. I’m mostly interested in how functional it is and how it would bring new options to the usual physical computing art of limited color palette.

Flora Wearable Ultimate GPS Module

It’s a sewable GPS module. Wearable art is awesome, but wearable art combined with technology is even cooler. I can see possibilities of combining this module with other sensors on the cloth.

Shadow Paint

For my projection project, I wanted to utilize sound while using box2D. It was really difficult for me to come up with an idea. At first I thought about creating eyes onto an inanimate object to give it life. But it was too similar to the creature project. As I was wondering what to create, my eyes fell upon the different colored glazes I bought for my clay mini class. I projected light onto the different glazes at an angle and realized that if the camera were tilted at a certain angle, I could play with just the shadows of the glaze containers because they were higher on the wall than the actual objects.

Why not mess with the shadow’s of the object? The shadows are black, and if I project black onto them, they will be saved. This created another curious layer as to what we are allowed to interact with. By interacting with actual objects, we extract something from fantasy and implement it into reality. Playing with the shadows seem like an even more fantastical experience. While the object is untouched, the shadow, the “child” of the object, which is supposed to mirror the object, transforms separate from it’s “parent”.


Ralph-Assignment-07-Projection

There is a certain sensation of satisfaction we gain from clearing things out. Like when we’re done washing dishes, and there’s just gunk leftover in the sink. There’s satisfaction in swiping all of that down into the food disposal drain. Or when we’re playing Bejeweled, and we clear out a poop-load of diamonds in one move. This sensation was the inspiration for this project, and what I wanted to emulate.
Little balls will appear to fall into the bucket until it fills up, and when the user presses space, the bucket will flush and all of the balls will drain. If the user does not flush within a certain amount of time, the bucket will clog and explode balls in all directions. The idea behind this project was to create a tension between the user’s desire to drain the bucket and let it fill up. The more the bucket fills up, the more satisfying the drain is. But the user should not want to allow the bucket to fill for too long, as it will empty out in a messy manner.

electrified water

Keystone is frustrating. The actual coding took way less time than trying to get Keystone to work on my program (especially since my computer won’t even render it correctly due to graphics card problems!) and calibrating it (probably an exaggeration but it certainly felt like it). So I learned this, yet again: logistics ruin the fun out of everything. Also, I didn’t expect the shadow of the stream of water–no way around that.

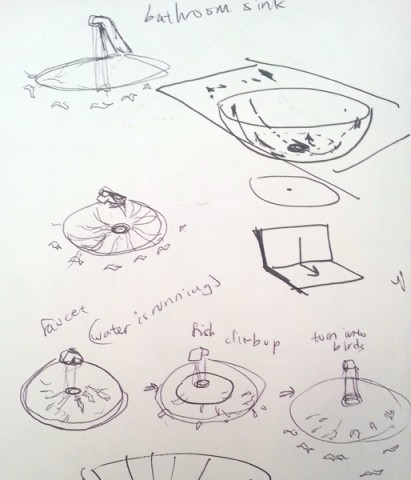
My main inspiration was to use sound that was already provided to me as part of the projection–and that sound was water hitting the sink as I washed my hands every day. I imagined the sound as bunch of electrically charged particles climbing up rather than flushing downwards into the drain, and it got to the point where I could hear electricity in the water.

20131018_133128

(part of the drawing is Golan’s explanation on why my design isn’t feasible for now)

Initially I wanted creatures that would climb up the sink and then turn into birds when they reached the top corners, but Golan was against the idea since it would be too complex for an assignment. He instead suggested that I confine it to a flat area near the drain, which turned out alright. The project might develop further by implementing the original idea I had.