the search for silence

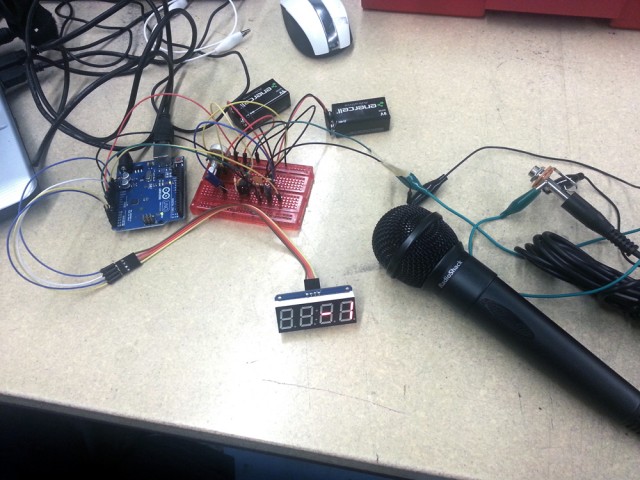
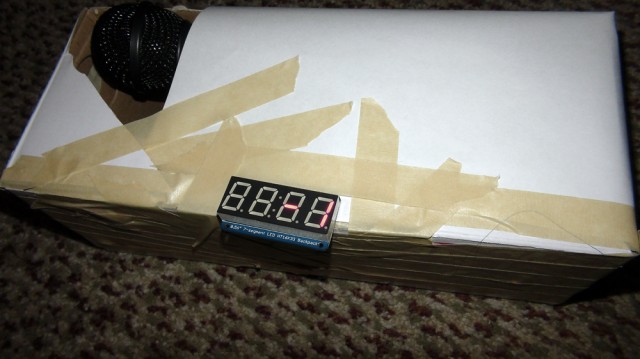
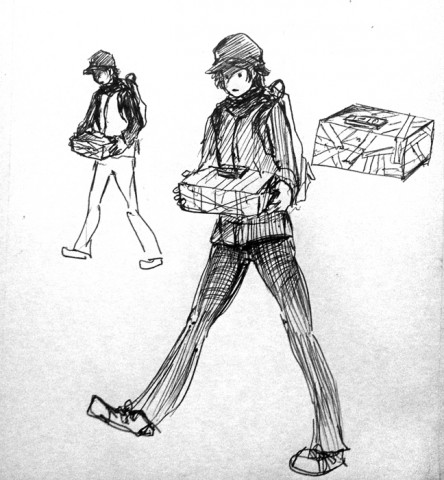
Last week I kept getting angry at the mere presence of more than five people and the constant noise around me. So much so in fact that one of the first ideas for this project I came up with was making what is essentially a punching bag to vent my frustrations on, with the matrix recording the level of my anger. But as I brainstormed over the course of several days, I realized what I was looking for was a sort of tranquility and its unattainable nature. I ended up sketching a fiction where I would travel while carrying around a haphazardly constructed measuring box that could indicate if the location is completely silent/tranquil. In the measuring system of tranquility, the numbers would range from -10 to 0, -10 being the least tranquil and 0 being the complete silence.

20131118_195326

I had followed the extremely well-documented steps by Amanda Ghassaei to create the sound input device, which surprisingly was not trivial as Golan explained to me. I realized belatedly that for my purposes of recognizing “sound” and not “sound pressure,” it would’ve been better to buy a shield instead (and Paolo Pedercini told me after I had assembled the circuit that the ArtFab had recently stocked up on microphone sound detection sensors). But I also realized afterwards that this was fine because it fits the narrative of “some person randomly decides to put together a ghetto box, whatever.”

20131117_195901

DSC00096

(thanks to my roommate for the shoebox!)

The code is exceedingly simple:

#include Wire.h //y'all know what this is really supposed to be
#include "Adafruit_LEDBackpack.h"
#include "Adafruit_GFX.h"

Adafruit_7segment matrix = Adafruit_7segment();

int incomingAudio;

void setup(){
  matrix.begin(0x70);
}

void loop(){
  incomingAudio = analogRead(A0);
  int adjusted = map(incomingAudio,400,1024, 0,11);
  adjusted = adjusted*-1;
  matrix.print(adjusted, DEC);
  matrix.writeDisplay();
  delay(200);
}

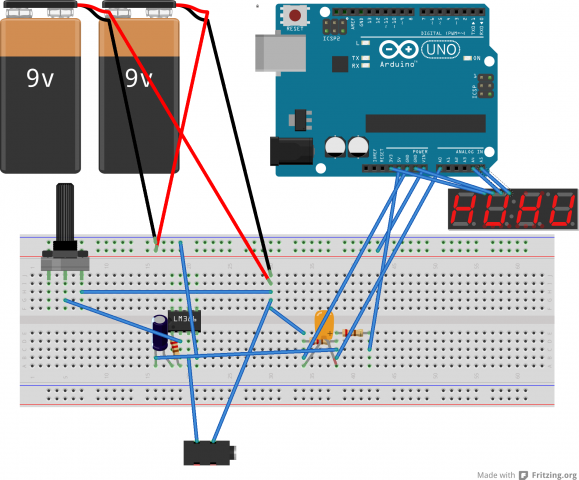
And here’s the Fritzing diagram (though really, Amanda Ghassaei has better circuit diagrams):

Untitled Sketch_bb


Flying Carpets and Related Ideas


http://www.artcom.de/en/projects/project/detail/symphonie-cinetique-the-poetry-of-motion/

I have seen the work of these artists around vimeo before, and their sculptures are always seamless and breathtaking. There is a mystical harmony between the reflective light, music, and wavelike motions. This documentary describes the artsts’ inspirations and process pretty well, and shows their different variations in the sculpture. Their blog and videos didn’t say much about how their sculptures were implemented, but there was one comment that said each string-bound obeject was controlled by a stepper motor, and that the movements were coded in hardware (I’m not too sure what that means).

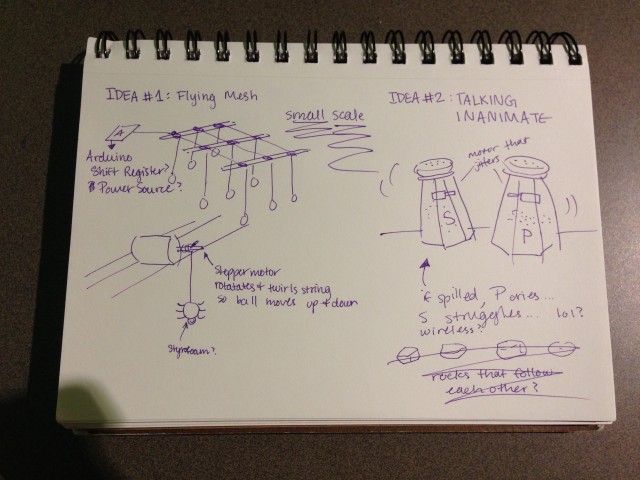
I’ve wanted to do a ceiling-type installation for a while, and I am extremely intrigued by the idea of making a sculpture that looks like it is floating. I imagine the challenge would be to get all the stepper motors to work at the same time and coordinate a sinusoidal motion. Even better, it would be cool if they were arranged in an array to look like a levitating mesh (flying carpet). But I realize this project needs to be scaled down, so I will just think about how to get all those stepper motors working. I would need a bigger power source for sure, as well as a shift register or something to get them to be programmed in the same way. I also am not that great at synchronizing the visual with music, so I think it would be cool for the movement to correspond to a sensor measurement.

I’ve seen a lot of drawing bots during my research, and I think this is a pretty interesting one because it is not a bot, really. It is controlled by motors reeling the string. This would be an interesting way of transforming a sensor measurement into a visual. Again, this would involve a lot of calculations between stepper motors, which would prove an interesting challenge.

This piece is really charming because it gives life to these typically inanimate objects and hides the mechanism behind its operation, which makes it quite mysterious. The artist uses a Lilypad and a servo for each book. It would be very interesting to take at least two inanimate objects and have them be able to communicate in a cute and humorous way. There method of communication would be through motors and maybe sound or light, and they would either have a sensor to interact, or maybe they could be connected through the internet. The idea would be that they have a story to tell together, and the viewers can watch or participate to figure it out. As for the actual objects, they could be salt and pepper shakers (Blue’s Clues anyone?), newspapers, rocks, water bottles, or generally anything that can conceal an arduino.

Sketches:
2013-11-18T21-55-41_4

THIS OR THAT?

Screen Shot 2013-11-18 at 9.45.17 PM

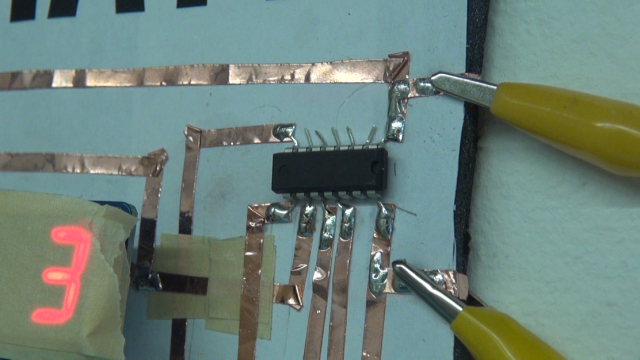
Recently, Microsoft Research presented their first paper on a project they’ve been working on where they are developing electrical components that are also stickers. The idea of sticky circuits is not new–Graffiti Research Lab was creating circuit boards out of mail postage in 2006, but while wearable computing has become immensely popular over the past few years, paper-based computing has not gained similar traction. Fascinated by this weird cousin of wearables, I tried my hand at a postage circuit board, using an ATtiny45 and some conductive tape:

I stuck it in a random elevator near ArtFab and it lasted a couple of hours.  Then, around Halloween, I actually ended up making a joke “ghost meter” that detected the amount of spirits haunting a person and put it in one of the women’s bathroom stalls.

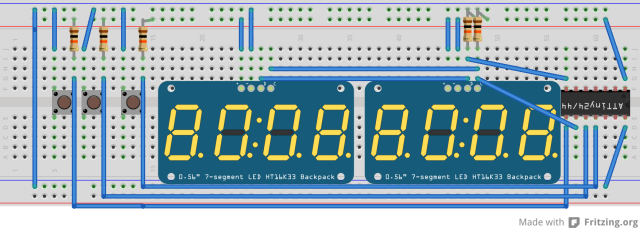
I really liked the idea of “physical apps”–cheap little programs (with varying degrees of usefulness and playfulness) that someone can stick or hang up on a wall for strangers to engage and play with. “Would You Rather” is a game where someone gives a group two (often terrible/gross) situations and the group is forced to vote for one or the other. This game has been turned into multiple apps and internet sites like Kitten War seem to draw inspiration from it. “This Or That” is an electronic poster constructive out of conductive tape, an ATtiny84, and two seven-segment displays that gives passerby a pseudo-anonymous platform to vote on one of two options (which they can also decide on!). While most people were honest in their votes, some people “stuffed the ballot” so to speak–this is probably not going to replace the ballot boxes during the 2016 presidential election, but it’s a fun diversion.

https://www.youtube.com/watch?v=9q_88BjcTKA

Ultimately, the choice is yours.

Screen Shot 2013-11-18 at 9.44.43 PM

poster_bb

#include 
#include 

Tiny_7segment lMatrix = Tiny_7segment();
Tiny_7segment rMatrix = Tiny_7segment();

int lCounter = 0;
int rCounter = 0;
const int lButton = 2;
const int rButton = 3;
const int rstButton = 5;
boolean rBoo = false;
boolean lBoo = false;

void setup() {  
  lMatrix.begin(0x70);
  rMatrix.begin(0x71);
}

void loop() {
  if (digitalRead(lButton) == LOW) {
    lBoo = true;
  } 
  else if ((digitalRead(lButton) == HIGH) && (lBoo == true)) {
    lCounter += 1;
    lBoo = false;
  }

  if (digitalRead(rButton) == LOW) {
    rBoo = true;
  } 
  else if ((digitalRead(rButton) == HIGH) && (rBoo == true)) {
    rCounter += 1;
    rBoo = false;
  }

  if (digitalRead(rstButton) == LOW) {
    lCounter = 0;
    rCounter = 0;
  }
  
  if (lCounter == 9999) {
    lCounter = 0;
  } else if (rCounter == 9999) {
    rCounter = 0;
  }
  lMatrix.println(lCounter);
  rMatrix.println(rCounter);
  lMatrix.writeDisplay();
  rMatrix.writeDisplay();
  delay(10);
}

Swetha and Ticha-Bathroom Stall Counter

After hearing Golan’s story about the urinal timer in China, Swetha and I were inspired to do something that also involved bathrooms. Due to the awkwardness that surrounds the bathroom atmosphere and people’s acute concern for public hygiene, we decided to create a measuring device that interplays these two characteristics. Hence, the bathroom stall counter was created: this simple device tallies the number of people who have used a particular bathroom stall and displays the value on the SSD. To do this, we attached a magnet to the bathroom stall door and used a hall effect sensor to determine the magnet’s proximity, which allowed us to tell whether the stall was vacant or occupied.

This project is similar to the work of Adam Frelin ( http://adamfrelin.com/works/TapeFountains-11/ )  in which he dashes into public bathrooms and films himself creating interesting but inconvenient duck tape sculptures that change the function of the bathroom. We were inspired by his erratic but well-edited documentation and his way of interacting with this public space.

IMG_0856


Although Swetha did a wonderful job at laser-cutting boxes for our two circuits, our devices still ended up having a ghetto-looking appearance when we secured the parts with masking tape. So, we decided to overplay the ghetto-ness by adorning the boxes with graffiti-esque typography and doodles, which turned out pretty nicely and complemented the bathroom’s atmosphere. Unfortunately, we were not able to mount both of the boxes we made because the sensor would not work for one of them unless it was connected to the laptop.


Below are the fritzing diagram and the code:

arduino fritzing


const int hallPin = 2;
const int buttonPin = 9; 
int hallState = 0;        // value read from the pot

int buttonState = 0;
int Value = 0;
int prevValue = 0;

// Enable one of these two #includes and comment out the other.
// Conditional #include doesn't work due to Arduino IDE shenanigans.
#include  // Enable this line if using Arduino Uno, Mega, etc.
//#include  // Enable this line if using Adafruit Trinket, Gemma, etc.

#include "Adafruit_LEDBackpack.h"
#include "Adafruit_GFX.h"

Adafruit_7segment matrix = Adafruit_7segment();
uint16_t counter = 0;
uint16_t countPeeps = 0;

void setup() {
#ifndef __AVR_ATtiny85__ 
#endif
  matrix.begin(0x70);
  pinMode(hallPin, INPUT);
  pinMode(buttonPin, INPUT);
}

void loop() {
  hallState = digitalRead(hallPin);      
  buttonState = digitalRead(buttonPin);    
  // map it to the range of the analog out:
  // change the analog out value:
  if(buttonState == LOW){ 
   counter = 0; 
   countPeeps = 0;

  }  

  if (hallState == HIGH) {        
  	Value =10; 
  } 
  else {
    Value = 0; 
    if(prevValue == 10) { 
    	countPeeps++;
    }
  }

  prevValue = Value; 

  matrix.println(countPeeps);
  if(countPeeps == 0) {
  	matrix.writeDigitNum(4, 0, false);
  }
  matrix.writeDisplay();
  delay(10);
}
Written by Comments Off on Swetha and Ticha-Bathroom Stall Counter Posted in Assignment-08

Get Out of My Space!

[vimeo 79357294]

by Chloe and Kristina,

with many thanks to Michelle Ma for acting for us 🙂

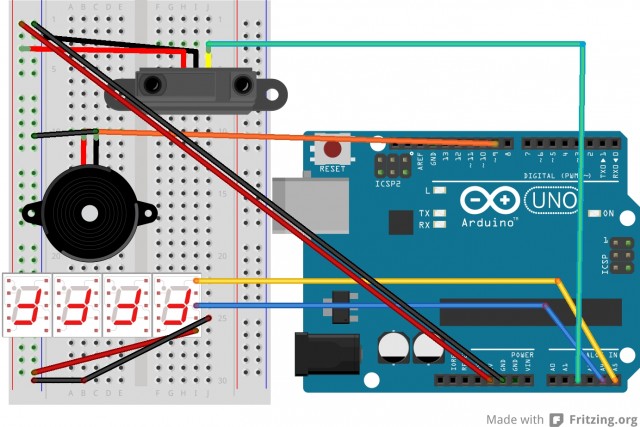
The following is out Fritzing diagram: 


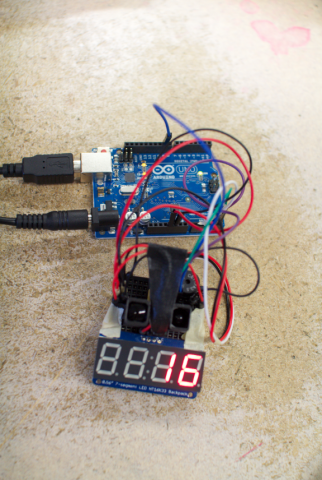
Clearly the epitome of style, this personal space sensor is all you’ll ever need to let those people who’ve been in your bubble too long it’s time for them to go — or at least to take a step back.

Screen Shot 2013-11-14 at 2.30.19 PM

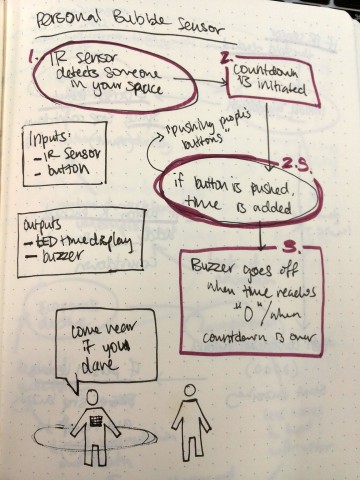
 We used: the Pico Buzzer from our Arduino Kits, the 7-segment display provided for the assignment, and an arbitrary InfraRed sensor in order to sense the distance between a person and the machine.

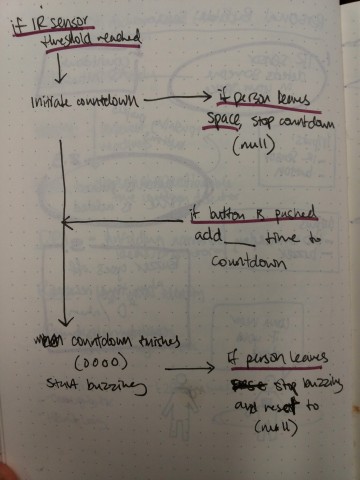
The following images are excerpts from our planning:

20131114_155939 20131114_155928

And here is our code:


#include <Wire.h> // Enable this line if using Arduino Uno, Mega, etc.
#include "Adafruit_LEDBackpack.h"
#include "Adafruit_GFX.h"

int irReader = 2;
int irVal = 0;
int buzzerPin = 9;
int songLength = 8;
int frequencies[] = {
330,262,330,440,330,262,330,440};
int tempo = 150;
int lastCountDownTime = 0;
boolean play = false;
int displayNum = 10;

void playBuzzer(boolean play){
if (play == true){
int i,tempo;
for ( i = 0; i < 2; i++){
tone(buzzerPin,frequencies[i],tempo);
delay(tempo);
}
}
while(true){
}
}

Adafruit_7segment matrix = Adafruit_7segment();
int myNum;
void setup() {
pinMode(buzzerPin,OUTPUT);
myNum = 10;
Serial.begin(9600);
Serial.println("7 Segment Backpack Test");
matrix.begin(0x70);

}

void loop() {
play = false;
int now = millis();
irVal = analogRead(irReader);
Serial.println(irVal);

if (irVal > 250){
int elapsed = now-lastCountDownTime;
if (elapsed >= 1000)
{
myNum = (myNum + 1)%11;
int displayNum = 10-myNum;
lastCountDownTime = now;
matrix.print(displayNum, DEC);
matrix.println(displayNum);
matrix.writeDisplay();
if (displayNum == 0) {
if (irVal > 250){
//play = true;
displayNum = 0;
//playBuzzer(play);
tone(buzzerPin,1000,tempo);
delay(200);
tone(buzzerPin,1000,tempo);
delay(200);
tone(buzzerPin,1000,tempo);

}
else
{
play = false;
playBuzzer(play);
}
}

}
play = false;
}
else
{
myNum = -1;
}

}


Rachel-Measuring Device

The Dis-empathy (Awkwardness) Collar

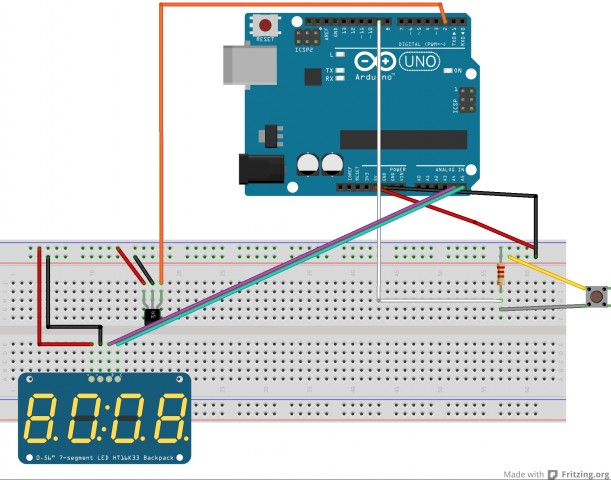
At its most abstract, this device measures the empathetic distance between two people, or awkwardness. A temperature sensor measures the heat rising off the bearer’s body, which increases as the bearer becomes embarrassed. The number displayed corresponds to the level of embarrassment the bearer feels, which is generated by the cumbersome devices as well as the reactions it elicits. The device, while covering up part of the body that flushes with embarrassment, still displays this emotion in quantified form. However, the cold,inorganic numbers cannot convey the emotion, only express its presence. The person interacting with the bearer has no way of knowing what emotion the bearer is experiencing, in fact the bearer might not be experiencing emotion at all as far they know. I think this turns the bearer into a sort of robot, confined to an uncomfortable slave collar of their own emotion, yet unable to release that emotion.

I arrived at this idea through the 7 segment display. I find it cold, emotionless, and robotically ugly. It is connotationless, un-symbolic, and inorganic. It serves a single functional purpose, to convey some information as numbers, stripping that information of interpretation and meaning. I wanted to make something that expanded this quality to the bearer, turning their human emotions into meaningless numbers.
 photo ACollar1_zps55312ffb.jpg

 photo ACollar2_zps91fe5cf1.jpg

 photo EmotionCollarFritz_bb_zps910187c0.jpg

/*Rachel Moeller, Dis-empathy Collar*/
#include 

#include "Adafruit_LEDBackpack.h"
#include "Adafruit_GFX.h"

Adafruit_7segment matrix = Adafruit_7segment();

const int tempPin = 0;

void setup() {
#ifndef __AVR_ATtiny85__
  Serial.begin(9600);
  Serial.println("7 Segment Backpack Test");
#endif
  matrix.begin(0x70);
}

void loop() {
  float emotionLevel=getVoltage(tempPin);
  float num=1.0;
  float outputNum=emotionLevel*100;
  outputNum=map(outputNum,40,90,0,20);
  int outnum=abs(int(outputNum));

  matrix.print(outnum, DEC);
  matrix.writeDisplay();
  delay(2000);
  }

  float getVoltage(int pin)
{

  return (analogRead(pin) * 0.004882814);
}


How Fast Can You Spin?

Spin

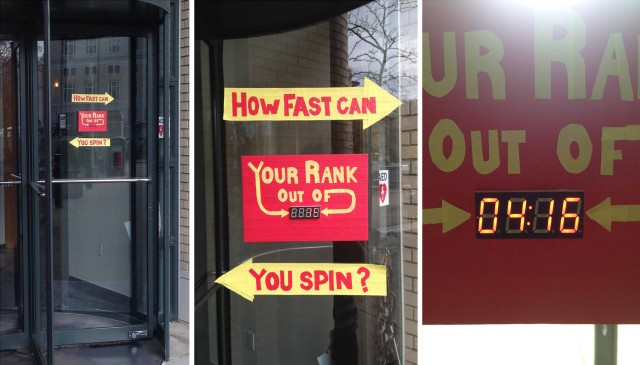
My arduino project was installed on the revolving doors of the University Center. Basically, it uses an accelerometer to compute the speed of the doors as someone pushes it. The LED display then reports back the rank of the person out of the total number of people who passed through when the box was installed.

When I heard of the measuring device assignment, I wanted the numbers to be something easy to understand. For some reason, rankings were the first thing that came to mind, since first place is first place no matter what game you play. So I decided to go with a competitive event, and when I learned about the gyroscope, I knew I wanted to do something with rotations. As it turned out though, the revolving doors only needed an accelerometer to measure a force in one direction.

Some problems I ran into, as you will see in the video, is that some people didn’t really understand the colon separating the rank and the total number of participants. Maybe I should have just displayed one number… Another strange issue is that photographs and videos of the LED display could not capture a whole number unless I took a picture really close to the display. I’m not sure if this means the camera goes out of focus, or if the LED display has a slow enough frame rate that the camera picks up each frame. Another issue was that it was a little too bright out for the LED to be put in certain locations. My last problem was that many people ignored the box…

Overall, I had a great amount of fun with this project. I only wish I could leave the project there as a permanent installation to see the rankings accumulate over time.

EDIT:
I tried to get a video of the actual numbers changing, but at night the numbers were too bright. Plus people kept walking through when I tried to get a video. So here is a VERY brief shot of the numbers, if you can see them.
IMG_2940

IMG_2942

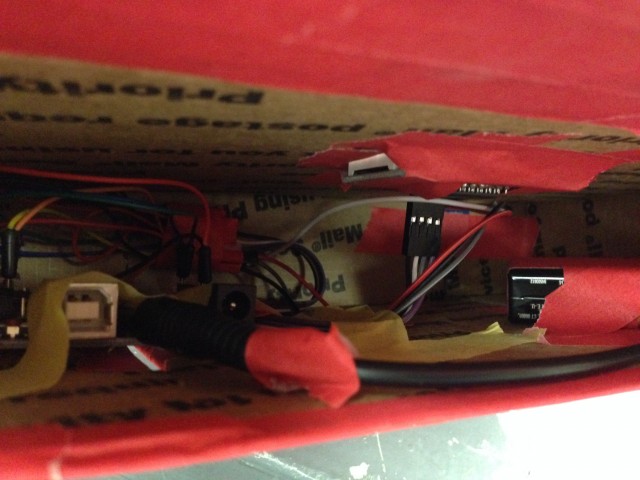
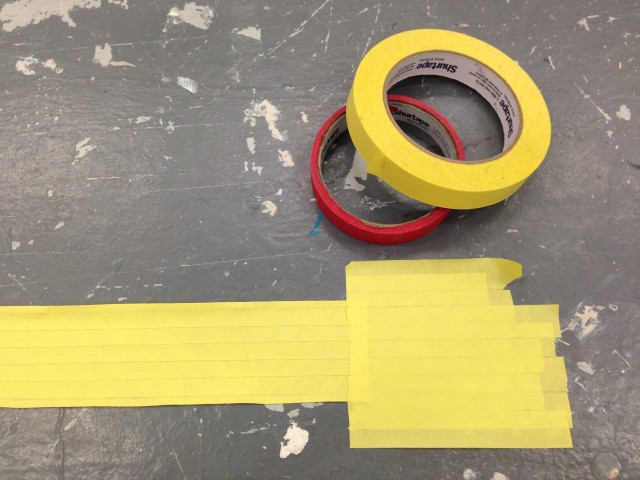
All the supplies I used were a FedEx box, masking tape, scissors, and Sugru to attach the thing to glass doors.
Revololving Games_bb

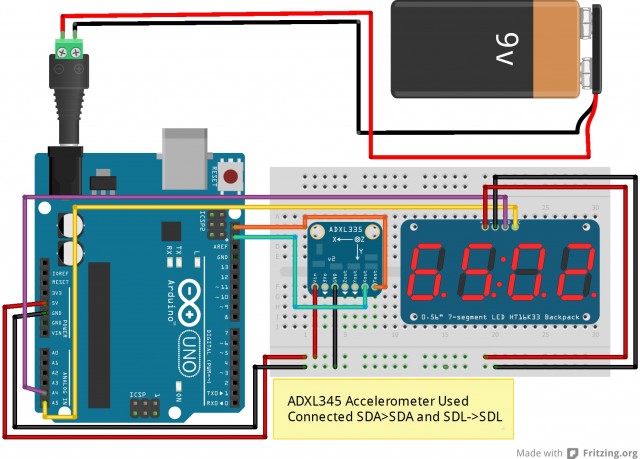
Parts used:
Adafruit ADXL345 – Triple-Axis Accelerometer
Adafruit 0.56″ 4-Digit 7-Segment Display w/I2C Backpack – Red

//Revolving Games
//Michelle Ma
//Adapted from Adafruit's 7 segment matrix and ADXL345 accelerometer example
//Using a 7 segment matrix and a 3-axis accelerometer, displays the ranking 
//out of a total number of rankings of the velocity of a person using a 
//revolving door.

#include 
#include "Adafruit_LEDBackpack.h"
#include "Adafruit_GFX.h"
#include 
#include 

Adafruit_7segment matrix = Adafruit_7segment();
Adafruit_ADXL345 accel = Adafruit_ADXL345(12345);

//If acceleration is greater than this value, start computing ranking!
const int accelThreshold = 2.00;
//There are only two available digits to display total rankings
const int numScores = 99;

//array of the speeds (scores)
float velocities[numScores];
int numRankings = 0;

void setup() {
  Serial.begin(9600);
  if(!accel.begin())
  {
    /* There was a problem detecting the ADXL345 ... check your connections */
    Serial.println("Ooops, no ADXL345 detected ... Check your wiring!");
    while(1);
  }
  matrix.begin(0x70);
  matrix.setBrightness(5);
  accel.setRange(ADXL345_RANGE_16_G);
  //velocities array initialized with impossible speeds
  for (int i=0; i accelThreshold) {
    float velocity = computeVel(event.acceleration.y);
    velToArray(velocity);
    //Give time for door to stop rotating
    delay(5000);
  }
}

float computeVel(float accel) {
  // Will collect over 250 ms
  // Using trapezoid rule to compute estimated velocity
  float sum = 0;
  int samples = 25;
  int dt = 10;
  for (int i=0; i < samples; i++) {
    if ((i==0)||(i==(samples-1))) {
      sum += abs(accel);
    } else {
      sum += 2*abs(accel);
    }
    delay(dt);
  }
  //dt is in milliseconds
  float result = ((dt/1000.0)/2.0)*(sum);
  Serial.print("  Velocity: "); Serial.print(result);
  return result;
}

void velToArray(float velocity) {
  int rank;
  //If rankings reach the cap of the matrix, take off the 
  //slowest velocity
  if (numRankings==numScores) {
    velocities[numScores-1] = 100.0;
    numRankings--;
  }
  //first velocity entered
  if (numRankings==0) {
    velocities[0] = velocity;
    rank = 1;
    numRankings++;
  } else {
    //Go through the list from the right
    for (int i=numScores-1; i>0; i--) {
      //place velocity after a faster velocity
      if ((velocity > velocities[i-1])){
        velocities[i] = velocity;
        rank = i+1;
        numRankings++;
        break;
      } else {
        //move velocities down an index
        velocities[i] = velocities[i-1];
        if (i==1) {
          //fastest velocity placed at beginning
          velocities[0] = velocity;
          rank = 1;
          numRankings++;
        }
      }
    }
  }
  Serial.print("  Rank: "); Serial.print(rank);
  Serial.print("  Fastest: "); Serial.print(velocities[0]);
  Serial.print("  NumRankings: "); Serial.print(numRankings);
  displayRank(rank);
}

void displayRank(int rank) {
  //Display rank in matrix0 and matrix1
  //Display total rankings in matrix3 and matrix 4
  matrix.writeDigitNum(0, int(rank/10));
  matrix.writeDigitNum(1, rank%10);
  matrix.drawColon(true);
  matrix.writeDigitNum(3, int(numRankings/10));
  matrix.writeDigitNum(4, numRankings%10);
  matrix.writeDisplay();
}
Are you sitting yourself to death? (Arduino Measuring Device – Julia & Dave)

Project Description

To start this assignment, we brainstormed interesting things to measure, interesting ways to measure them, and possible locations for our measurement device.  We came up with all kinds of ideas—from a person’s repetitive thoughts (through self report) to boredom in class (seeing if we could look at network data and count how many people were on facebook.) In the end, we narrowed our ideas down to these 3:

  1. Measuring light in dark areas where plants grow nonetheless—seeing how much light is actually there.

  2. Measuring the effect of an installation piece on altruism—if we had a countdown that would motivate people to be aware of or donate to distant issues.

  3. (on the quantitative self side of things) measuring how long we spent sitting during the day. This was inspired by a study that indicated that excessive sitting increases health risks and decreases lifespan.

We chose to measure sitting as our final idea because it fit better with the assignment—measuring something that existed already—rather than idea 2, which was very deliberately changing people’s behavior. We also chose to measure sitting because we felt the measurement could be a provocative one, encouraging a wearer to think about their lifestyle choices.

Sensors Used

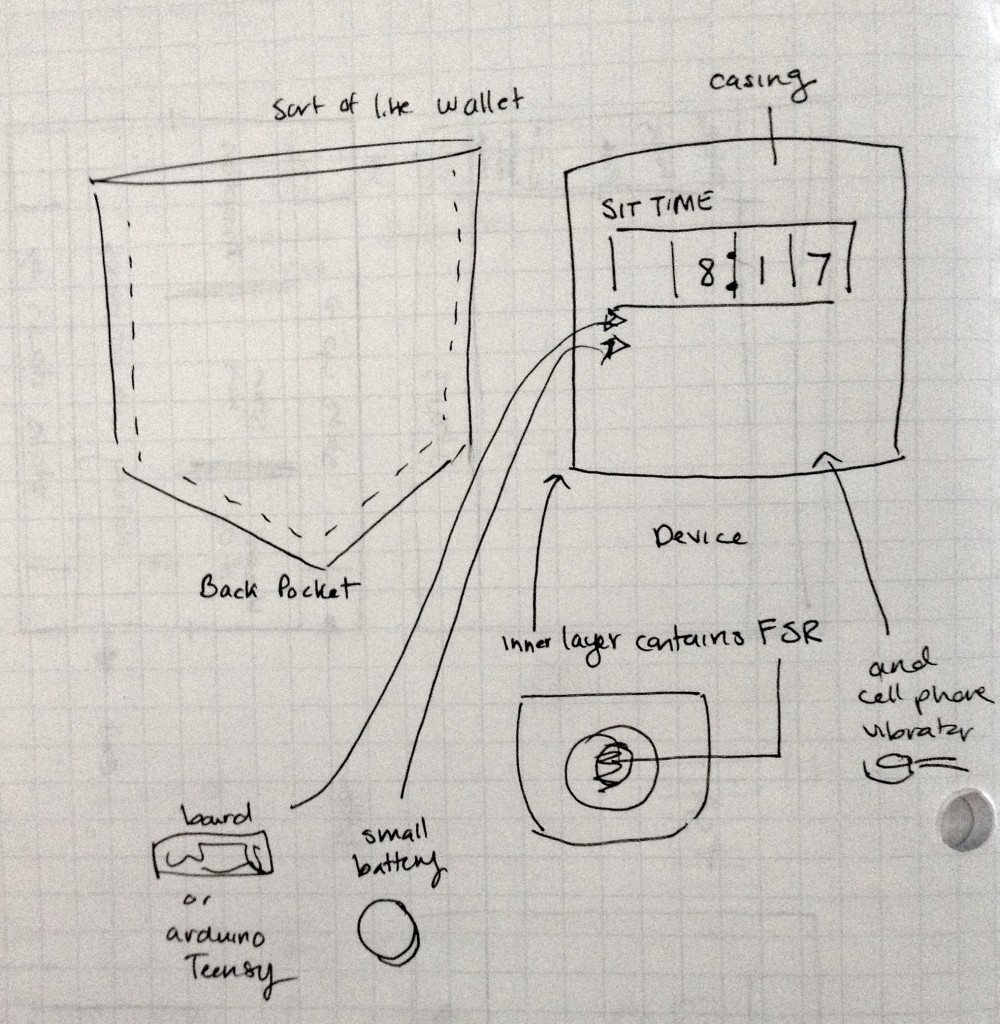
We used a pressure sensor (a.k.a. round force-sensitive resistor) placed in a back pocket to tell if a person was sitting.

Sketch

Photo Nov 11, 3 37 54 PM

Photos

Video

Code

Github repo: https://github.com/juliat/ems2a8

#include  Wire.h
#include "Adafruit_LEDBackpack.h"
#include "Adafruit_GFX.h"

// initialize the 7 segment number display
Adafruit_7segment matrix = Adafruit_7segment();

// pressure sensor
const int sensorPin = 0;
int pressureReading; // the analog reading from the FSR resistor driver
int sittingThreshold = 900;

// cell phone vibrator
int vibratorPin = 7;

#define minutesToMillisFactor 60000

boolean currentlySitting = false;
float overallTimeSitting = 360*minutesToMillisFactor;
float sitStartTime = 0;
float timeBefore = 0;

boolean warningNow;

// 0.1 minutes for testing, but this would really be about 30 minutes (for practical use)
const float sitWarningThresholdInMinutes = 0.1;

void setup() {
  // get the serial port running for debugging
  Serial.begin(9600);
  Serial.println("Start");

  // setup the 7 segment number display
  matrix.begin(0x70);

  // initialize vibratorPin
  pinMode(vibratorPin, OUTPUT);
}

void loop() {
  pressureReading = analogRead(sensorPin);

  checkSitting();
  Serial.println("overallTimeSitting");
  Serial.println(overallTimeSitting);

  // how long have I currently been sitting?
  float currentSitDurationInMillis = millis() - sitStartTime;

  // warn if I've been sitting too long
  if ((currentSitDurationInMillis > sitWarningThresholdInMinutes * minutesToMillisFactor) 
     && currentlySitting) {
       warningNow = true;
  }

  if (warningNow == true) {
    digitalWrite(vibratorPin, HIGH);
  }

  // if I'm sitting, update the display, adding the time delta

  matrix.print((long)overallTimeSitting/minutesToMillisFactor, DEC);
  matrix.writeDisplay();
  delay(50);
}

void checkSitting() {
  Serial.print("pressure: ");
  Serial.println(pressureReading);

  float timeNow = millis();
  // are you sitting?
  if (pressureReading < sittingThreshold) {       // were you sitting last time I checked?       if (currentlySitting == false) {         sitStartTime = millis();         currentlySitting = true;         Serial.println("started sitting");       }       else {         Serial.println("still sitting");         // update overall sitting time         float thisSitDuration = timeNow - timeBefore;         overallTimeSitting += thisSitDuration;                }   }   // are you sitting now   if (pressureReading > sittingThreshold) {
    // did you just get up?
    if (currentlySitting == true) {
      currentlySitting = false; 
      Serial.println("got up");
      warningNow = false;
      digitalWrite(vibratorPin, LOW);
    }
  }
  timeBefore = timeNow;
}

Diagram

Written by Comments Off on Are you sitting yourself to death? (Arduino Measuring Device – Julia & Dave) Posted in Assignment-08

Ticha-Arduino Exercises

EDIT: NEVER MIND about the issue I had with #12 – it was really dumb…

In general, I found these exercises to be relatively enjoyable (albeit a little dull) and instructive in allowing me to get acquainted with the Arduino. I actually felt that the circuit diagrams were more useful than the pictorial representations because they clearly showed how the components related to each other.

Also I couldn’t find a way to properly document #12, so please assume that since it moved somehow, it must have worked…

Finally to prevent too many people from getting Rickrolled, I decided to use my own tune for #11. 😀