THIS OR THAT
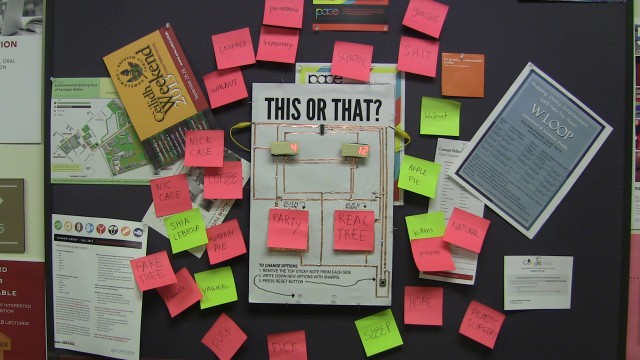
Inspired conceptually by websites like Kitten War and classic games like “Would You Rather?” and technically by projects like Post-Circuit Board by the Graffiti Research Lab, This or That is an electronic voting poster that allows passersby to vote on two different options as chosen by other strangers.
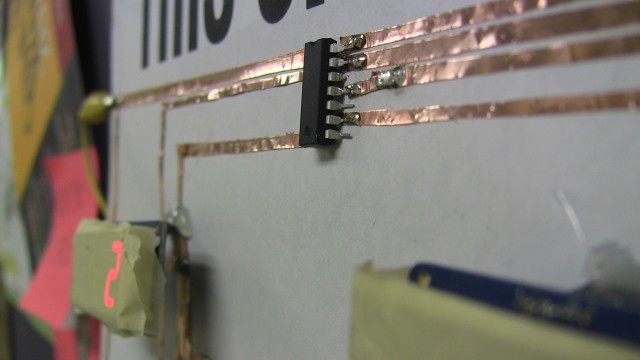
The poster consists of a voting button and seven-segment display on each side, as well as a reset button, all of which are controlled by a single ATTiny84. There are no wires on the poster besides the alligator clips connecting to the power–all the traces were made with copper tape.
While we are becoming more interconnected digital, electronics are becoming more and more personal–our laptops and cellphones are not devices that are meant to be shared physically, and we even get physically anxious when they’re out of our reach for too long. This or That is a “public” electronic, its charm and fun comes from its communal usage.
 Older iteration (I’ve since learned the art of making pretty traces!).
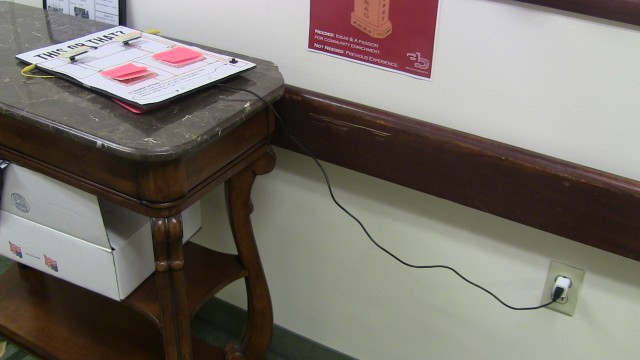
At one point I traded my coin cell battery in for a sweet LiPo battery that someone had lying around.
chargin’ a poster whaaat
Code & Circuits
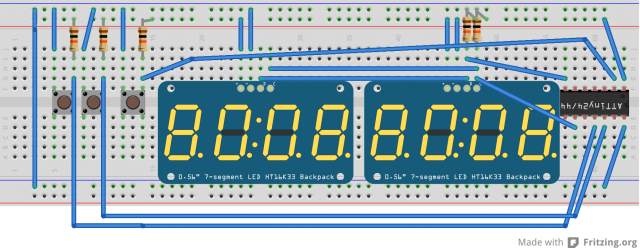
DIAGRAM:
I have a .ai file that needs cleaning that has both the poster text + lightly drawn traces that you can use to create a poster for your own, so bear with me! 🙂 Here’s a Fritzing diagram for now:
MATERIALS:
- Adafruits’s 7-Segment LED Displays x2 (these aren’t actually soldered directly onto the poster–instead I just used header pins on the poster so I could use the displays on other projects if I wanted 🙂 )
- ATtiny84
- 1/4 in. Copper Tape (the voting buttons were actually made with two strips of 2 in. wide copper tape)
- Coin Cell Battery
- Push Button
- 10K ohm resistors x5
- Post-it Notes
- Sharpie
- 11″x17″ paper
LIBRARIES:
ARDUINO CODE:
MIT Media Lab’s High Low Tech group has a fantastic tutorial on programming ATtinies. For reference, on an ATtiny84:
- Physical Pin 9 –> SCK
- Physical Pin 8 –> MISO
- Physical Pin 7 –> MOSI
- Physical Pin 5 –> RESET
My code below has a diagram included, and each physical pin number has been labelled:
#include
#include <tiny_ledbackpack .h>

/*
                           -------
                       +  | 1  14 | -
LEFT VOTE BUTTON [PIN 10] | 2  13 | RESET BUTTON [PIN 0]
                          | 3  12 | RIGHT VOTE BUTTON [PIN 1]
                          | 4  11 |
                          | 5  10 |
                          | 6   9 | SCLOCK
                    SDATA | 7   8 |
                           -------
*/

Tiny_7segment lMatrix = Tiny_7segment();
Tiny_7segment rMatrix = Tiny_7segment();

int lCounter = 0;
int rCounter = 0;
const int lButton = 10;
const int rButton = 2  ;
const int rstButton = 0;
boolean rBoo = false;
boolean lBoo = false;

void setup() {
  lMatrix.begin(0x70);
  rMatrix.begin(0x71);
}

void loop() {
  if (digitalRead(lButton) == LOW) {
    lBoo = true;
  }
  else if ((digitalRead(lButton) == HIGH) && (lBoo == true)) {
    lCounter += 1;
    lBoo = false;
  }

  if (digitalRead(rButton) == LOW) {
    rBoo = true;
  }
  else if ((digitalRead(rButton) == HIGH) && (rBoo == true)) {
    rCounter += 1;
    rBoo = false;
  }

  if (digitalRead(rstButton) == LOW) {
    lCounter = 0;
    rCounter = 0;
  }

a    lCounter = 0;
  } else if (rCounter == 9999) {
    rCounter = 0;
  }
  lMatrix.println(lCounter);
  rMatrix.println(rCounter);
  lMatrix.writeDisplay();
  rMatrix.writeDisplay();
  delay(10);
}
If you have any questions regarding construction, feel free to email me at maddyvarner (at) gmail (dot) com (preferably with the subject line “This or That”).
