Project 4: My Life is like a Video Game

by jonathan @ 2:12 am 29 March 2012

My goal for this project was simple: just dick around (and learn something too).

On that note, I nabbed one of Golan’s Kinects and began tossing around idea after idea, ranging from a bicycle mounted egg launcher to kinectified augmented reality.

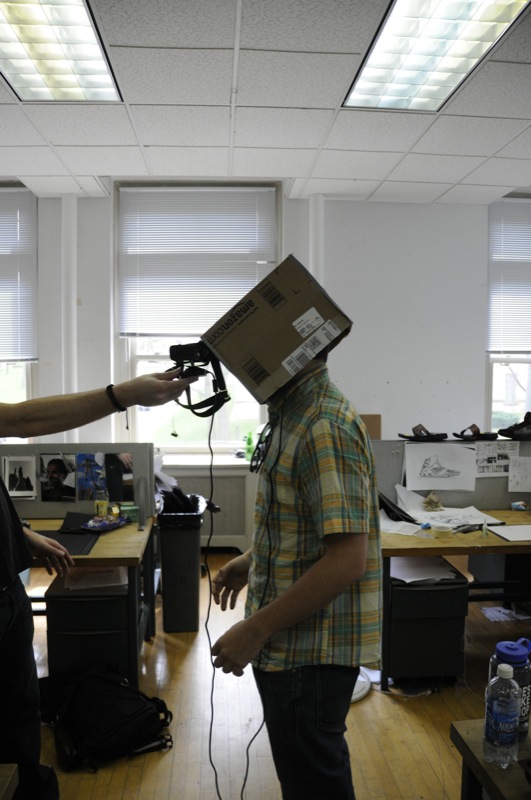
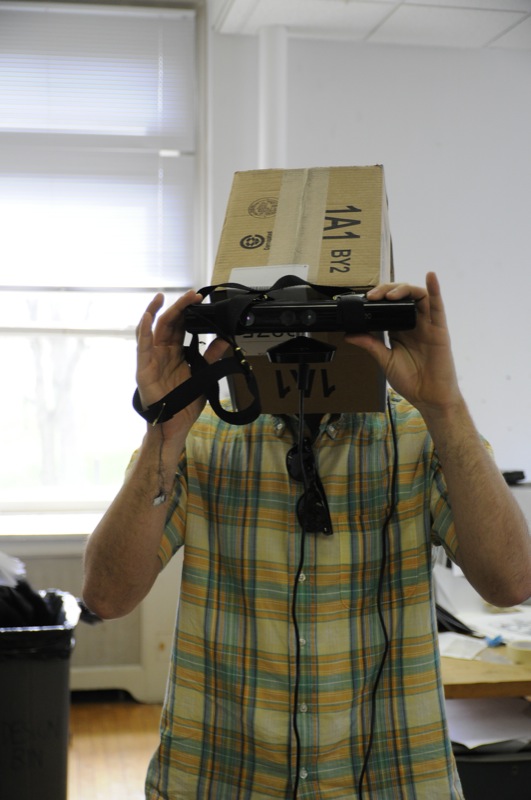
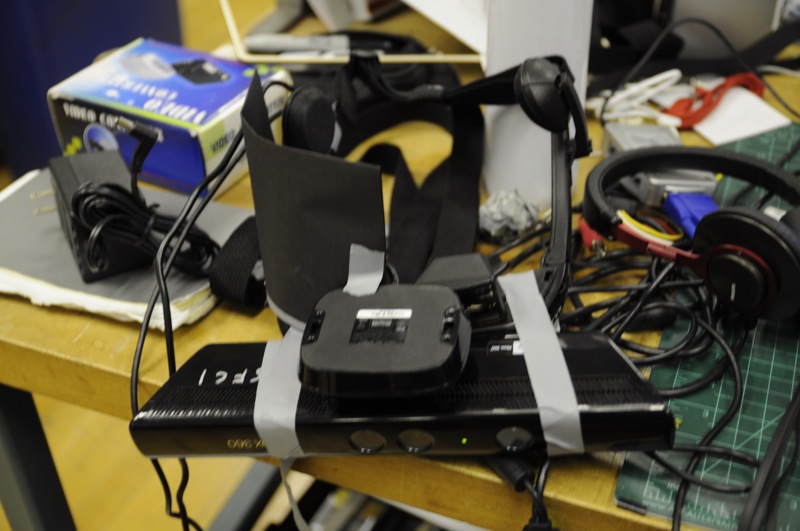
Of the first ideas that I had, I wanted to hook up the Kinect to a pair of VR goggles which Golan fortunately had a pair around. Not surprisingly, a significant chunk of my initial time went in to figuring out how to hook up all the components together. I was intrigued by replacing our stereoscopic vision with the depth map of the Kinect and simply seeing what would happened if I did.


[vimeo https://vimeo.com/39392778]

It was interesting, no doubt, but I kept experimenting some more.

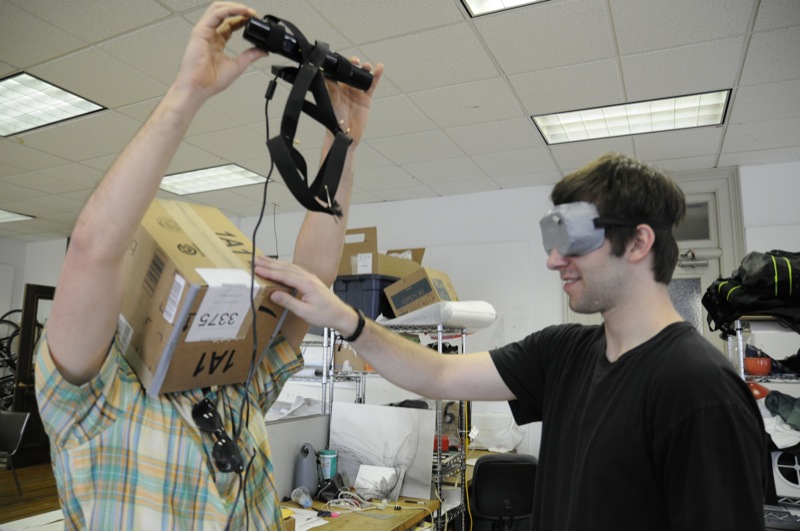
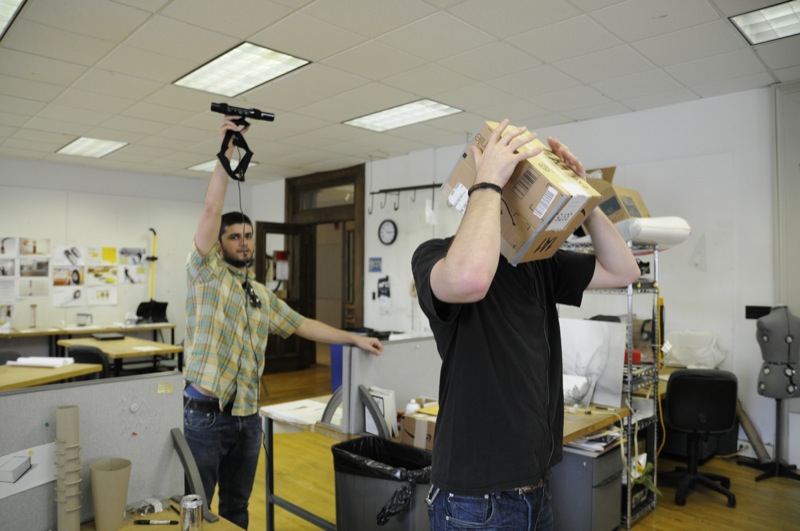
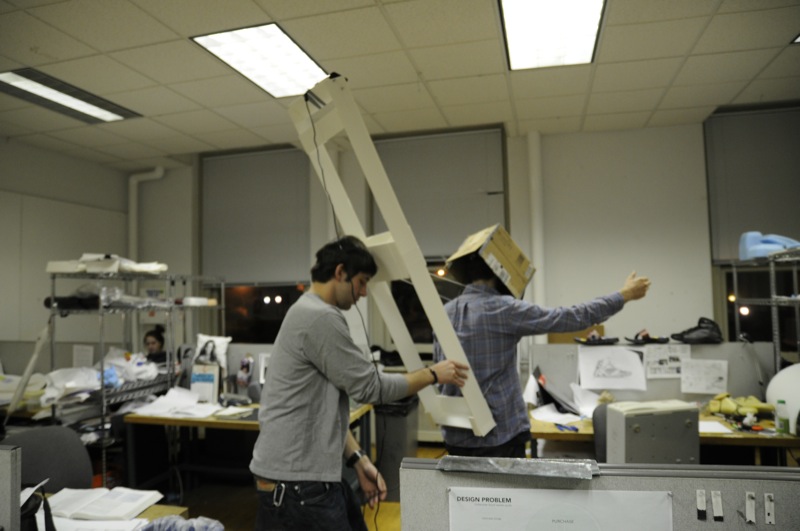
More dicking around later, the next question became, what if I made this an experience for two people? One person would be wearing completely blacked out goggles with the Kinect attached to their face while the other person would have the VR goggles fed with the Kinect video feed, therefore making each person mutually dependent on each other.

[vimeo https://vimeo.com/39392777]

With last iteration of this Kinectivision I suspended the Kinect above the user, making them feel as if they were in a RPG situated in real life. I think this has the potential to lead to many more interesting directions. I guess I am imagining the user to be able to actively alter the depth image: moving objects, grabbing people walking by, creating new objects in an actual space in real time. Who wouldn’t want their life to be a video game?

[vimeo https://vimeo.com/39392779]


I wish I had a bit more time and skill to implement more of my wishes, though I believe this foundation is a good spring board to other different utilizations.

Ju Young Park – InteractFinal

by ju @ 1:56 am


Inspiration 

For this project, I am inspired by Nam Jun Paik’s video art series. Especially, I was motivated by his More the Better(多多益善) and V-yramid. I love his art in a way it uses tv as a source of colors, graphics, or information. Since tv itself represents media and information, his artwork breaks away from physical place, and instead it represents virtual place where people mentally get mediated from information given by tv and media.


Concept

As I identify the experience of getting mediated by tv as a virtual place where people re-define their knowledge, I wanted to draw surreal tv in  a virtual place.

So, I decided to use AR-toolkit to reproduce Nam Jun Paik’s V-ramid.


Sketch

[youtube=https://www.youtube.com/watch?v=QIw1hwBcYjA]


Final

[youtube=https://www.youtube.com/watch?v=AIyN8hAvbUo]


HeatherKnight – Sommelier – Project4

by heather @ 12:24 am

I’ve had enough of low-brow beer delivery robots. Clearly it is time for an impeccably dressed, charming robot sommelier!

One of the neat things about robots is that they can interact with objects, not just by sensing what’s going on around it, but also by acting on the world. Manipulation depends on the robot’s physical capabilities, the physics and material characteristics of the task, and would ideally include corrections for mistakes or the unexpected.

I spend most of my time thinking about how to design algorithms for machines to interact with people. For this project, I decided to ignore people altogether. Maybe machines just want to hang out with other inanimate objects. It is also a chance to explore a space that might help humans bond with robots… drinking wine.

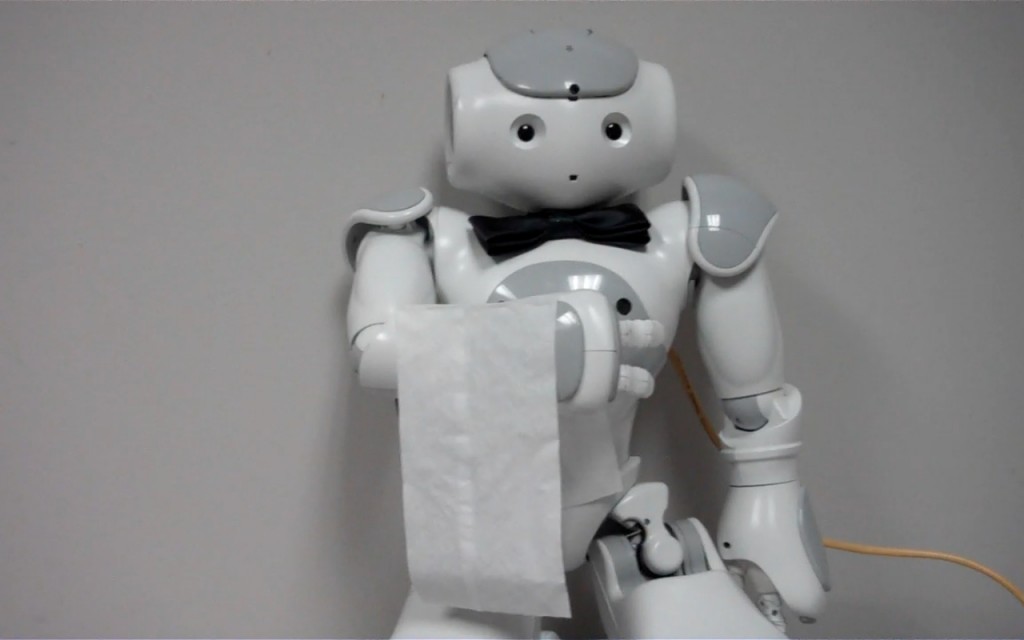
My Nao robot, aka Data the Robot, is an aspiring robot actor. And as everyone knows, acting is a tough job. Lots of machines showing up at the castings, but only a few lucky electricals make it to the big screen. So obviously they need something that pays the bills along the way.

This project is an early exploration of how my robot might earn a couple extra bucks until he gets his big break. Automation really isn’t his thing, and there might be lots of human drama to learn from once the fermented grape juice starts flowing. In this initial work, I spent time exploring grasps and evaluating bottles, then decided to augment the world around the robot.

He’s not quite to real wine bottles quite yet. The three fingers of each hand are coupled, controlled by a single motor behind each hand, which tugs cables to move the springy digits. Past experience told me that the best grip would be with two hands, but it took some experimentation to figure out how to get the bottle to tilt downward.

First I tried to get the bottle to tilt to the side, using one hand as the fulcrum and the other as the positioner, but there was never enough grip. Next I tried to use one arm as the fulcrum, giving excuse to the napkin over his arm in the initial photograph, but that was even less successful. Finally, I modified a small box to provide a cardboard fulcrum while the robot continues to use two hands. One could imagine a specialized bar with build in apparatus for robots, or conversely the robot to carry a portable fulcrum over before bringing the wine.
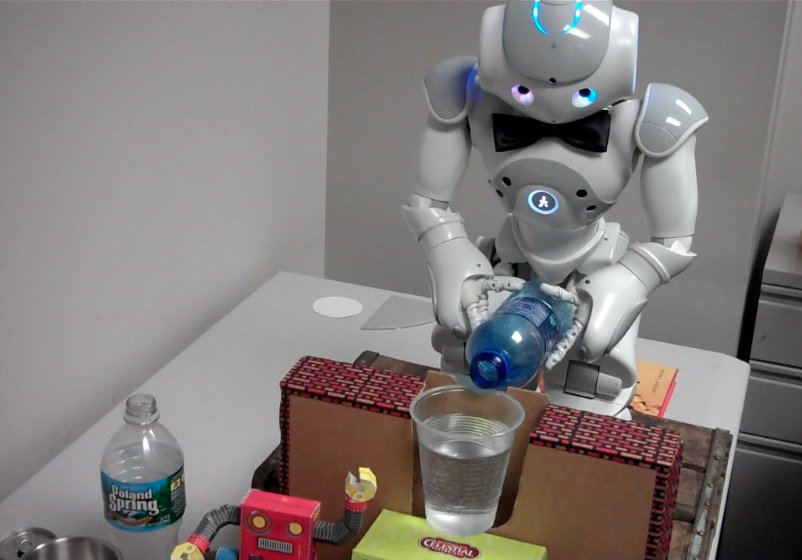
However, even that was not sufficient with arm motion alone. The closest I got to a (openloop) solution, featured in the photo above, was using the robot’s full body motion; crouching, bending forward, partially rising still bending (that makes the motors very tired), then all the way up.

What I am most interested in modeling in the project is the pour. Even in these initial experiments I see many complexities in the releasing and tipping the bottle. Grasping the lower end of the bottle tightly allowed for a stable hold through the initial descent, but when the bottle was fairly close to the fulcrum, I let it fall by loosening the robot’s fingers. I posted a short video showing this sequence:

[vimeo=https://vimeo.com/39392005]

When I was testing with one finger from each of my own hands, rotation was very useful, but that could be quite difficult on the robot. When I tested with the tips of two fingers, rotation no longer came easily, so my entire hand moved with the bottle until it was in the horizontal position, then I got underneath the back side of the bottle to continue tipping the front side lower and ensure flow.

Next up, adding real physics and algorithmic planning, filming with a proper wine glass and choosing *just* the right vintage. A little romance wouldn’t hurt either.


Sam Lavery – Project 4 – Interaction/Augmentation

by sam @ 11:49 pm 28 March 2012

Project 4

Poli's Restaurant today

The Mystery of the Poli Lobster Door Handles

Poli’s Restaurant was a Squirrel Hill institution, serving Italian seafood specialties from 1921-2005. Since my Italian-American grandmother used to live in the neighborhood, my family would go there to eat whenever we visited. I remember being fascinated with the huge lobster door handles made from solid brass. These handles were very recognizable as a significant and unique neighborhood artifact (the Heinz History Center made an attempt to obtain the handles after the restaurant closed). It was only after coming to Pittsburgh in 2008 to attend CMU that I learned of the mysterious disappearance of the handles. It seems that after Poli’s closed, someone managed to saw off the ornate handles without anyone noticing. Although the theft was well-known in the community, the lobsters have never been found and there are no pictures of them on the internet.

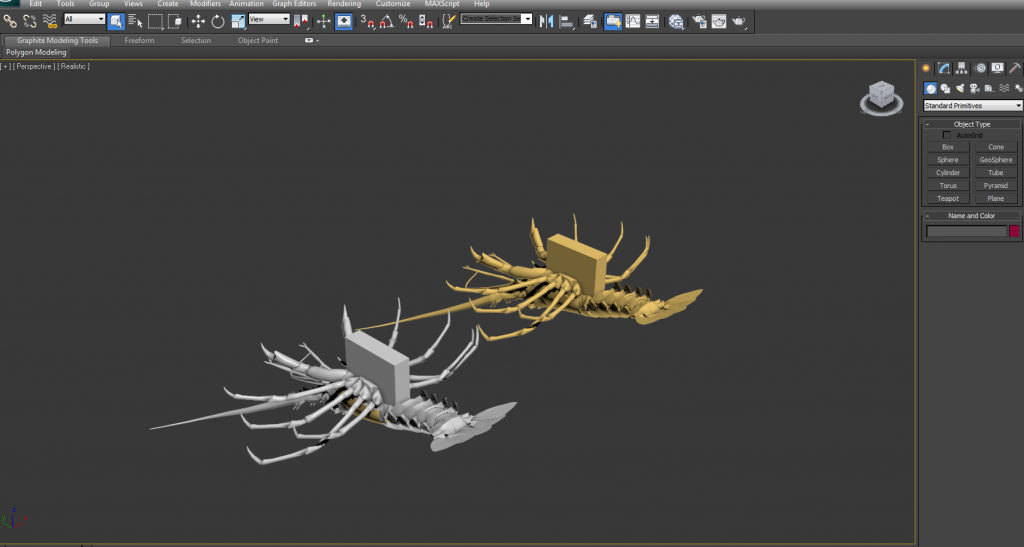
This mysterious theft of a significant neighborhood cultural artifact inspired me to create an augmented reality experience that recreates the lobster handles in their former glory. I modified a model of a lobster in 3ds Max and combined the ofx3DModelLoader and ofxArToolkitPlus addons to overlay the 3D lobster handle over a marker. My plan is to tape this marker to the doors of the now abandoned restaurant. People running the program can see what was once there and gain some appreciation for the little things that make neighborhoods like Squirrel Hill unique.

Lobster Handles from Sam Lavery on Vimeo.

I used this project as an opportunity to familiarize myself with openFramworks. Getting the two addons to compile together was difficult for me as I am not familiar with C++ and have only some experience using an IDE (I used Xcode). I have also never worked with marker-based augmented reality before so just getting everything set up took a lot of time. If I had more time/skill I would like to make a mobile application of this so that other people in the neighborhood could experience the project. Maybe if it raised awareness of the lobster handles, someone might solve the mystery.

Duncan Boehle – Interaction Project

by duncan @ 9:42 am 27 March 2012

Inspiration


I often uncontrollably air-drum while listening to good music, and Kinect seemed like the perfect platform to realize my playing into sound. When I look around the internet, however, I mostly found projects that don’t encourage any kind of composition or rhythm, like simple triggers or theremin-like devices.

This is one of the examples of a laggy drum kit that I wanted to improve on:

[youtube=https://www.youtube.com/watch?v=47QUUqu4-0I&w=550]

Some other projects I found were really only for synthesizing noise, rather than making music:

[youtube=https://www.youtube.com/watch?v=RHFJJRbBoLw&w=550]

One game for Xbox360, in the Kinect Fun Labs, does encourage a bit more musicality by having the player drum along to existing music.

[youtube=https://www.youtube.com/watch?v=6hl90pwk_EE&w=550]

I decided to make my project unique by encouraging creative instrumentation and rhythm loops, to help people compose melodies or beat tracks, so they wouldn’t be limited to just playing around a little for fun.


Process


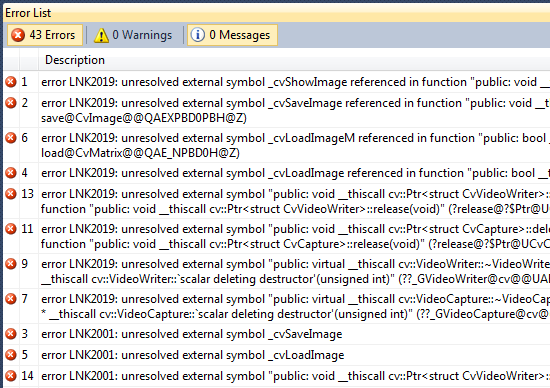
Because I wanted to control the drum sounds using my hands, I wanted to take advantage of OpenNI’s skeletal tracking, rather than writing custom blob detection using libfreenect or other libraries. Unfortunately, trying to use OpenNI directly with openFrameworks caused quite a few nightmares.

Linker Fail


So instead of fighting against the compiler when I could be doing art instead, I decided to just use OSCeleton instead in order get the skeleton data from OpenNI over to openFrameworks. This solution worked pretty well, since even if openFrameworks didn’t work out, I would only ever have to worry about using an OSC library.

Unfortunately this added a bit of delay, since even with UDP, using inter-process communication was a lot more indirect than just getting the hand joint data from the OpenNI library itself.

The first step was to figure out how I would be able to detect hitting the instruments. The data was initially very noisy, so I had to average the positions, velocities, and accelerations over time in order to get something close to smooth. I graphed the velocity and acceleration over time, to help make sure I could distinguish my hits from random noise, and I also enabled the skeleton tracking for multiple players.

For the first version of the beat kit, I tried using a threshold on acceleration in order to trigger sounds. Even though this seemed more natural based on my own air drumming habits, the combined latency of Kinect processing, OSC, and the smoothed acceleration derivation all made this feel very unresponsive. For the time being, I decided to revert to the common strategy, which would just be spatial collision triggers.

Here’s the video of the first version, with all of the debug data visible in the background.

[vimeo 39395149 w=550&h=412]

Looking Forward


I was very frustrated by the linker errors that forced me to use OSC for getting the Kinect data, so immediately after the presentation I found Synapse, which is an open-source openFrameworks version of OSCeleton using OpenNI for tracking. Using that codebase as a starting point, I’d be able to have just one process using the Kinect data, and I might reduce some of the latency preventing me from using acceleration or velocity thresholds effectively. I could also greatly improve the UI/instrument layout, and add more controls for changing instruments and modifying the looping tracks.

Nir Rachmel | Project 4 + Interactive

by nir @ 7:20 am

For this project, I decided to focus on a technology and ideate interesting and creative ideas which I can implement using this piece of technology. I chose the ARTypeKit, as I was curious to do something with augmented reality. These days, the boundaries between the physical world where we live, and the online world is ever more complicated and more difficult to understand.

I swear, I tried using openfx, and here’s what I got:

All I wanted was to go back good old processing. And I so I have.

My project utilizes the AR patterns to create an engaging game of bubbles. Once a pattern is identified, it ‘grows’ a bubble. Just like a fruit, the bubble grows to a specific threshold and then flies up! In addition, to make it more fun, I dedicated three patterns to be used as controls that alternate the gameplay: 1) Changes the colors of all the bubbles, 2) Chances the course of directions to all of the bubbles and last, 3) Inflate the balloons until they pop.

Video goes here:

Here’s a cool talk from SXSW about misuse of QR codes: http://schedule.sxsw.com/2012/events/event_IAP11256


Blase- Project 4- They Might Be Giants

by blase @ 7:08 am

KelseyLee-project4-starMagic

by kelsey @ 6:12 am

Inspiration

[youtube=https://www.youtube.com/watch?v=XChxLGnIwCU]
reference: 3:48
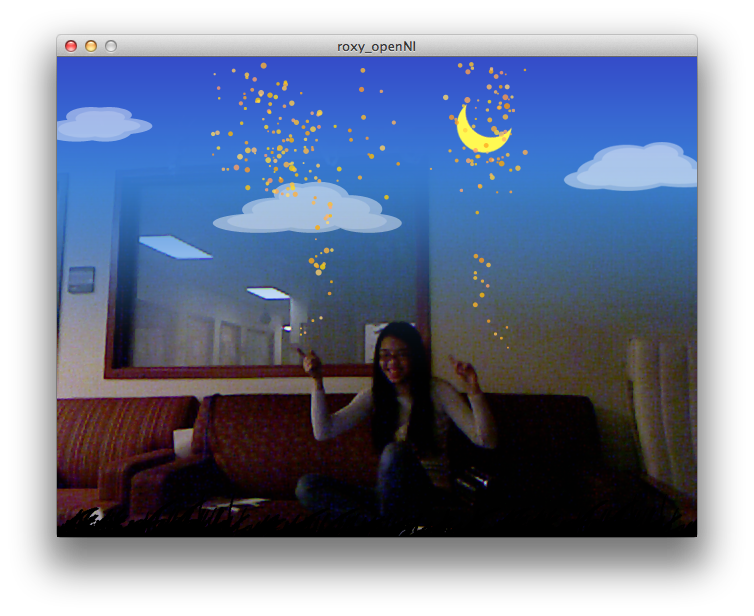
I was inspired by the scene in Fantasi where Mickey Mouse is controlling everything with just a flick of his hand. I thought about controlling a stream of stars and wanted to do so as if I was conducting them into the sky.

Iteration 1 – using NyArToolkit, Processing

[youtube=https://www.youtube.com/watch?v=dQ3wiq5sfq8&feature=youtu.be]
I started with NYArToolkit because originally I wanted to use Augmented Reality (via the iPhone). I used a marker to trigger the creation of a “star” and it would slowly float to the top of the screen after being generated. This was a big laggy though because the marker couldn’t be moved around very fast. Also, poor lighting conditions meant that this did not always work.

Iteration 2 – Kinect, OpenNI, Processing

I shifted over to the Kinect and started using OpenNI. Since I only wanted to detect hand positions this would be a fairly simple task. To create a star the behavior was a flicking motion, with the hand needing to be a certain distance from the shoulder, and having moved past another threshold from the previous to the current frame. The floating behavior of the stars is the same, but with this more robust generation, I made it so more stars would be created. Each star also has a life span so that eventually they fade into the sky and can be replaced by new stars.

[youtube=https://www.youtube.com/watch?v=UF45e88PQ4w&context=C4c36d84ADvjVQa1PpcFM1HfZ6AxrMHcwChmgbdl1T1QqLTmhl84Q=]
(And thank you to Kaushal Agrawal)

Billy Keyes – Project 4 – Video Looper

by Billy @ 5:31 am

Inspiration

I first thought of this idea a year and a half ago, when I saw the following video created by Tell No One (Luke White and Remi Weekes). I believe they achieved this effect with careful compositing and I wanted to replicate it interactively and automatically. So at the risk of further highlighting the flaws in my implementation, I think sharing this best explains what I set out to accomplish.

[vimeo 12825278 w=625&h=352]

(I recommend you check out their other videos as well)

In particular, I really like the abstract forms that are generated by freezing motion and I designed my system with the goal of generating form rather than scenes.

The plot thickens…

I thought this would be an ideal project for figuring out how to use the Kinect with openFrameworks, two things I was familiar with but had never seriously explored. But when I showed Duncan and some other friends the video above, they were immediately reminded of a game made by Double Fine called Happy Action Theater. As a part of this game, there’s a mini-game called Clone-O-Matic, which is exactly what I was planning to do but on a timer and with still images instead of video. I decided to go ahead with my project anyway.

VideoLooper

[vimeo 39259832 w=625&h=352]

The video shows the process of recording loops (accelerated) and then the final products. Before you start recording, there’s a setup screen where you can adjust the thresholds and the angle of the Kinect. Having good threshold settings is important if you want the object to appear to float instead of appearing attached to a limb or other prop.

Technically, the software is pretty simple. The depth image from the Kinect is filtered with a median filter to reduce the noise on the edges of objects and then thresholded. The thresholded image is blurred and then used as the alpha channel for the color frame. Initially, this step was severely broken because the depth and color images were not aligned. Thankfully, the development version of ofxKinect includes built-in calibration functionality. Once I discovered this, my alignment problem disappeared. Loops are stored in memory as a sequence of frames, so the software will quickly slow down with long loops or high-resolution input.

Improvements

The biggest current problem is usability. Starting and stopping recording is awkward because you have to use the mouse or keyboard; automatic triggering or a footswitch would be better. Second, you have to look at the computer to see your position in the frame (and the video is mirrored) — a projector would help. Finally, the layers are stacked with the oldest layer on top. I suspect this is counter-intuitive and some other z-ordering scheme should be used.

The next thing to improve is the video quality. It would be great to have a higher resolution camera, but more importantly, the segmentation and looping can be improved. Like most Kinect projects, I had trouble getting clean depth data, but if this were cleaner, segmentation would be better. I’d also like to explore automatically finding loop points that minimize the visible skip when the video layer loops.

And of course, the output is only as good as the input, so I’d like to see other people give it a try.

Interaction Project by Zack J-W

by zack @ 1:13 am


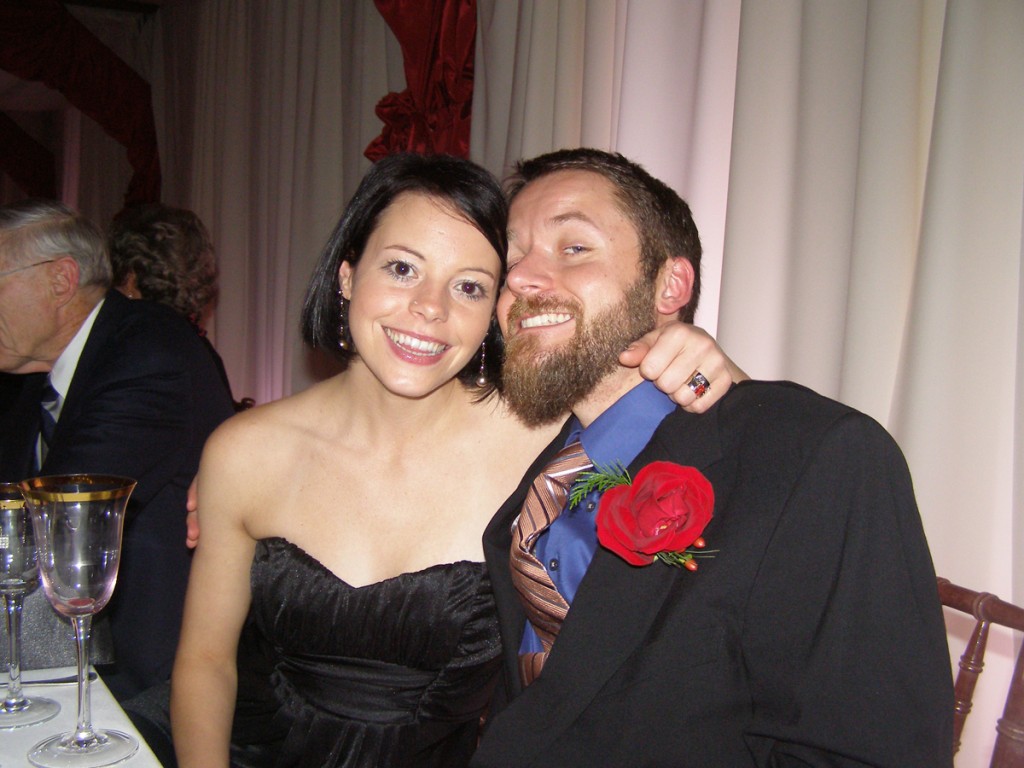
Either my wife or myself have been in grad school the entire time we’ve been married.  One of her instructors told her out right, kiss your sex life goodbye.  Without getting into too much detail, let’s just say we wish we had the time and energy to spend a little more happy-time together.

Me and Juls

She does, after all, have needs…

Wow!

In exploring interaction projects I came upon various devices for tele-presence and I was inspired by Kyle Machulis’ tele-dildonics projects, featured here last Oct at Art&&Code.  So I uh…dove right in.

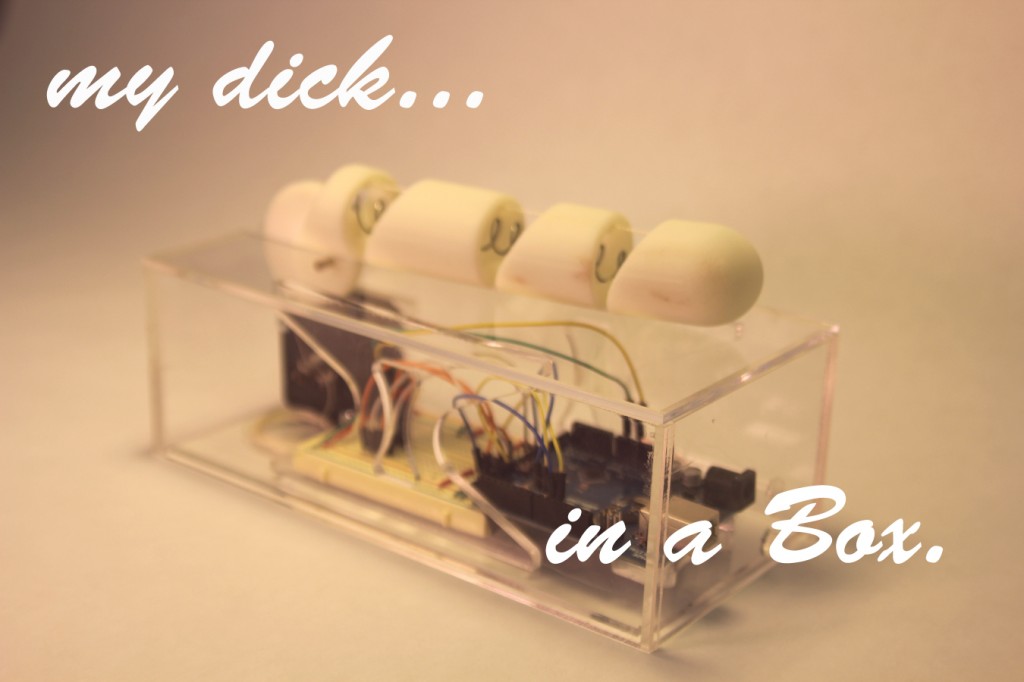
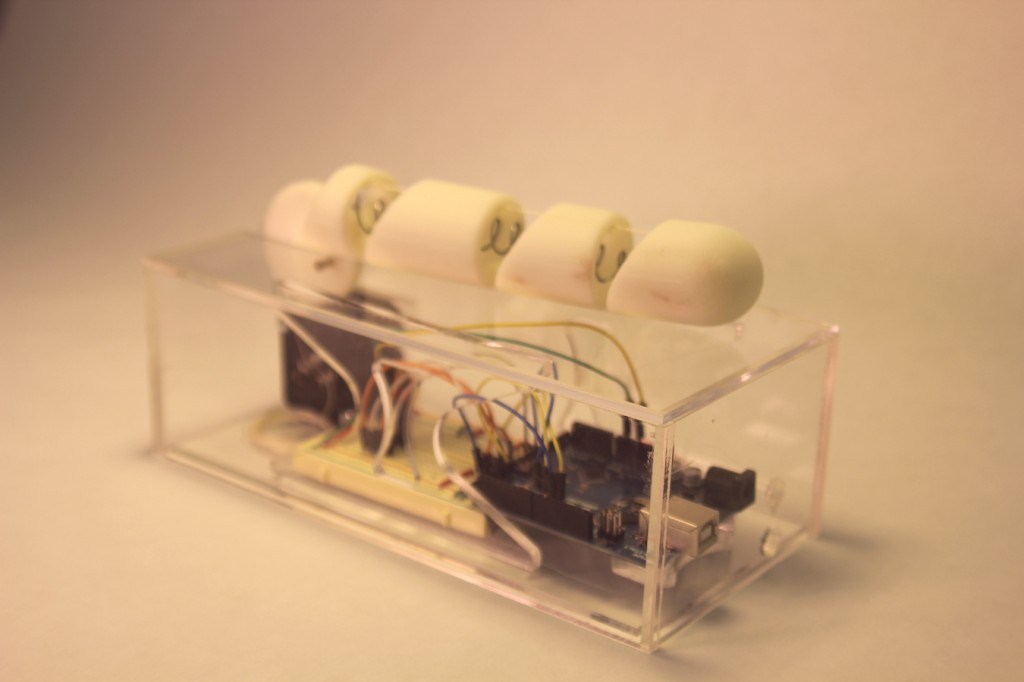
What I came up with was a robo-dildo that only becomes errect while I’m working at my computer, which I almost always am.  It uses a stepper motor to operate the mechanism as my keyPress count increases.  Conversely, if I don’t type, it slowly becomes flaccid again.  While it is tethered right now, it will soon run on WiFi so it works at home while I’m at school.

[youtube https://www.youtube.com/watch?v=QJqyrl9L35w]

———————————————-

PROCESS

———————————————-

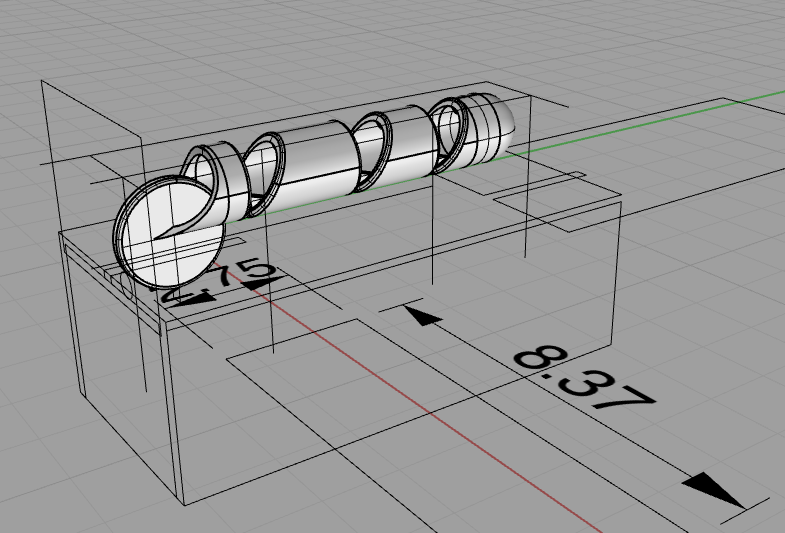
I took the opp to cash in on some established skills and think about how to put them to work for my better half.  Rhino horn is believed to increase male potency.

CAD in Rhino

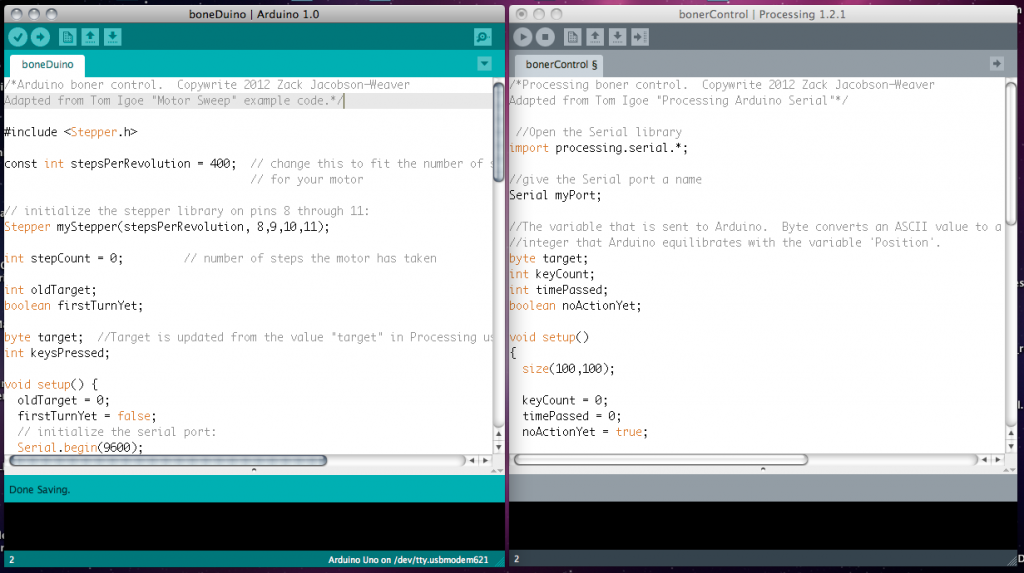
I’ve had experience with a Processing / Arduino conjugal visits before and pulled that out just in time.

Processing / Arduino Serial

I had to throw in some laser cut acrylic to hold everything in place.  If you can think of some innuendo for that one let me know.

Laser Cut Acrylic Case

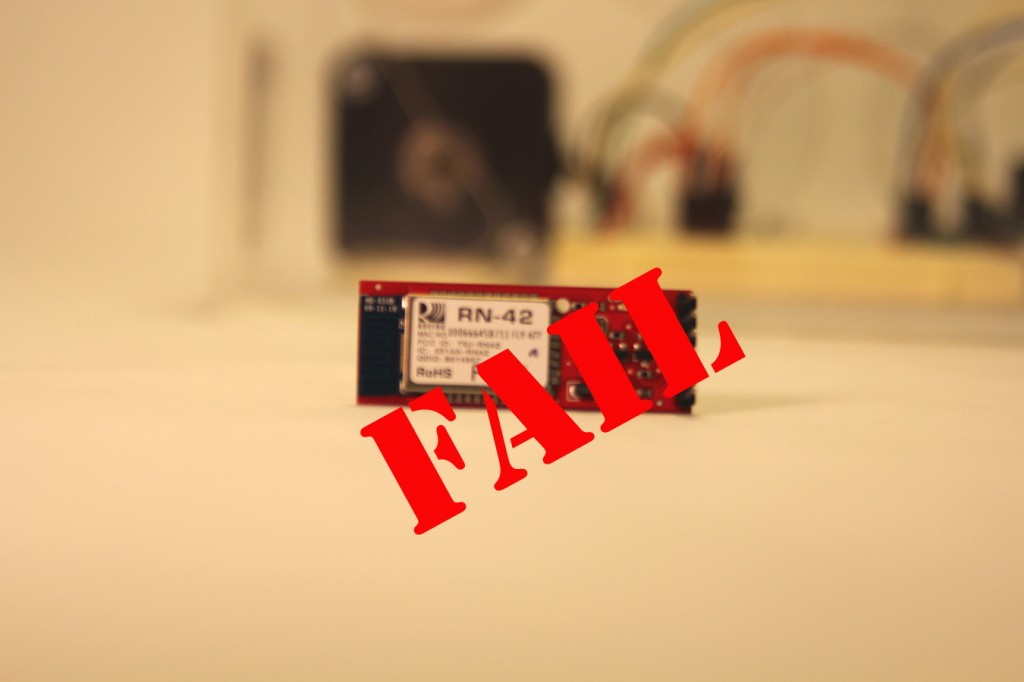
What went terribly wrong was the need for this device to be untethered.  I dumb assedly ordered a blue tooth modem instead of an ethernet shield for Arduino, and continued to suck with it, anyway.  Can’t recommend this product, at least for a Mac.

Sparkfun Blue Tooth Mate

———————————————-

GOALS:

———————————————-

  • Explore the emotional/psychological space of tele”presence” and it’s inherent lack of presence
  • Lose the wires!
  • Refine the form
  • Throw in some more bells and buzzers, maybe a camera in the box.
  • Look at interchangeable covers for the ding dong
  • Make the box out of warmer materials

———————————————-

 CODE:

———————————————-

 ARDUINO:


/*Arduino boner control.  Copywrite 2012 Zack Jacobson-Weaver
Adapted from Tom Igoe "Motor Sweep" example code.*/
 
#include 
 
const int stepsPerRevolution = 400;  // change this to fit the number of steps per revolution
                                     // for your motor
 
// initialize the stepper library on pins 8 through 11:
Stepper myStepper(stepsPerRevolution, 8,9,10,11);            
 
int stepCount = 0;         // number of steps the motor has taken
 
int oldTarget;
boolean firstTurnYet;
 
byte target;  //Target is updated from the value "target" in Processing using Serial.read / Serial.write.
int keysPressed;
 
void setup() {
  oldTarget = 0;
  firstTurnYet = false;
  // initialize the serial port:
  Serial.begin(9600);
}
 
void loop() {
 
  //Serial.println(target);
     if (Serial.available())     //If there is a number waiting to come in from Processing,
  {
   target = Serial.read();     // take that number and make it equal to target.
 
  }
  keysPressed = map(target, 0, 255, 0,1000);
 
  if (keysPressed = 100 && firstTurnYet == true){
    myStepper.step(0);
    oldTarget = oldTarget + 100;
    stepCount = 0;
  }
  else if(keysPressed > oldTarget +100){
  myStepper.step(1);
  //Serial.print("steps:" );
  //Serial.println(stepCount);
  stepCount++;
  firstTurnYet = true;
  delay(25);
  }
 
    if(stepCount >= 100 && firstTurnYet == false){
    myStepper.step(0);
    oldTarget = oldTarget - 100;
    stepCount = 0;
  }
    else if(keysPressed < oldTarget -10){
  myStepper.step(-1);
  //Serial.print("steps:" );
  //Serial.println(stepCount);
  stepCount++;
  firstTurnYet = false;
  delay(25);
  }
 
  //Serial.println(target);
 
  }

———————————————-

 PROCESSING:———————————————-

/*Processing boner control.  Copywrite 2012 Zack Jacobson-Weaver
Adapted from Tom Igoe "Processing Arduino Serial"*/
 
 //Open the Serial library
import processing.serial.*;
 
//give the Serial port a name
Serial myPort;
 
//The variable that is sent to Arduino.  Byte converts an ASCII value to a corresponding
//integer that Arduino equilibrates with the variable 'Position'.
byte target;
int keyCount;
int timePassed;
boolean noActionYet;
 
void setup()
{
  size(100,100);
 
  keyCount = 0;
  timePassed = 0;
  noActionYet = true;
 
////Begin adapted example by Tom Igoe from Processing API reference of write()
// List all the available serial ports in the terminal window at startup.
println(Serial.list());
//The following is used to select the proper Serial port from the list generated above
myPort = new Serial(this, Serial.list()[0], 9600);  //Array index [0] corresponds with the Serial port I need to use.
myPort.bufferUntil('\n');
////End adapted example by Tom Igoe from Processing API reference of write()
}
 
void draw()
{
  activity();
}
 
void activity()
{
  timePassed ++;
  target = byte(keyCount);
  if (keyPressed){
    noActionYet = false;
    keyCount = keyCount +1;
    timePassed = 0;
  }
  if(timePassed > 300 && noActionYet == false){
    keyCount = keyCount -10;
    timePassed = 0;
  }
 
    myPort.write(keyCount);
    //println(target);
}
« Previous PageNext Page »
This work is licensed under a Creative Commons Attribution-Noncommercial-Share Alike 3.0 Unported License.
(c) 2023 Interactive Art and Computational Design, Spring 2012 | powered by WordPress with Barecity