Final Project – Puzzling: An AR Puzzle Game

by Joe @ 11:46 am 6 May 2012

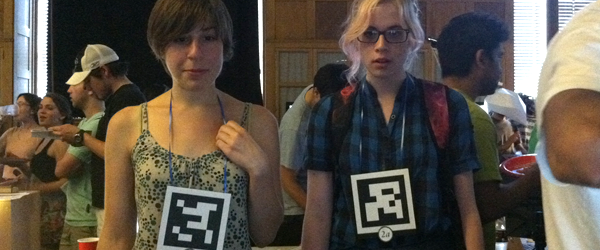
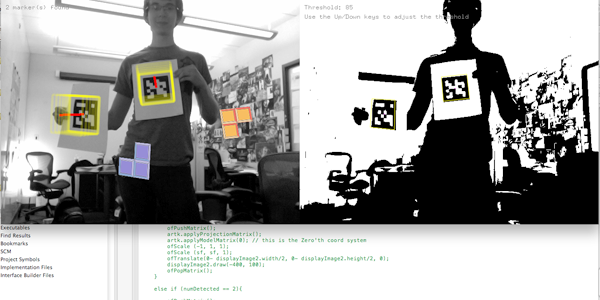
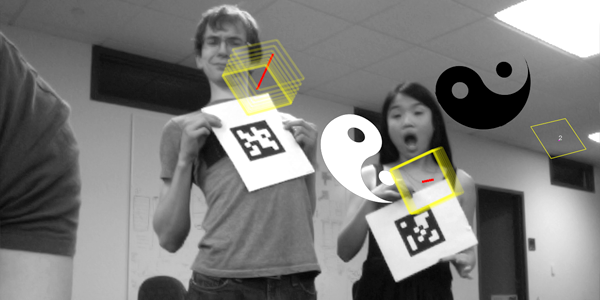
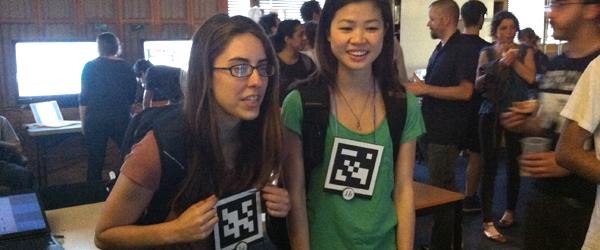
The game, Puzzling, uses fiduciary markers attached to the participants to project virtual puzzle pieces at a designated distance. The players must, through any sort of bodily contortions possible, fit the projected images together to form a unified whole. No cheating!

The Gist of It
Puzzling is a creation born from a simple idea – Why do most augmented reality projections have to live so close to their associated markers? What happens when you toy with the spatial relationship between the two? How real can these virtual entities feel, and can they bring people closer together, physically or otherwise?


The game uses fiduciary markers attached to the participants to project virtual puzzle pieces at a designated distance. The players must, through any sort of bodily contortions possible, fit the projected images together to form a unified whole. No cheating!


Testing, 1,2,3
There was an unusually grueling process of ideation involved in selecting a concept for this assignment. I knew I wanted to do something with AR and Open Frameworks… but what? After tossing around ideas ranging from digital masks to a sort of lilly pad-based frog game, I settled on the current puzzle design.


Testing proved to be an enjoyable sort of chore, constantly adjusting variables until something resembling an interesting puzzle emerged. Due in part to time restrictions and in part to the maddening experience of learning a new library, programming environment and language all at the same time, a few features didn’t make it into the final version…
• Detection of when the pieces actually align
• Puzzles with more than 1 piece per person
• Puzzles for 3+ players
• Puzzles that encourage specific physical arrangements, like standing on shoulders or side-hugging.
• Mirroring and High-Res support


Opening Night
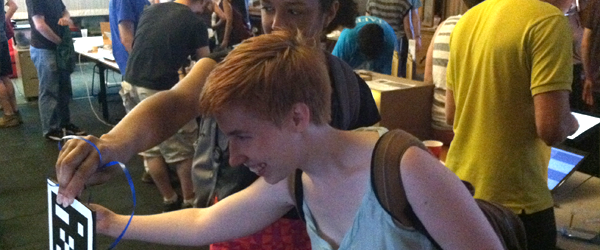
The final version of the game is relatively simple, but thoroughly entertaining. Despite the technically frustrating lighting conditions of the final presentation space, visitors stuck with the game for quite some time, a few even managing to successfully match the pieces!


AFTERIMAGE_Final Project

by deren @ 11:10 am 4 May 2012

By Deren Guler & Luke Loeffler
AFTERIMAGE transforms your iPad into an autosterecopic time-shifting display. The app records 26 frames, which are interlaced and viewed through a lenticular sheet, allowing you to tilt the screen back and forth (or close one eye and then the other) to see a 3D animated image.

We sought to create some sort of tangible interaction with 3D images, and use it as a tool to create some virtual/real effect that altered our perception.  While looking for more techniques Deren came across lenticular imaging and remembered all of the awesome cards and posters from her childhood. A lenticular image is basically a composite of several images splices together with a lenticular sheet placed above them that creates different effects when viewed from different angles.

The images are interleaved in openFrameworks following this basic model (from Paul Bourke):

Deren was thinking about making some sort of realtime projector displaying using a camera and a short-throw projector, and then she talked to Luke and he suggested making an iPad app. His project was to make an interactive iPad app that makes you see the iPad differently, so there was a good overlap and we decided to team up. We started thinking about the advantages of using an iPad, and how the lenticular sheet could be attached to the device.

The first version took 2 views: the current camera feed and the camera feed from 5 seconds ago and showed them as an animated gif video. We wanted to see if seeing the past and present at the same time would create an interesting effect, maybe something to the effect of Camille Utterback’s Shifting Time: http://camilleutterback.com/projects/shifting-time-san-jose/

The result was neat, but didn’t work very well and wasn’t the most engaging app. Here is a video of feedback from the first take: afterimage take1

Then we decided to create a more isolated experience that you can record and developed the idea behind Afterimage. The new version transforms your iPad into an autosterecopic time shifting display. The app uses either the rear or front facing camera on the iPad to record 26 frames at a time. The frames are then interlaced and viewed through the lenticular sheet that has a pitch of 10 lines per inch. A touch interface allows you to simply slide along the bottom of the screen to record video. You can rerecord each segment by placing your finger on that frame and capturing a new image. When you are satisfied with your image series you can tilt the screen back and forth (or close one eye and then the other) to see a 3D animated gif.

Afterimage takes the iPad, a new and exciting computational tool and combines it with one of the first autosterescopic viewing techniques to create an interactive unencumbered autostereoscopic display.

We experimented with different ways to attach the lenticular sheet to the ipad and decided that it would be best to make something that snaps on magnetically, like the existing screen protectors. Since the iPad would be moving around a lot we didn’t want to add too much bulkiness. We cut an acrylic frame around the screen that and placed the lenticular sheet on this frame. This way the sheet is held in place in a fairly secure way and the user can comfortable grab the edges and swing it around.

Though the result is fun to play with, though we are not sure what the future directions may be in terms of adding this to a pre-existing process or tool for iPad users.

We also added a record feature that allows to swipe across the bottom of the iPad screen to capture different frames and the “play them back” by tilting the screen back and forth. This seemed to work better than the past/realtime movie, especially when the images were fairly similar.

Alex + Mahvish | Thumbnail and Summary

by a.wolfe @ 6:52 am 3 May 2012

For our final project, we completed a series of studies experimenting with soft origami in the context of creating a wearable. We developed several methods of creating tessellations cut normal folding time in half and were simple to create in bulk, including scoring with the laser cutter, creating stencils to use the fabric itself as a flexible hinge, and heat setting synthetics between origami molds. We also examined the folds themselves, writing scripts to generate crease patterns that either focused on kinetic properties or being able to control the curve and shape of the final form.

These studies culminated in a  dress that took advantage of the innate kinetic properties of the waterbomb fold to display global movement over the entire skirt structure with a relatively lightweight mechanical system. The dress moves in tandem with a breath sensor, mimicking the expanding/contracting movements of the wearer.

SeaLegs: A Squid-Based Modeler for Digital Fabrication – Madeline Gannon

by madeline @ 2:36 pm 1 May 2012

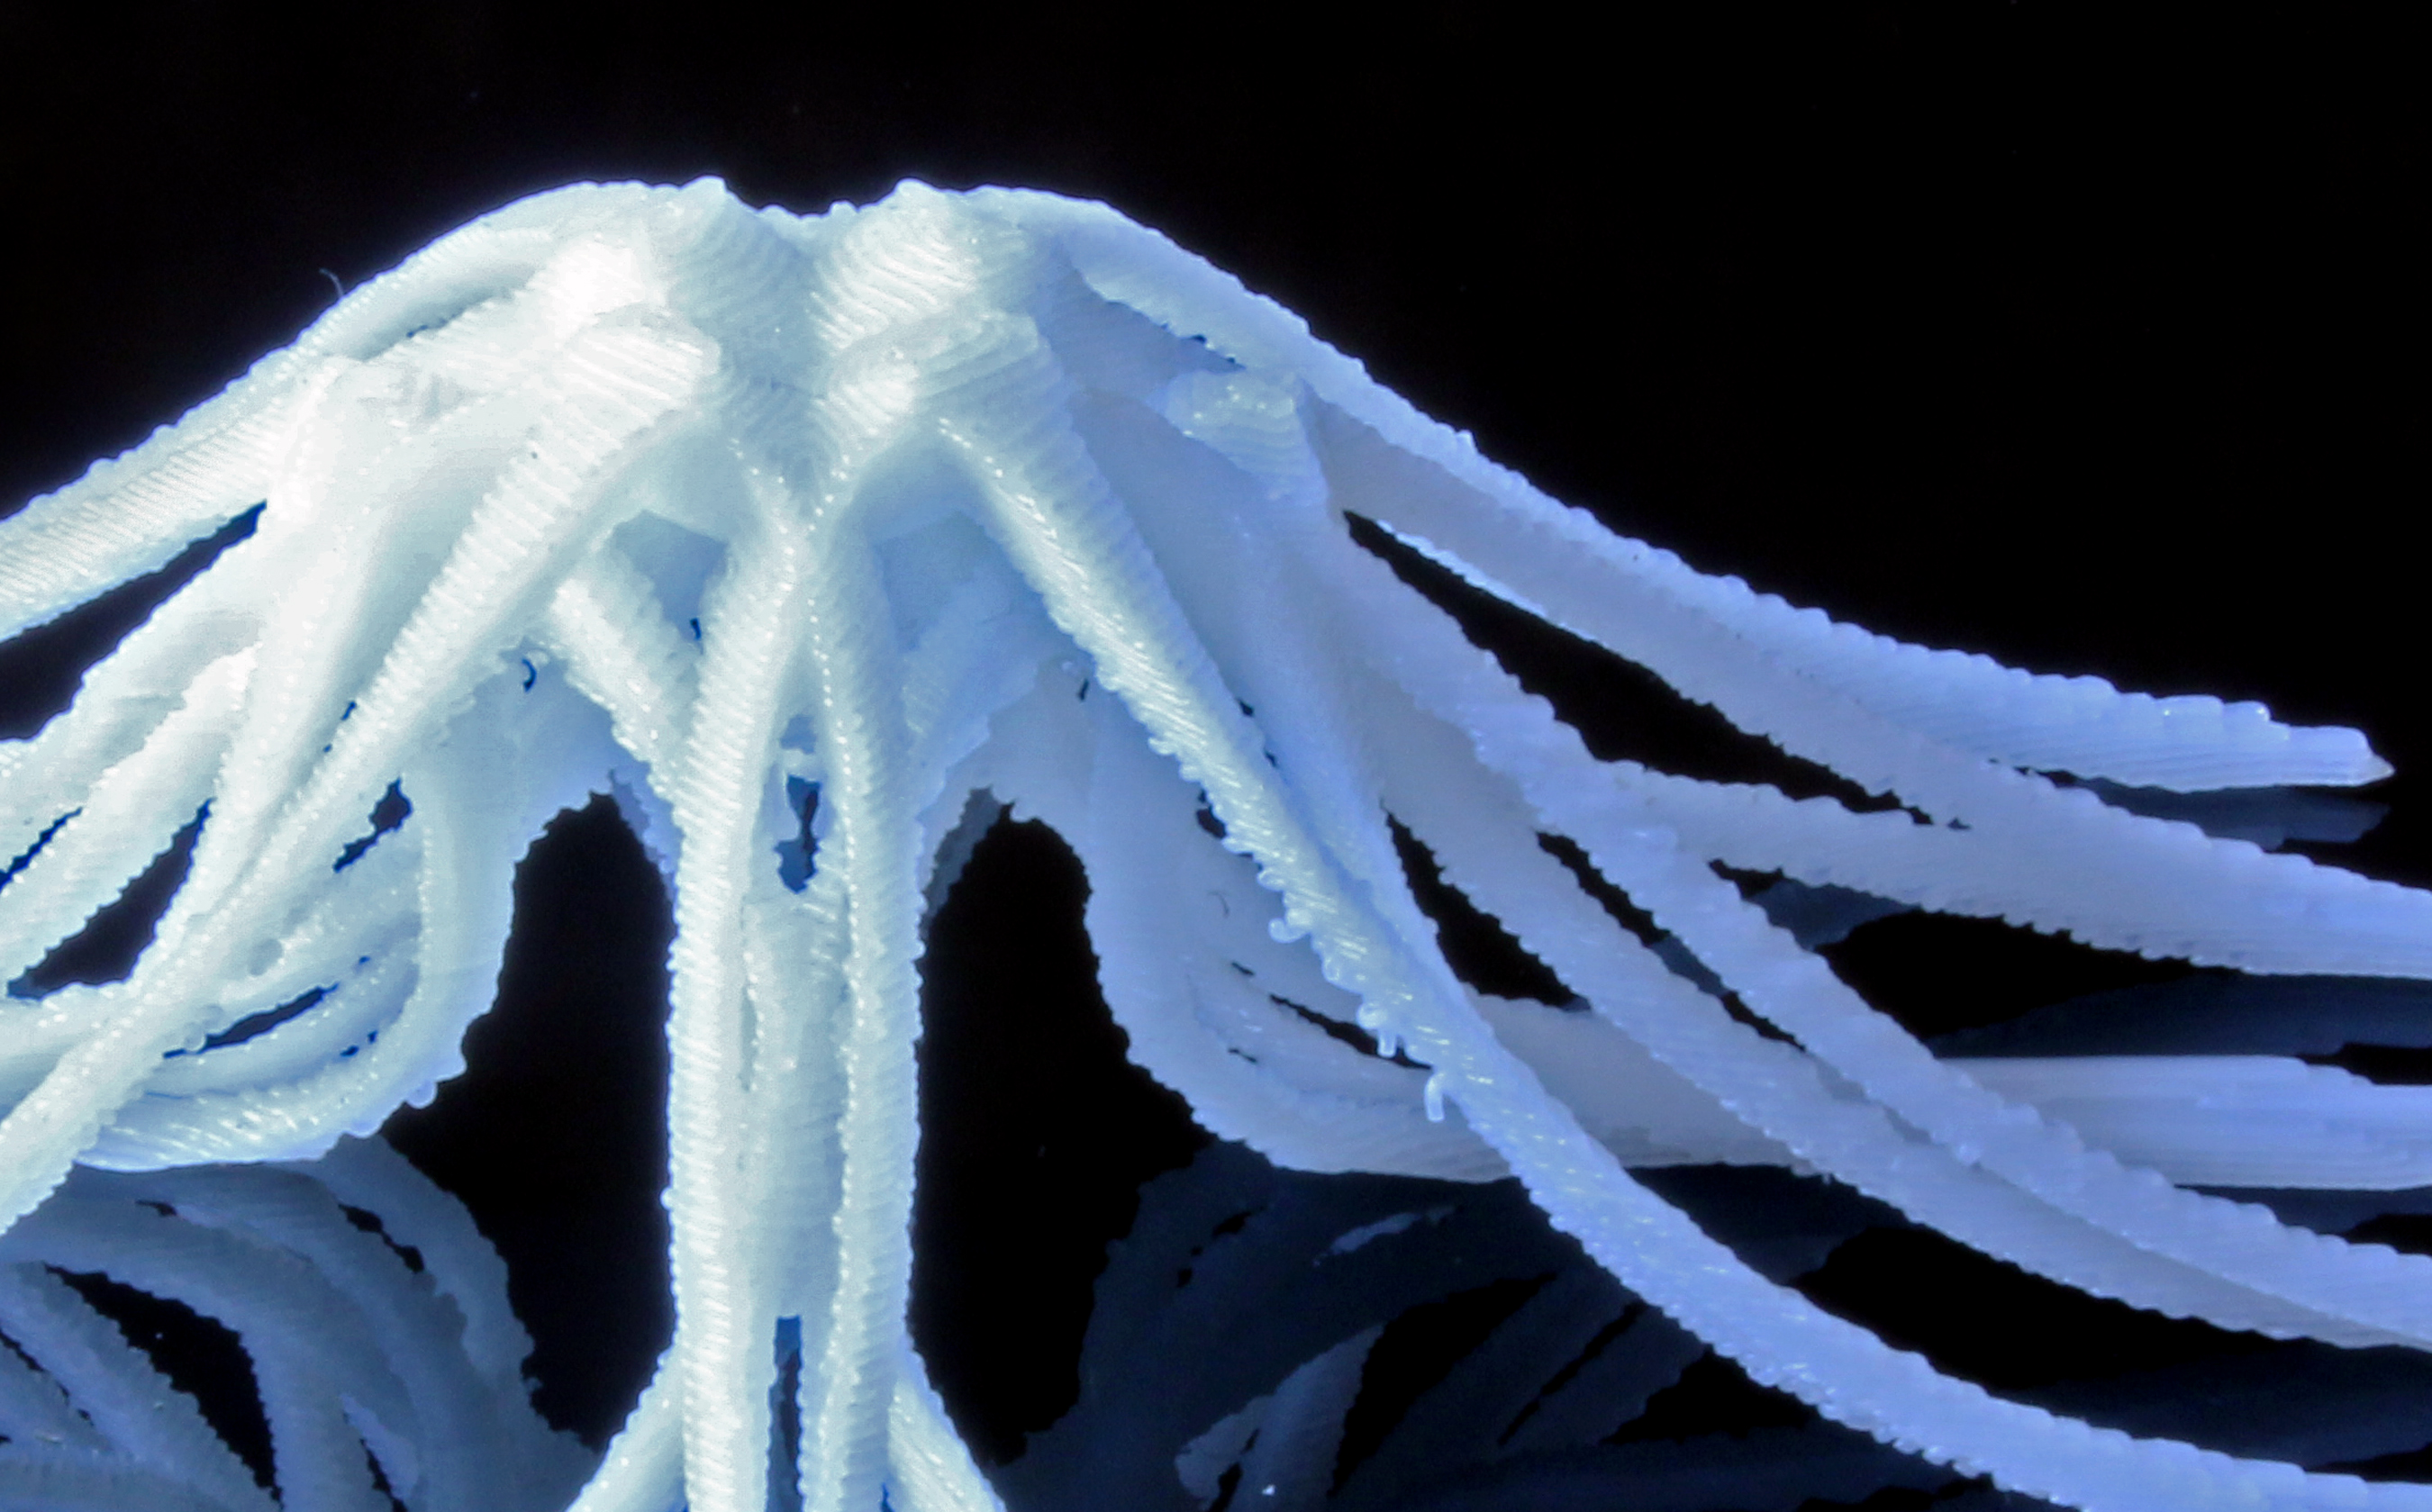
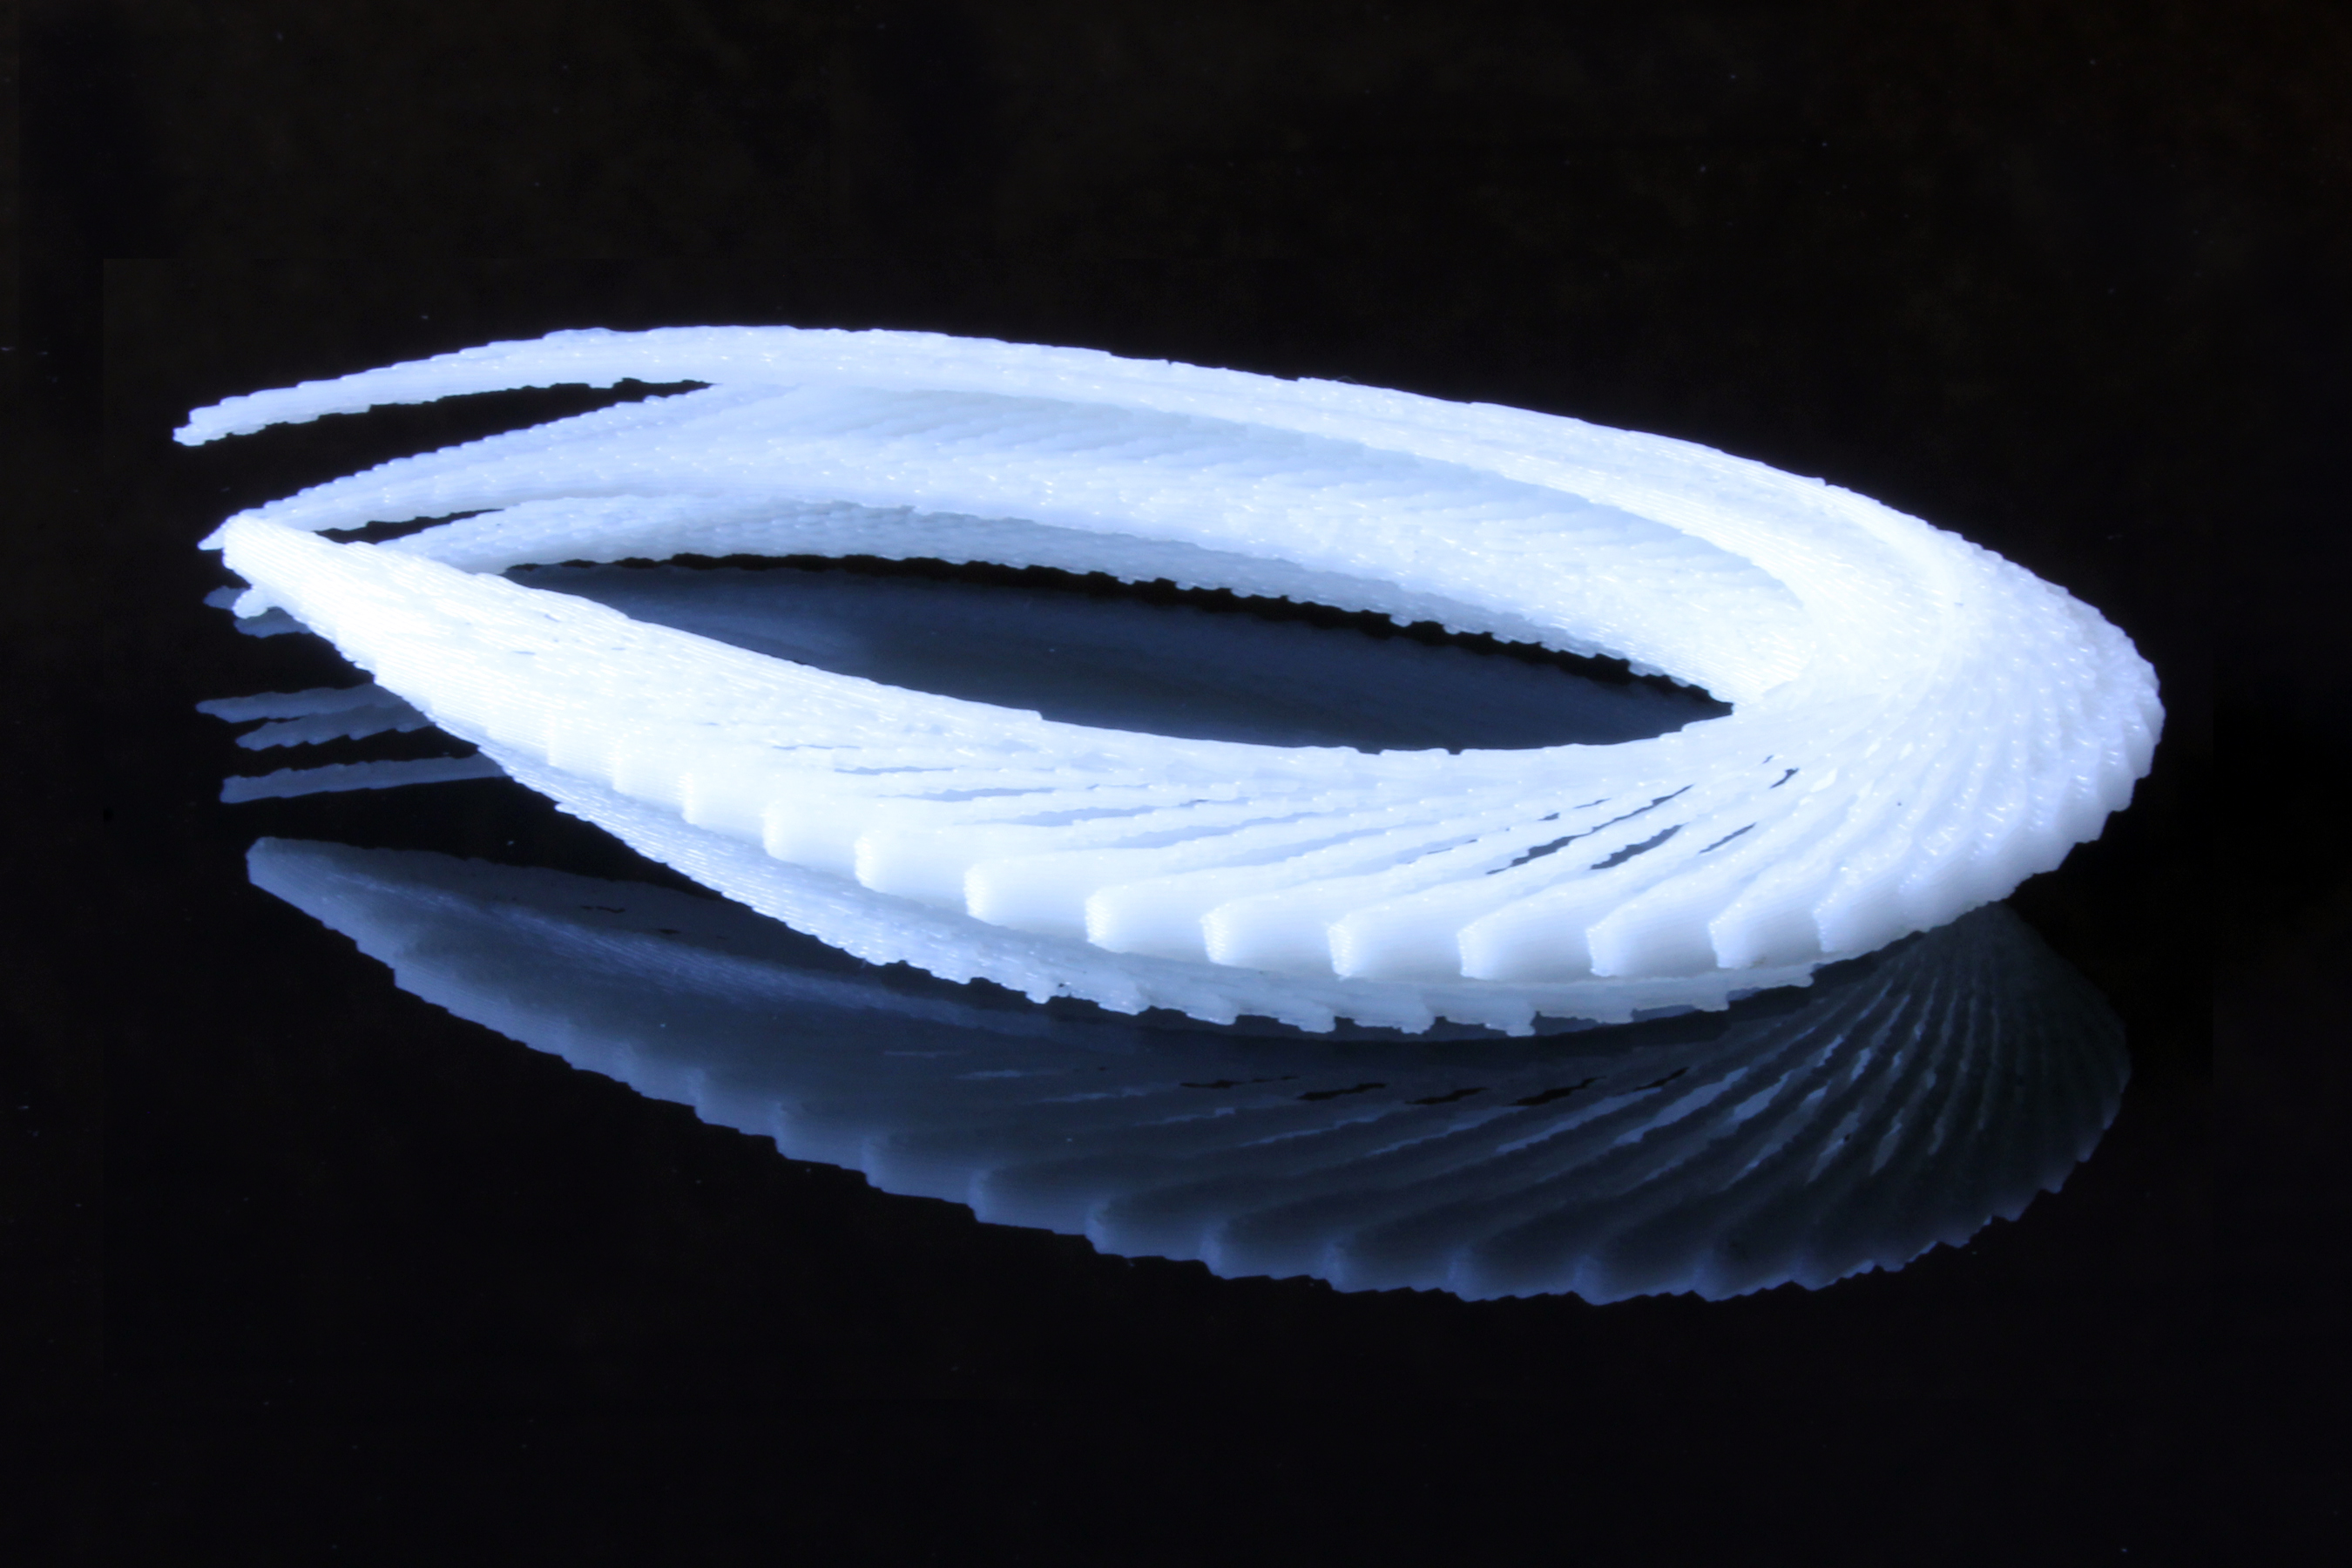
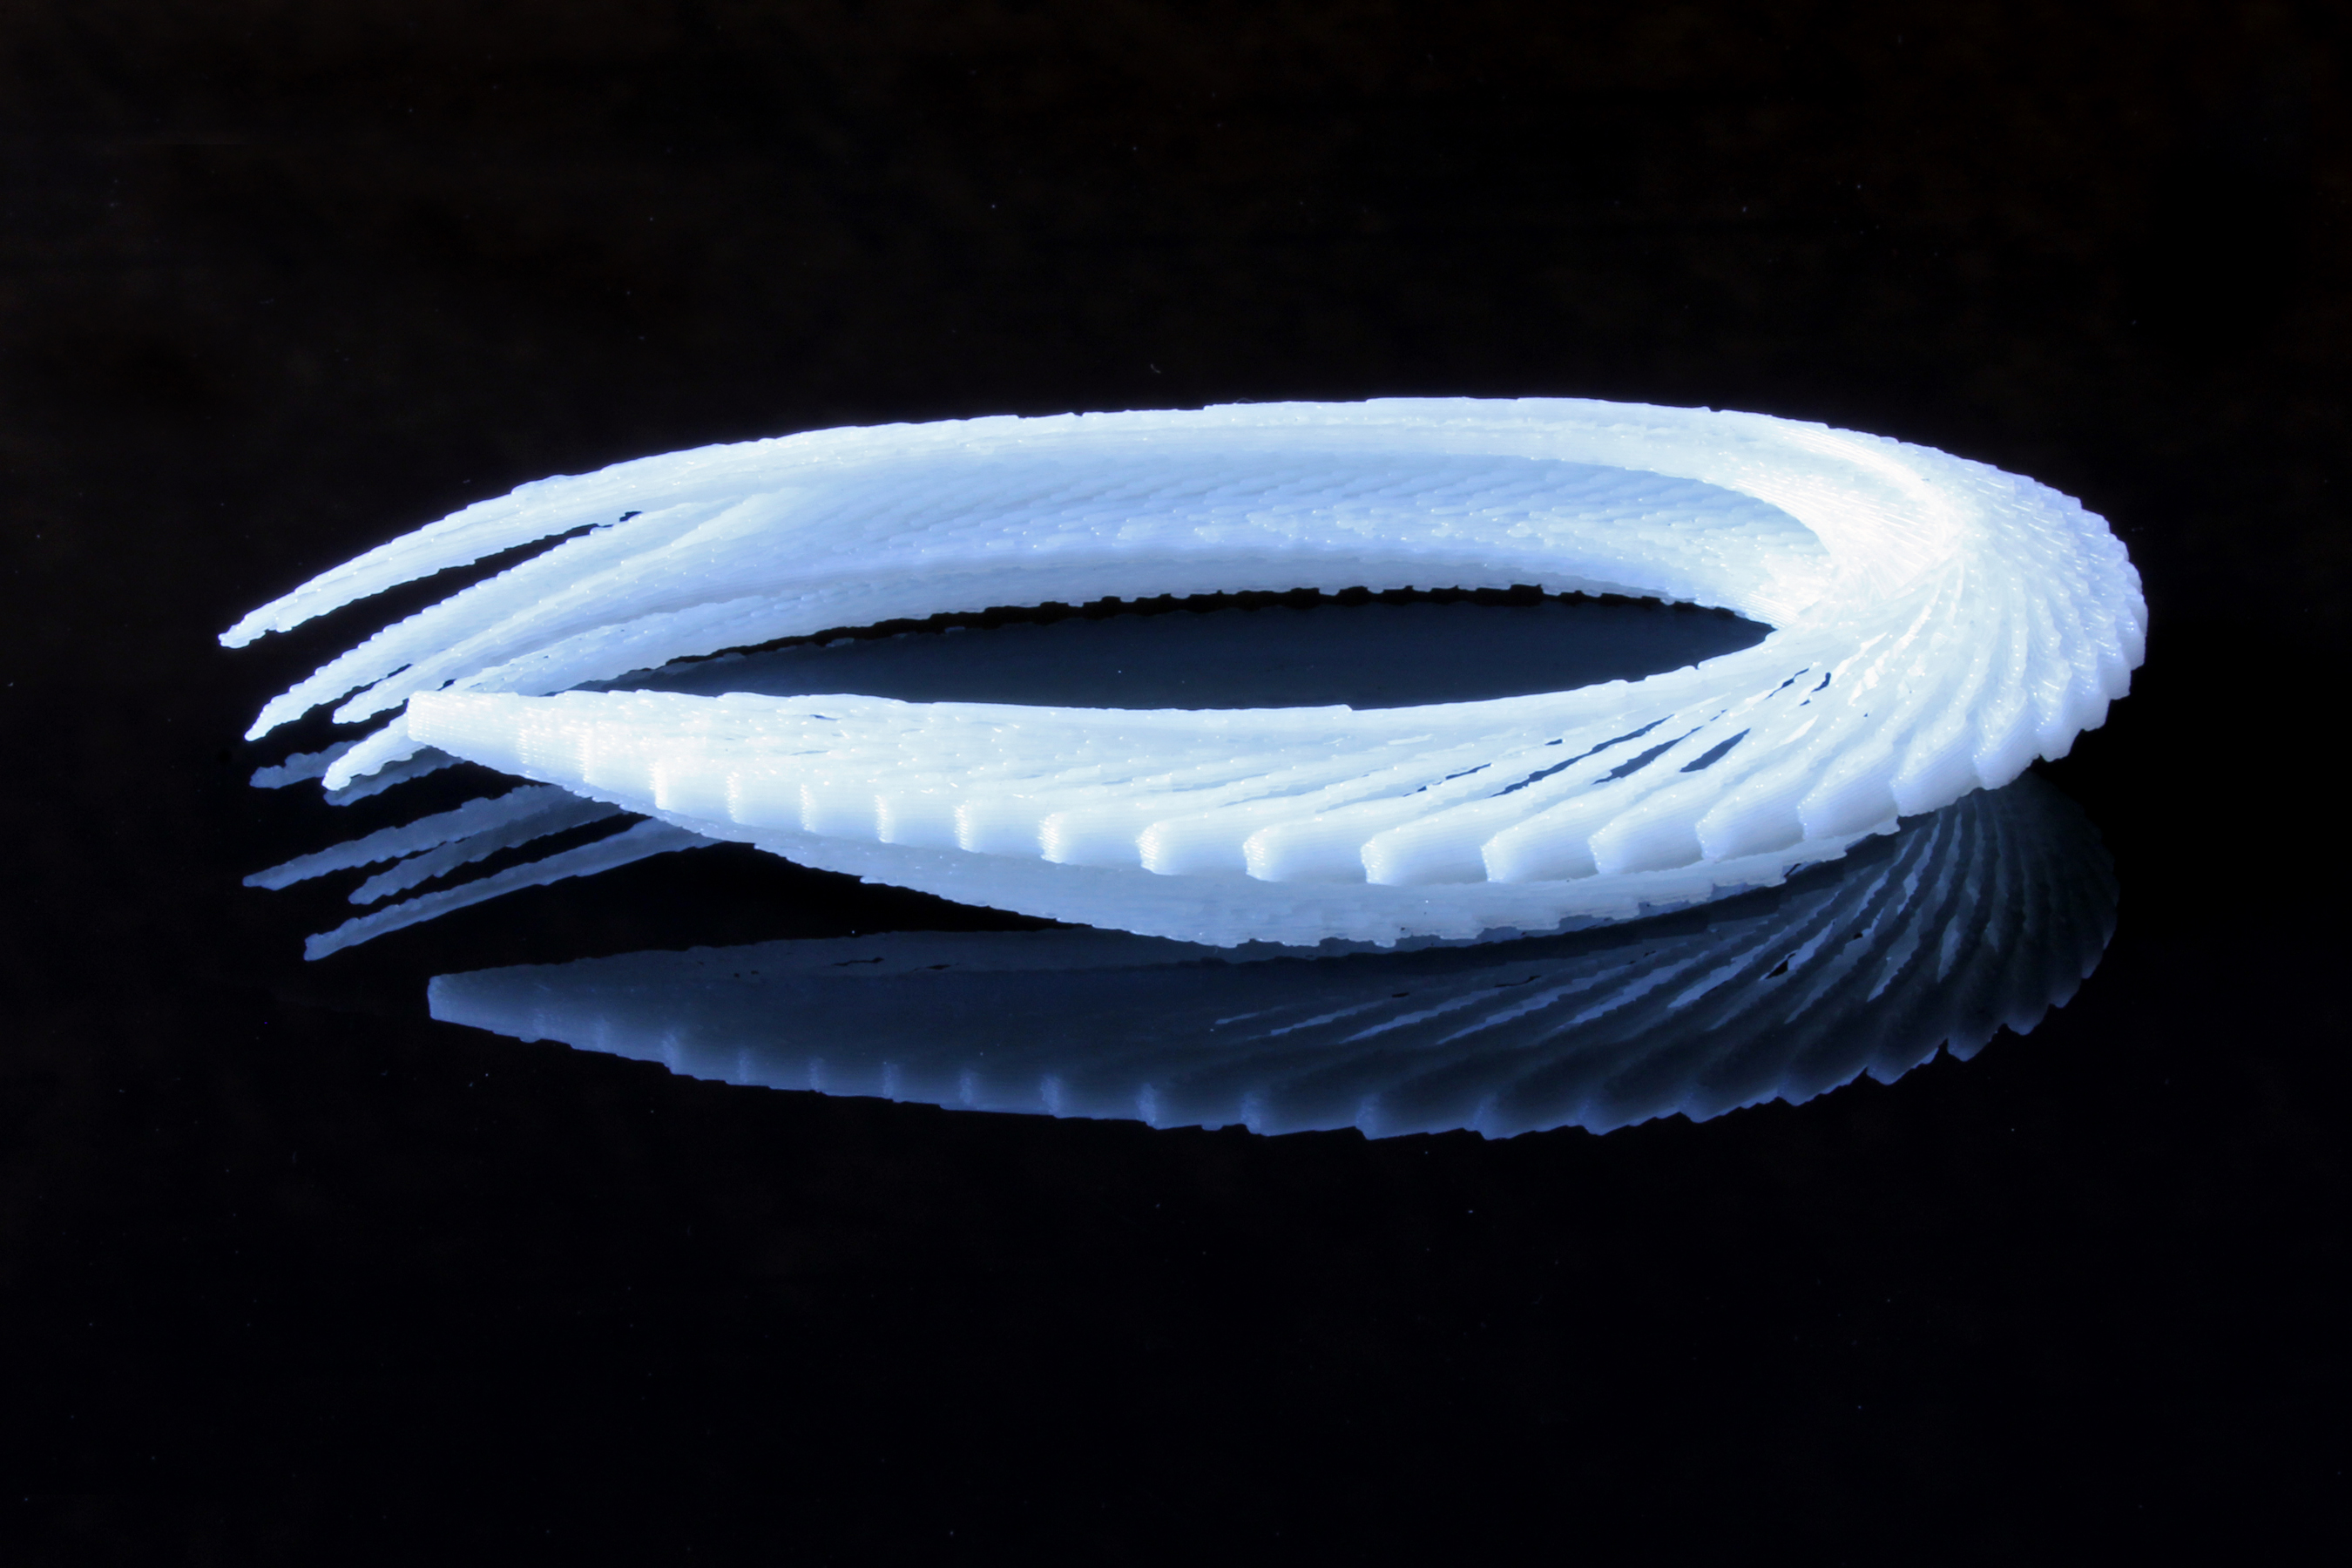
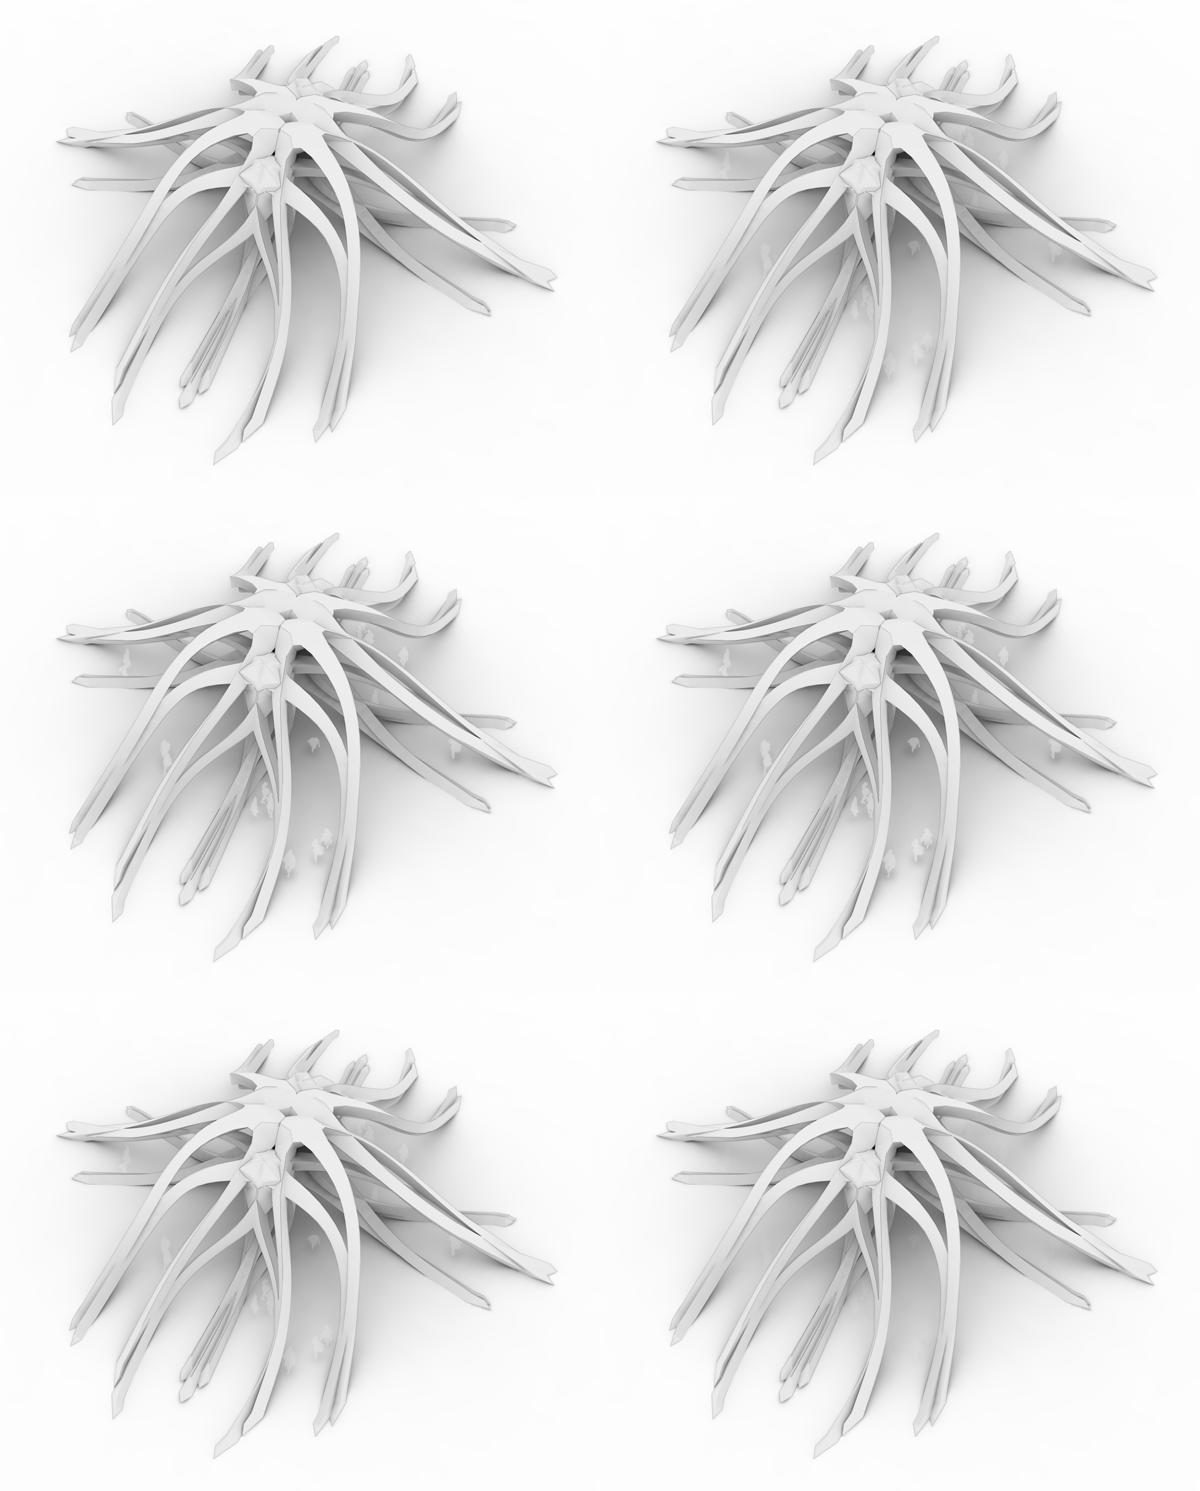
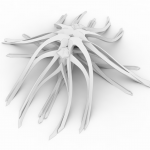
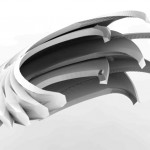
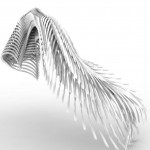
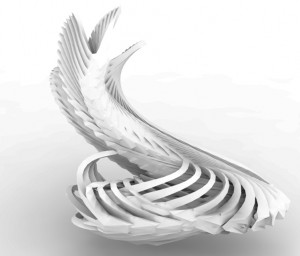
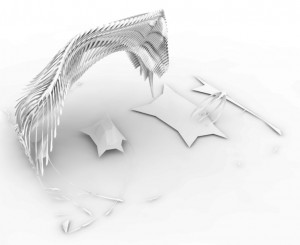
SeaLegs, a responsive environment for “Mollusk-Aided Design”, harnesses the power of simulated virtual squids to generate baroque and expressive spatial forms. Specifically, the project uses “chronomorphology” — a 3D analog to chronophotography — to develop complex composite forms from the movements of synthetic creatures.

[vimeo 42085064 width=”620″ height=”350″]

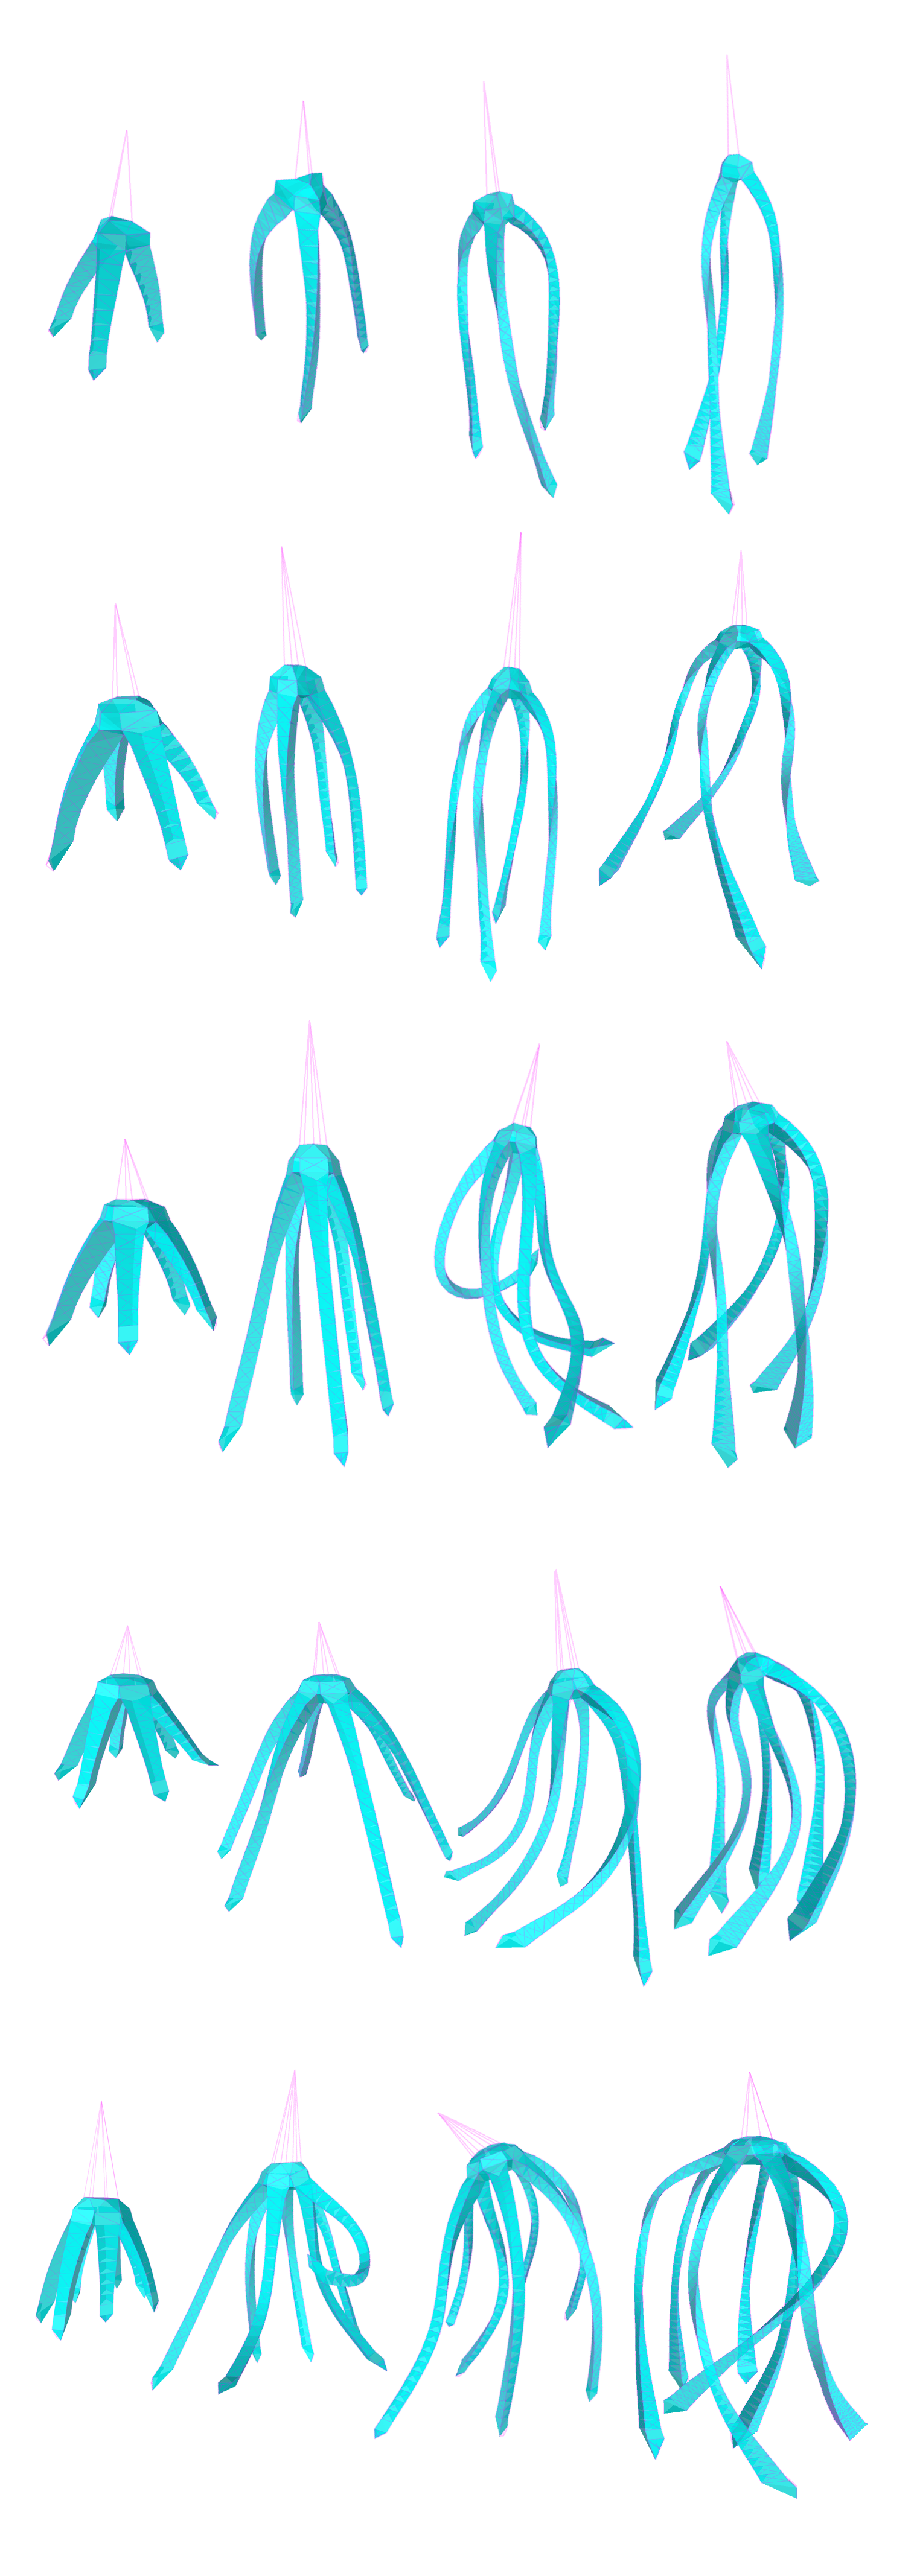
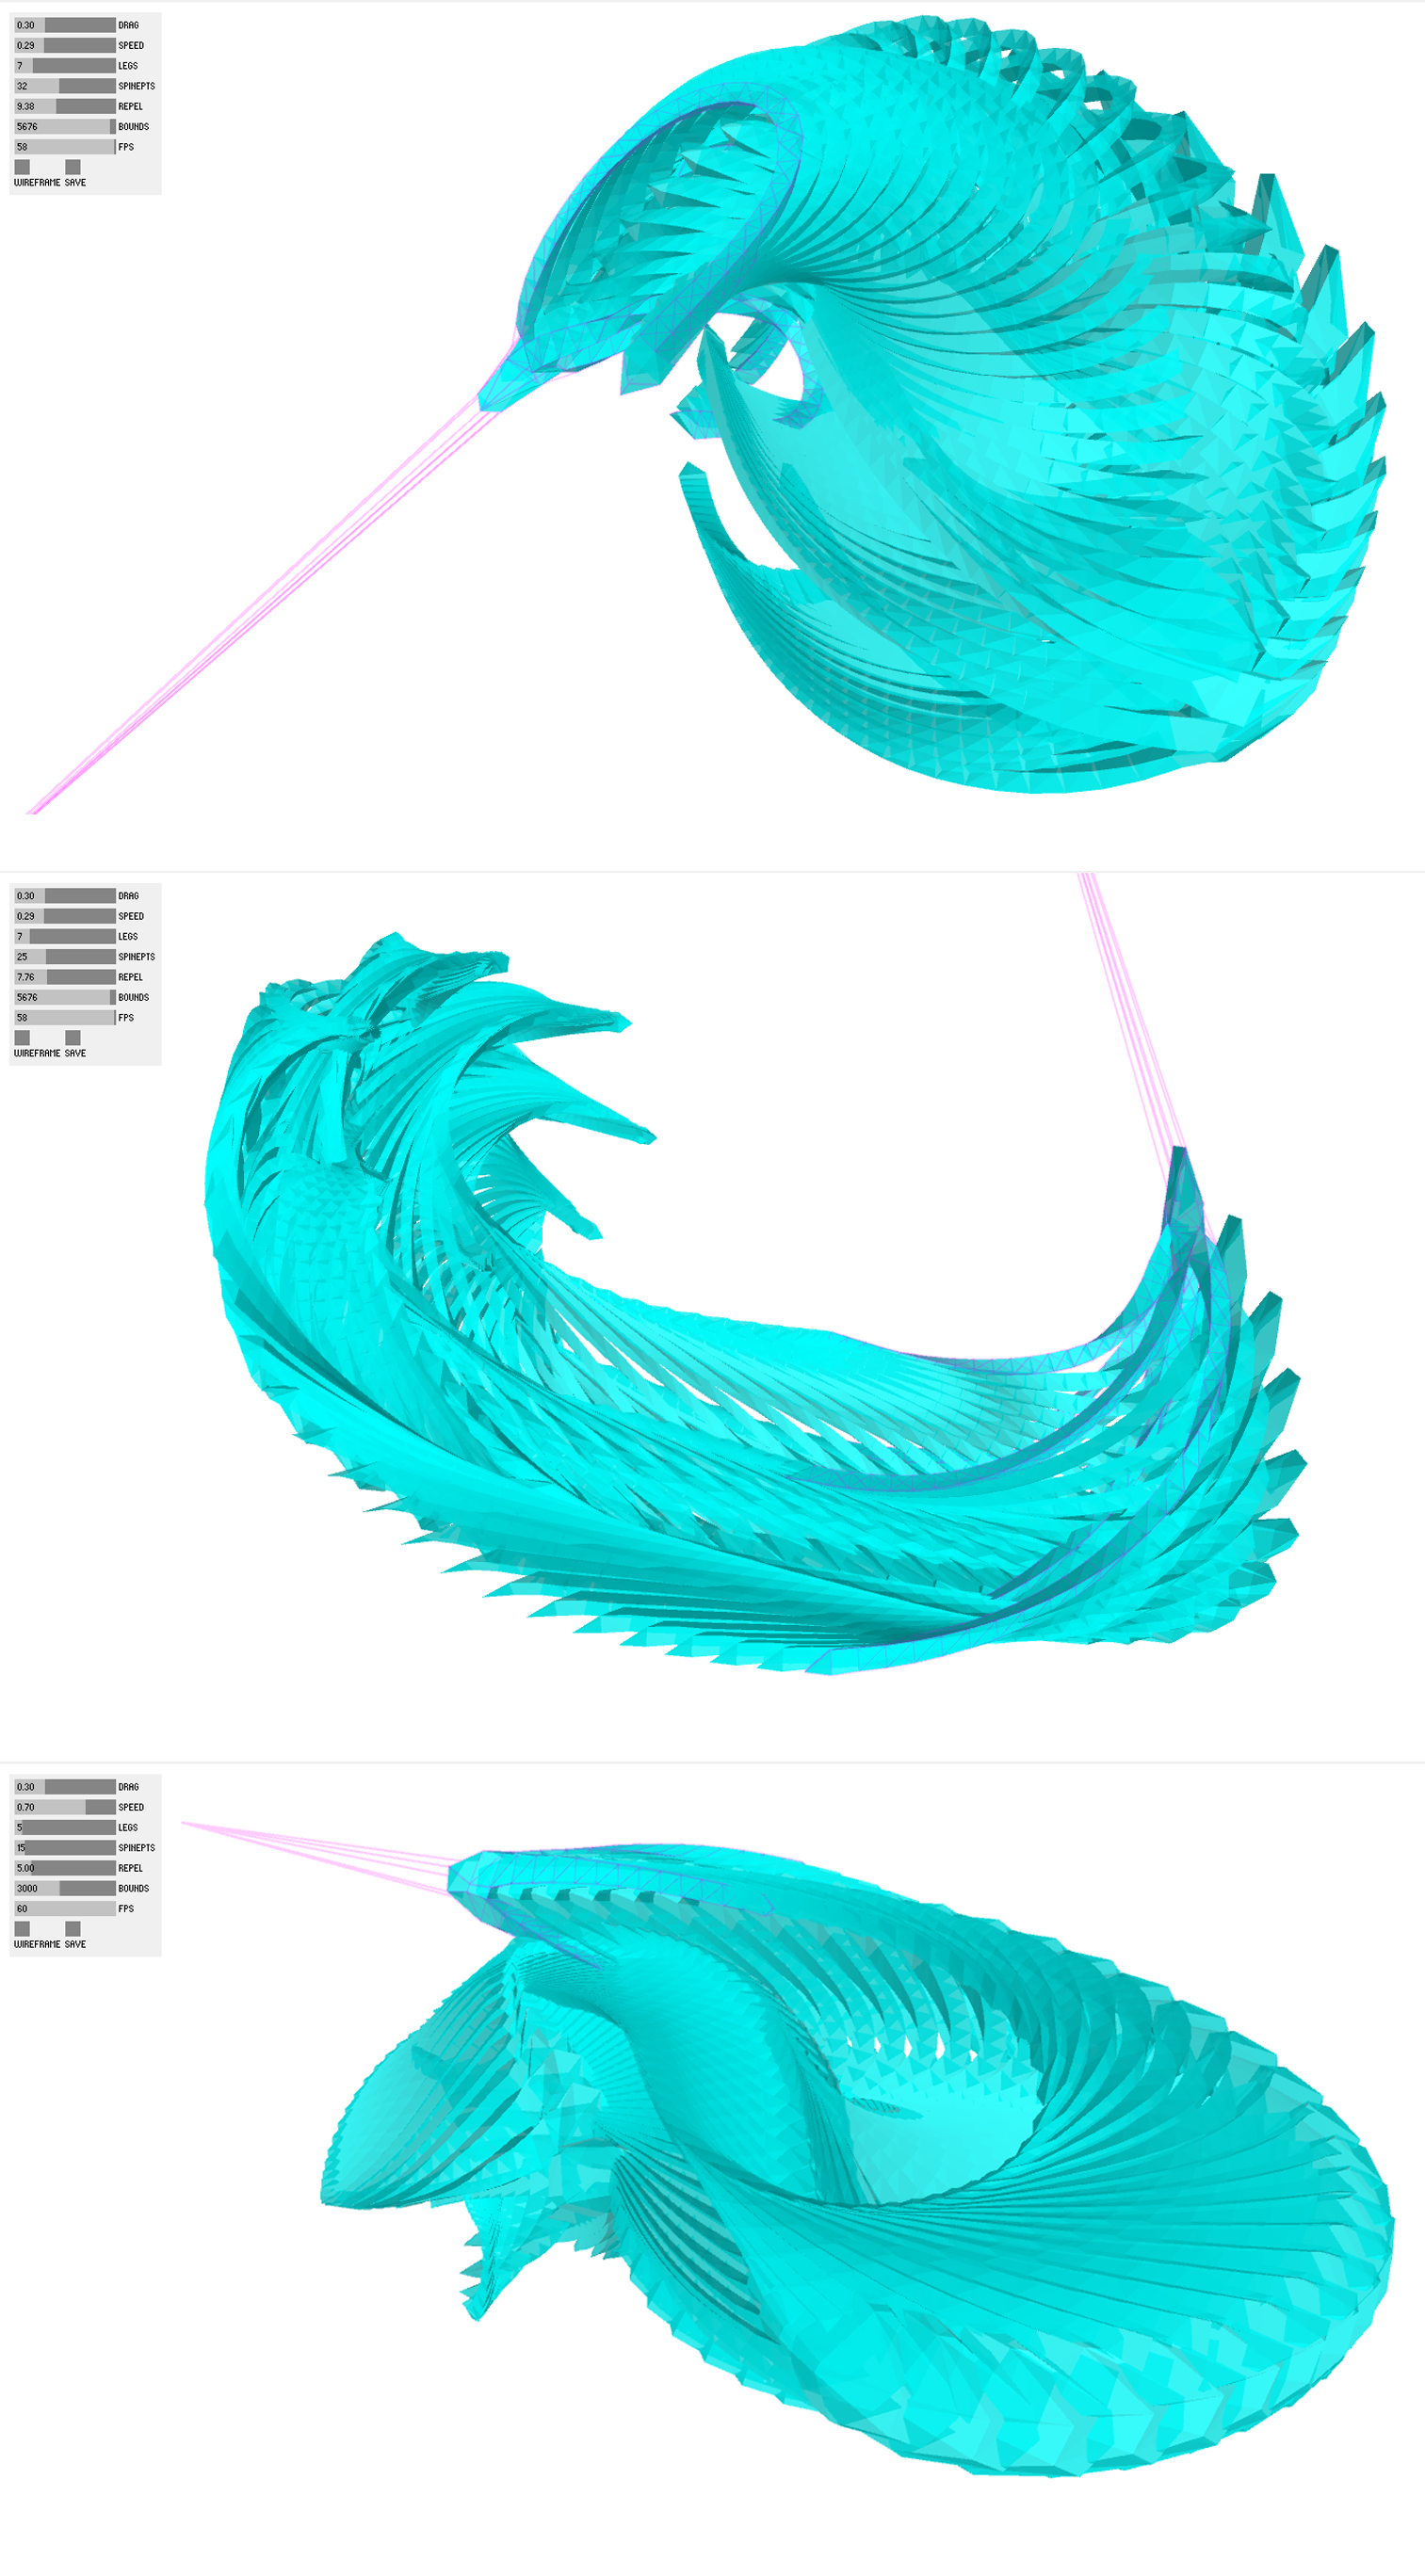
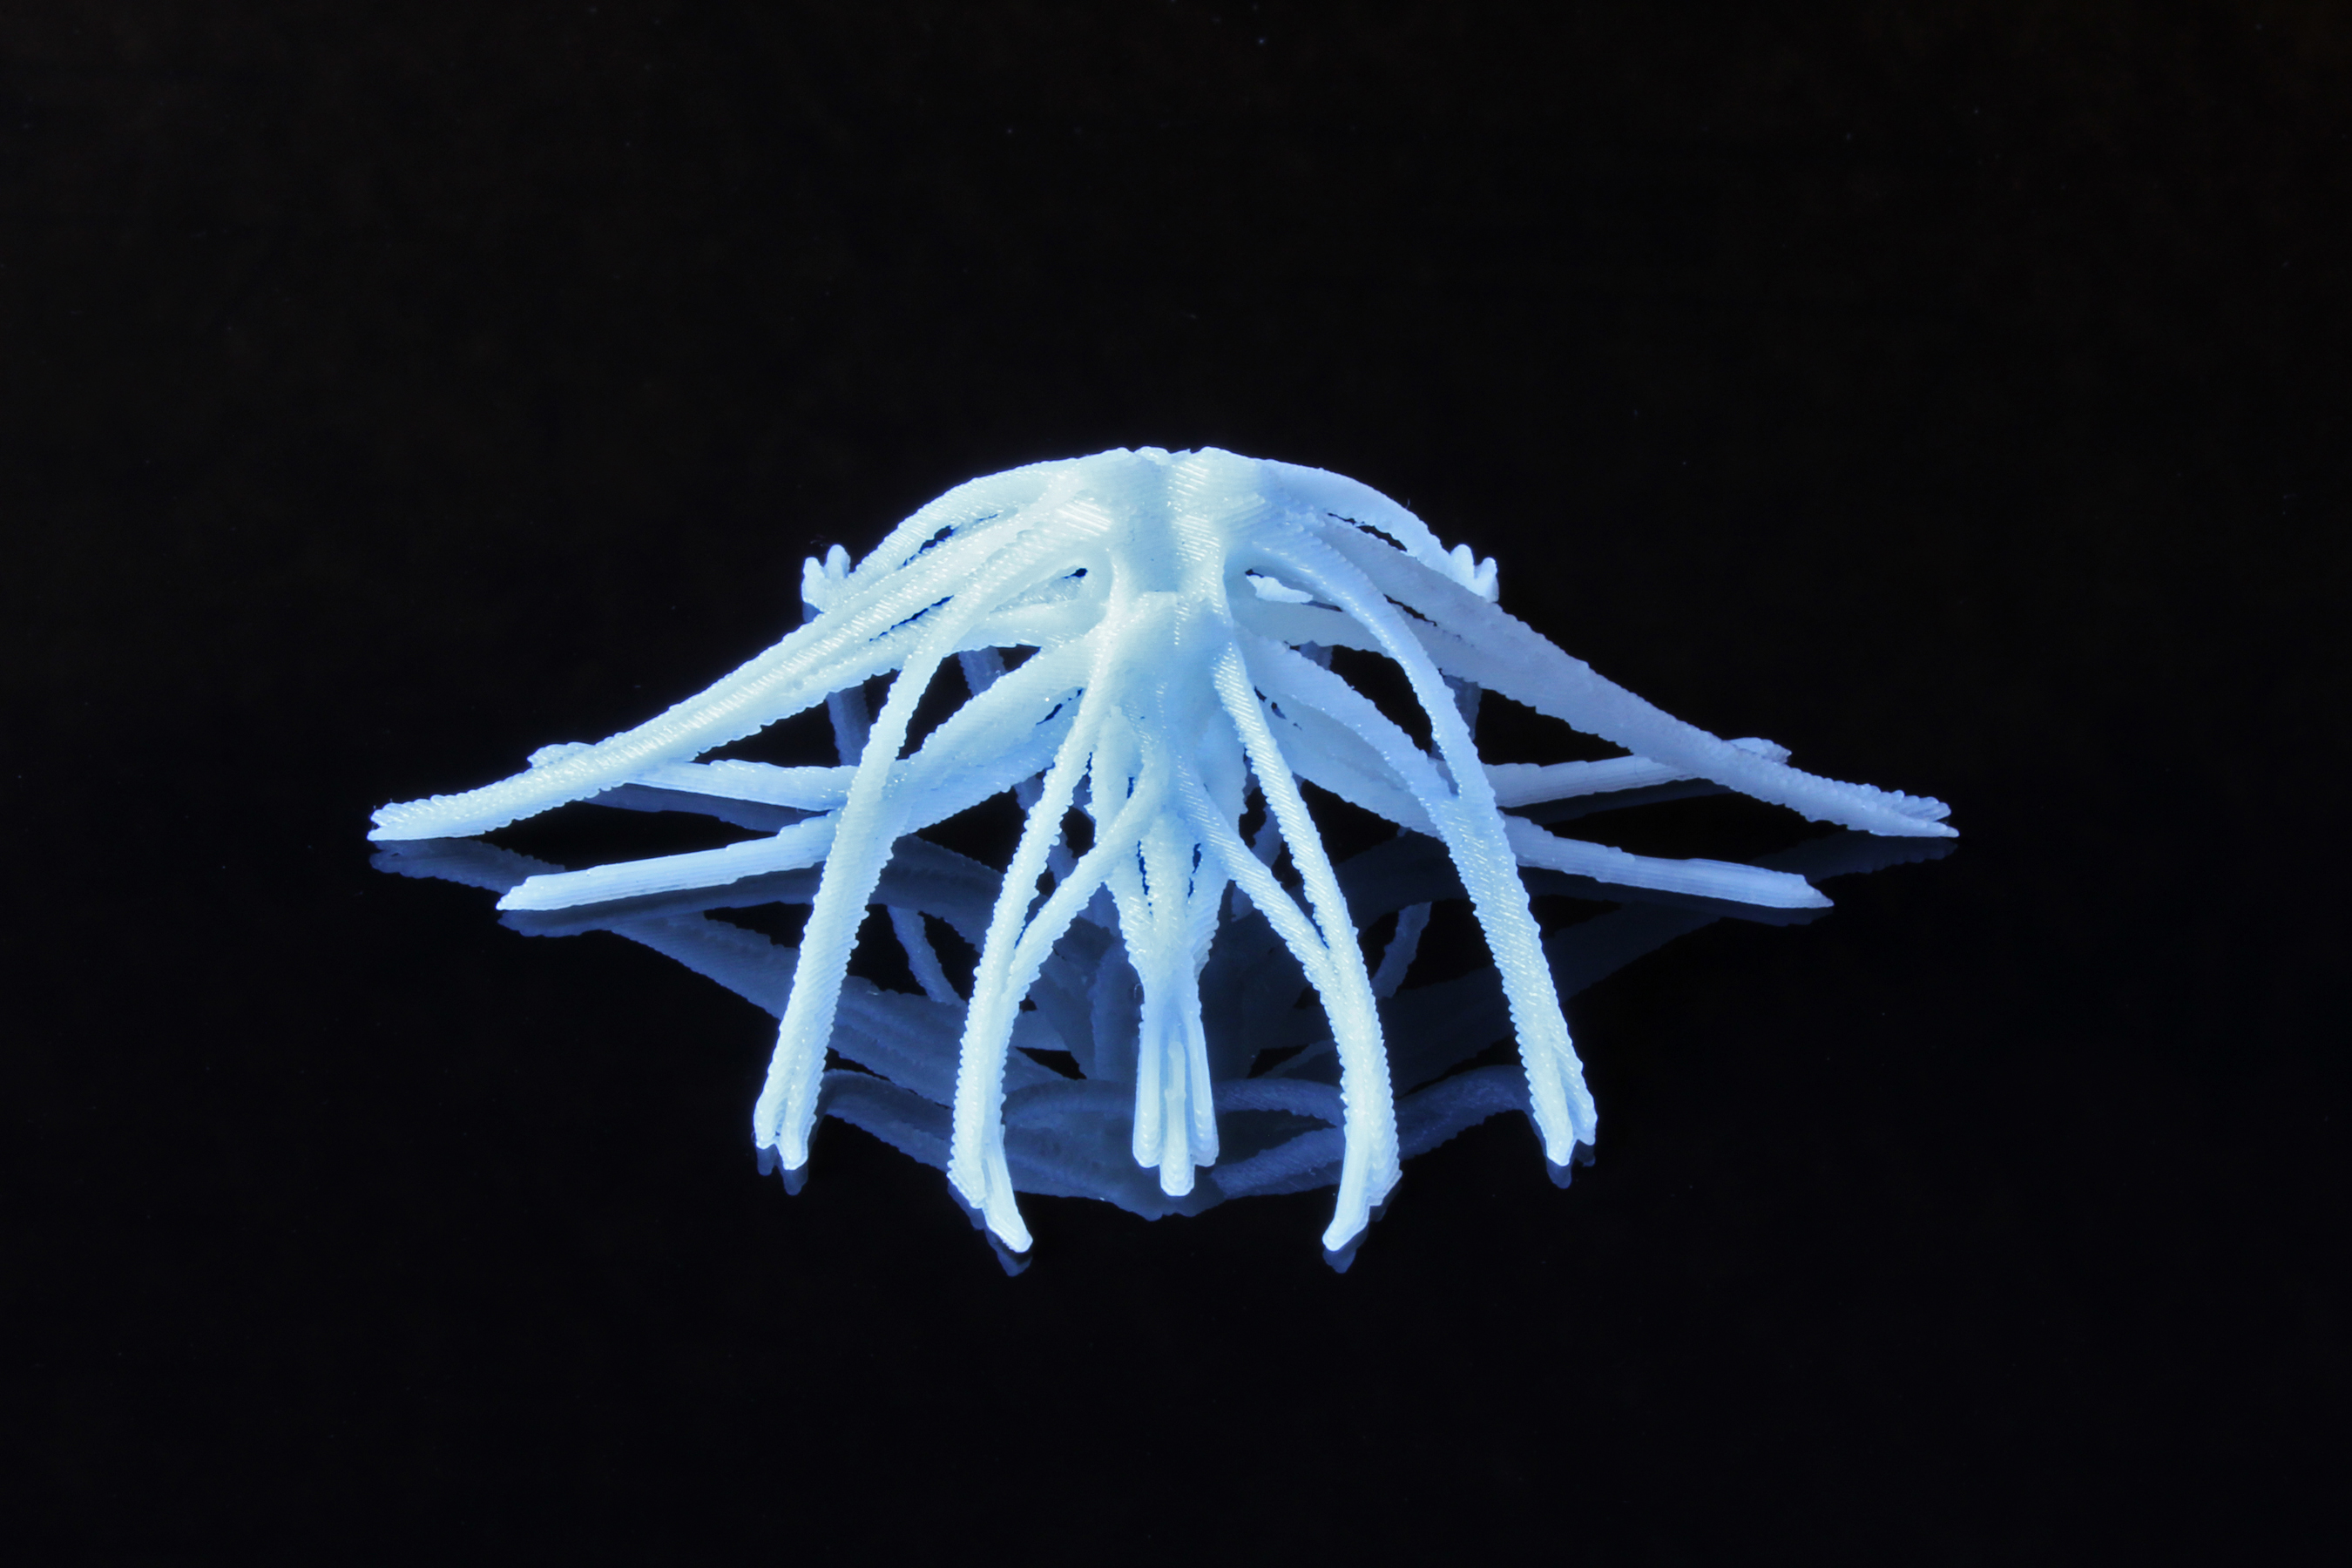
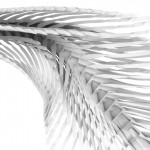
Within the simulated environment the creature can be manipulated for formal, spatial, and gestural variation (below left). Internal parameters (the number of legs and joints per leg) combine with external parameters (such as drag and repulsion forces) to create a high level of control over the creature’s responsiveness and movement through the virtual space. As the creature’s movements are traced through space and time, its familiar squid-like motion aggregates into unexpected, intricate forms (below right). The resulting forms are immediately ready for fabrication, and can be exported to high resolution 3D printers (bottom).


Physical Artifacts Generated:

 
Additional Digital Artifacts:


*made in java with the help of Processing, Toxiclibs, PeasyCam, and ControlP5

Alex Wolfe + Mahvish Nagda | Final Project

by a.wolfe @ 8:00 am

For our final, Mahvish and I collaborated on a kinetic wearable. We wanted to focus on creating a lightweight system that allowed for garment wide kinetic movement, a feature lacking from most wearables today. In order to accomplish this we used the Lilypad Arduino and Processing to develop some generative Origami.


Ju Young Park – Final Project

by ju @ 7:50 am

Inspiration 


Augmented Reality is considered as a new business market with potential growth. Many companies now employ the Augmented Reality in marketing, advertising, and products. Especially, education and publishing companies start to invest in digital book market. In Korea, Samsung publishing company launched a children’s AR book in last December. They implemented a mobile application that can be used for the children’s AR book. I found this interesting, because I am interested in educational software development. Therefore, I decided to create one by myself as a final project.


Project Description


ARbook is an interactive children’s book that provides storytelling 2D image using Augmented Reality. With this project, I attempt to create an educational technology for children’s literacy development. My main goal is to motivate and engage users while they read the whole story. Motivation and engagement are very important factors that keep children’s attention on reading for a long period of time.

I decided to employ Augmented Reality in my project, because it can easily interact with audience, and many children find it interesting. Therefore, I thought that Augmented Reality could be a prime factor to engage and motivate children.

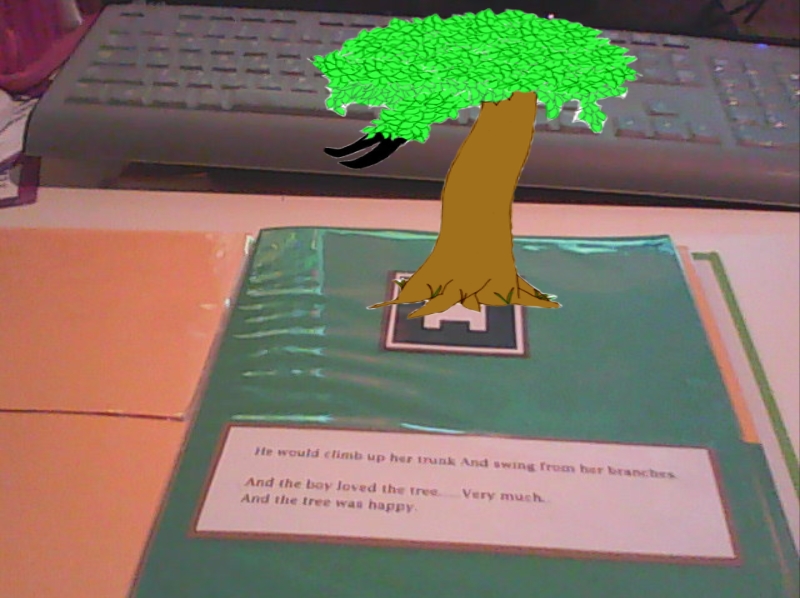
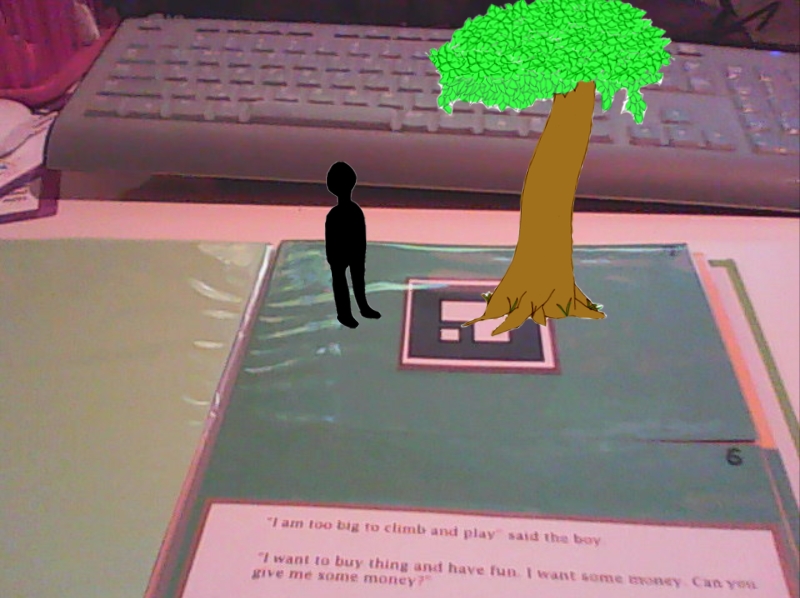
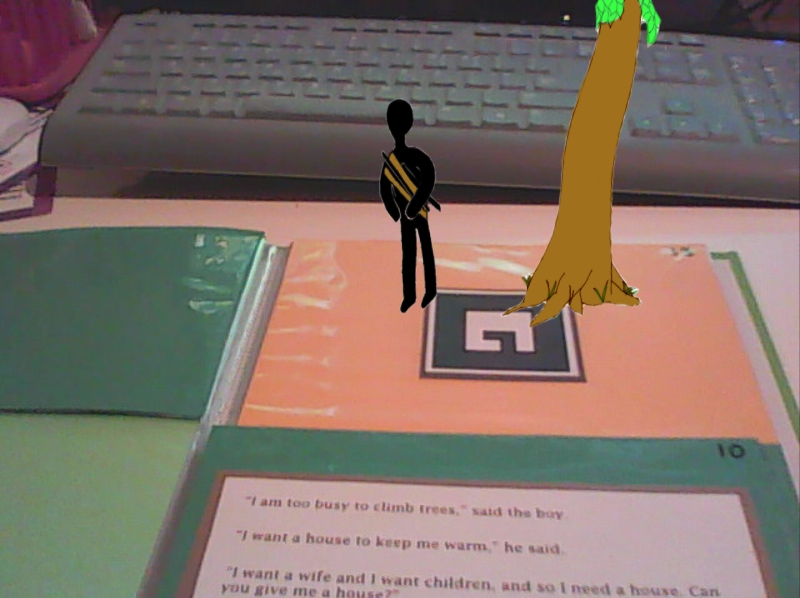
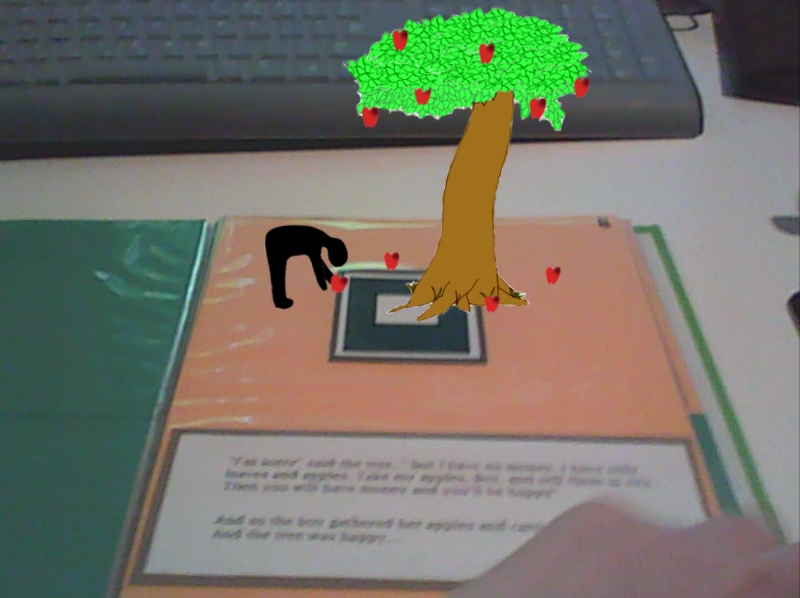
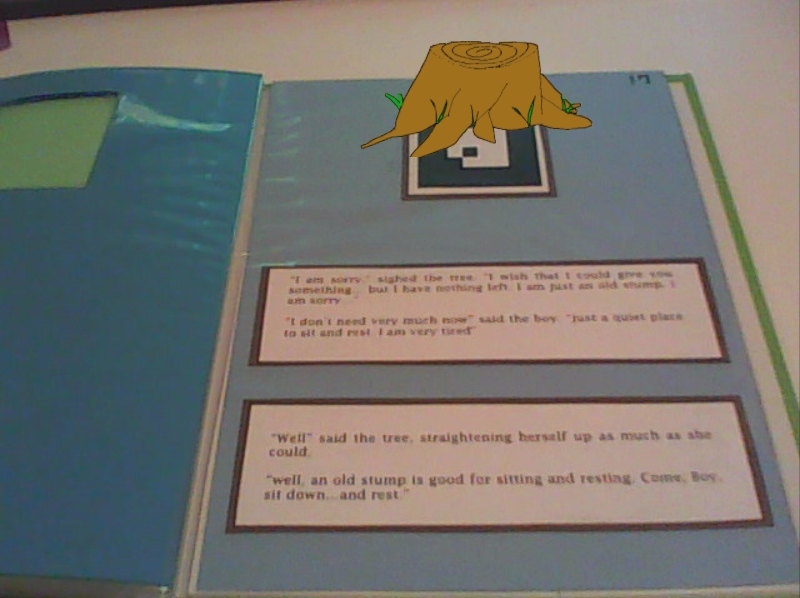
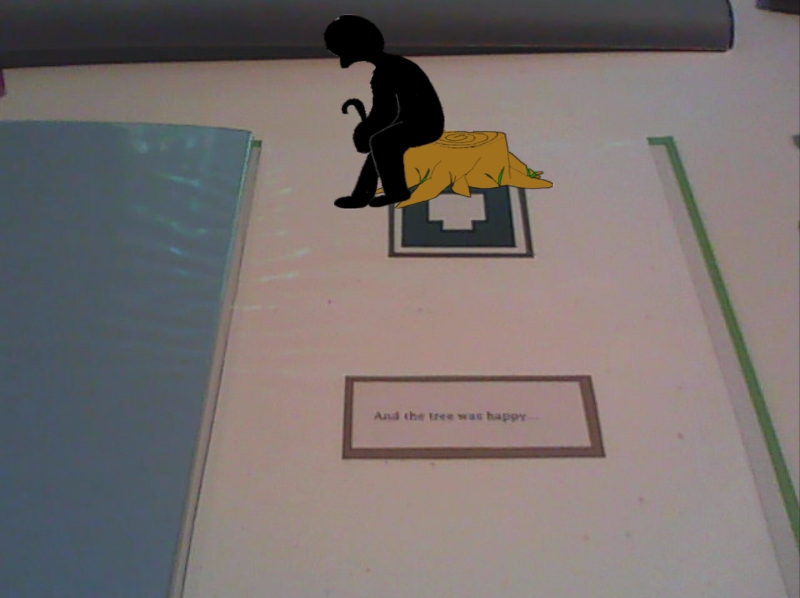
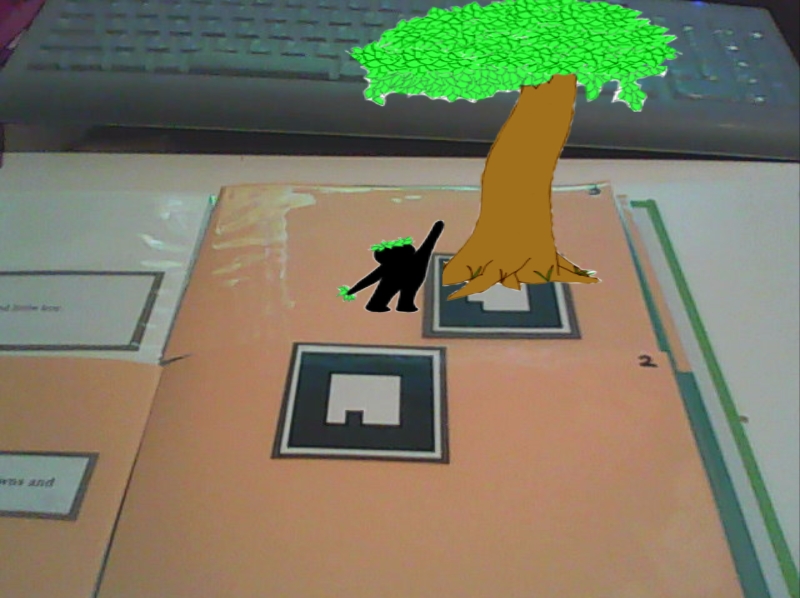
The ARbook allows users to read the story and see the corresponding image at the same time. This prohibits misunderstanding and incorrect transfer of storytelling of the book. A web-cam camera is attached to the book, so users are required to capture AR code on the book with the camera in order to view the corresponding scene, and each scene is displayed on computer screen.


Process/Prototype


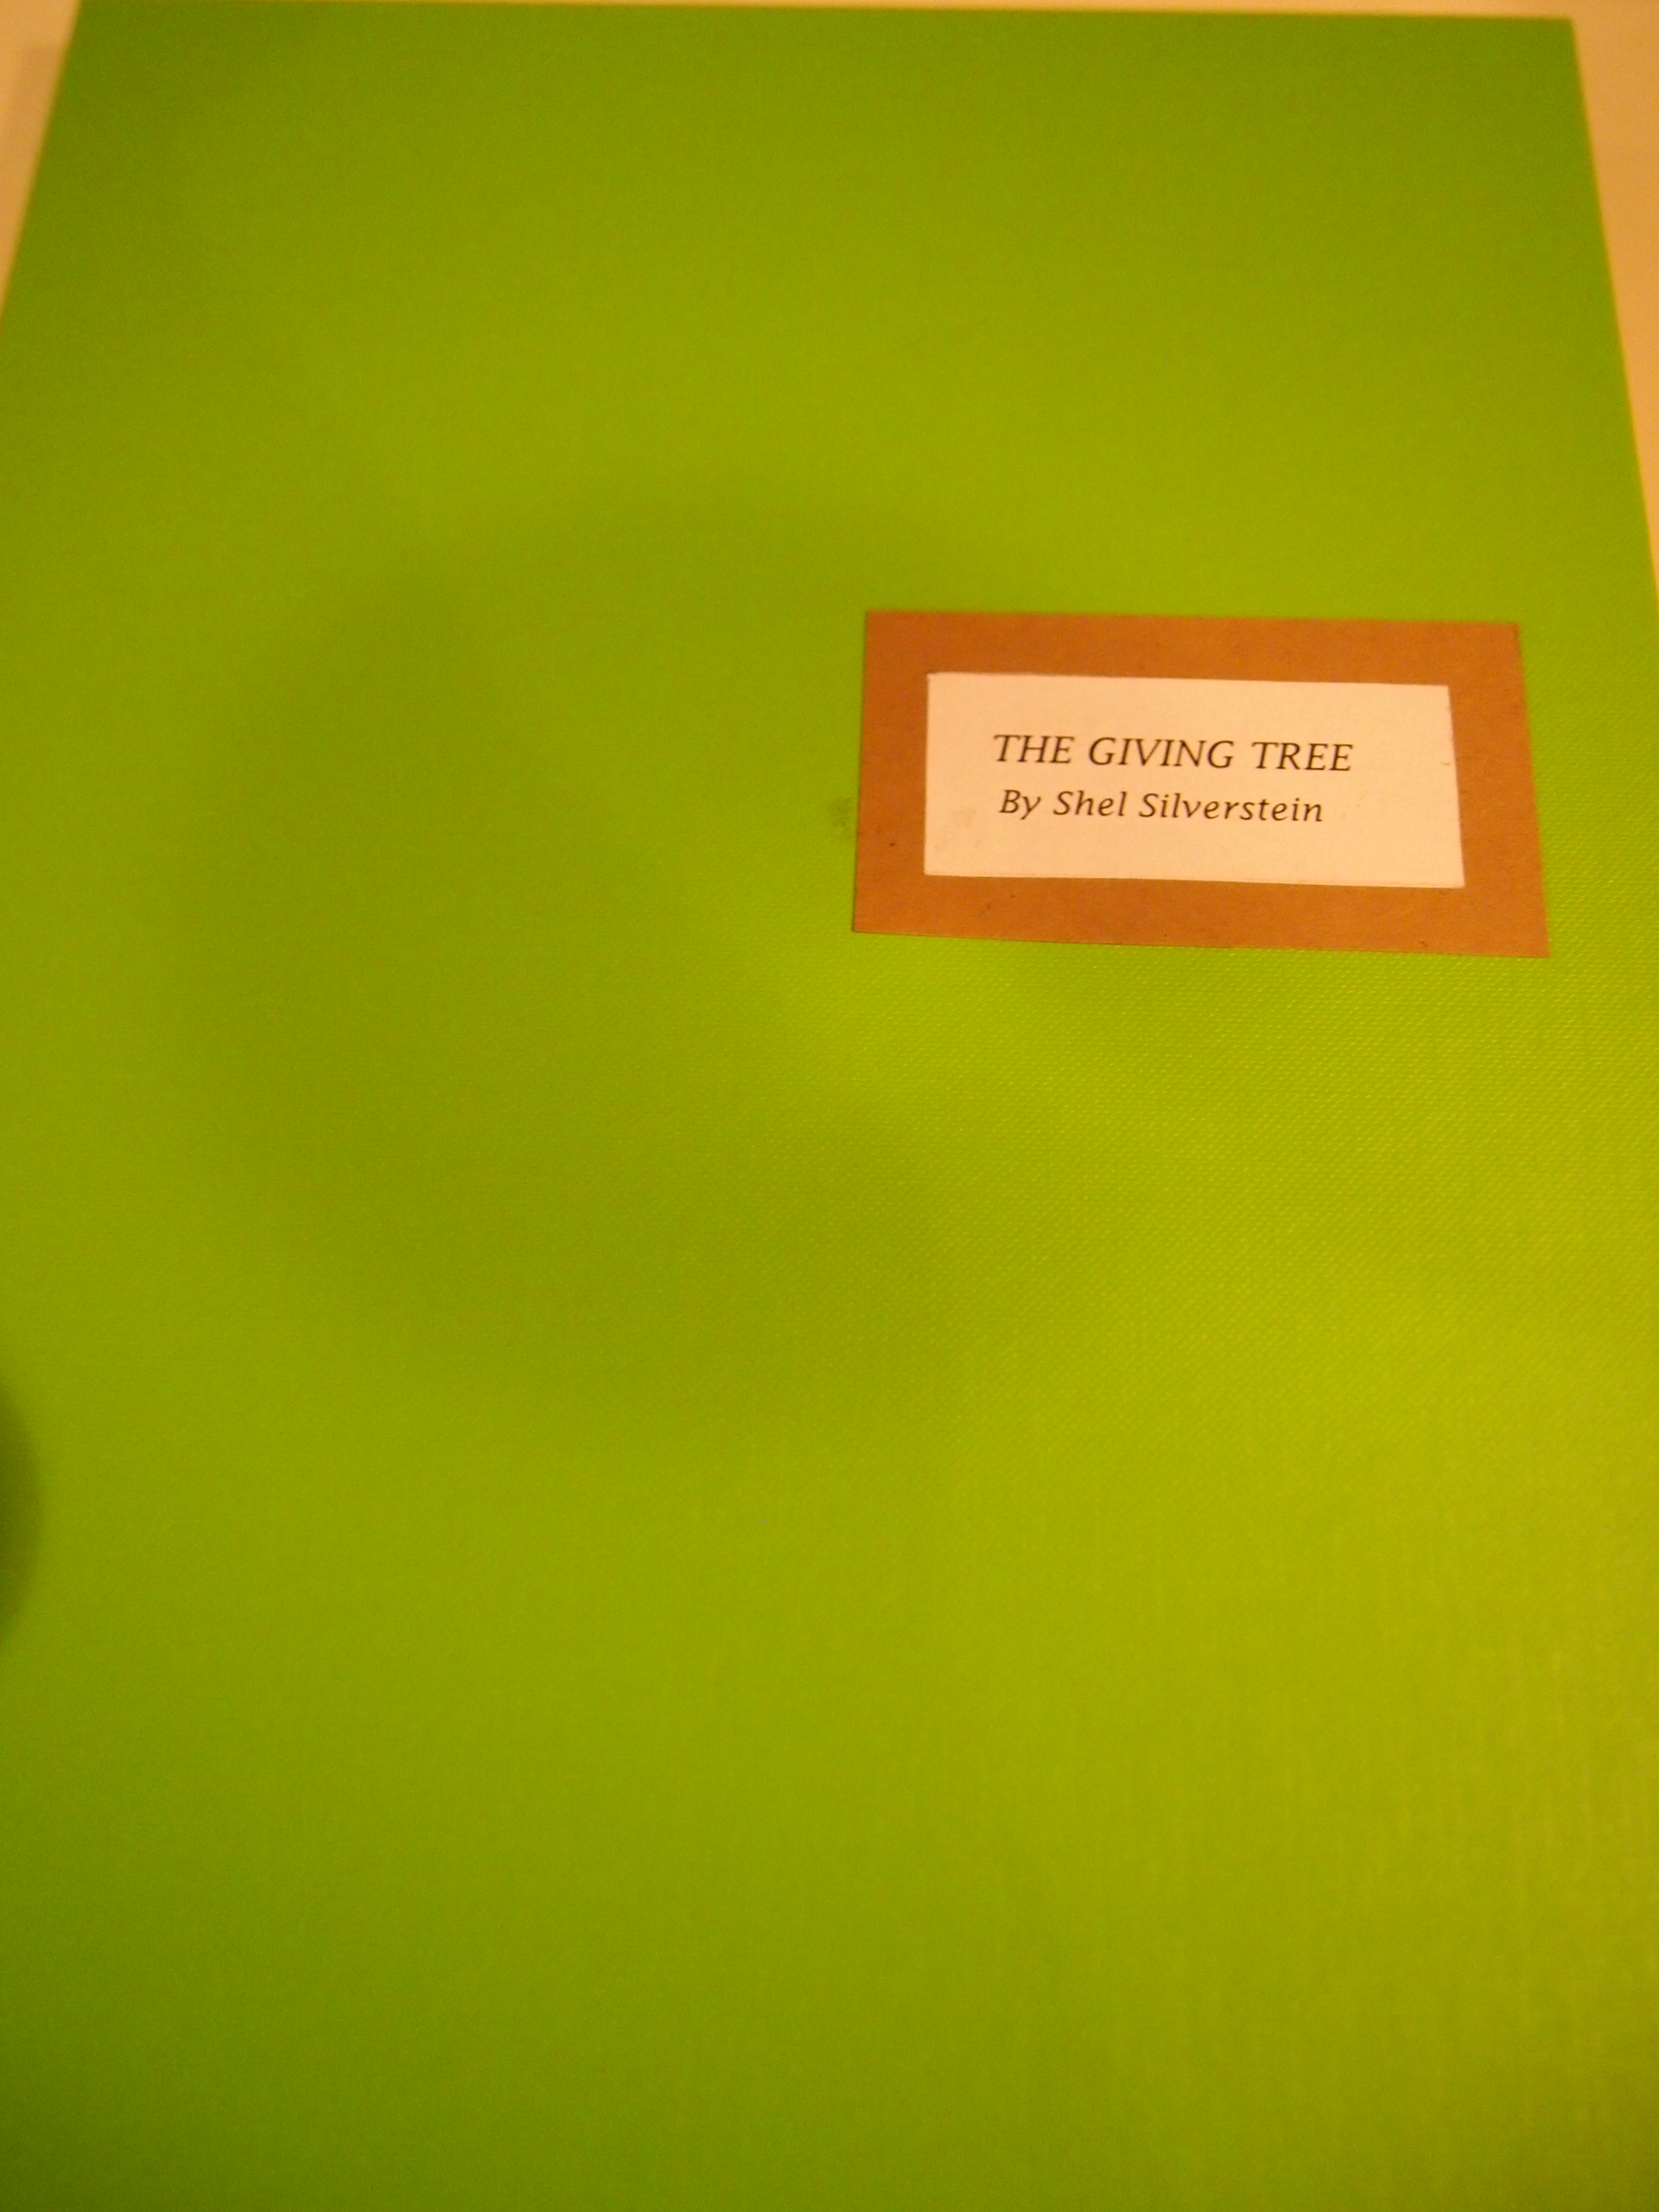
I decided to implement the ARbook using  Shel Silverstein’s The Giving Tree. Primary reason for choosing this book is my personal taste. When I was a kid, I really enjoyed reading this book, and as a child, this story taught me a lot of moral lessons. This book is not just a children’s short story, but it includes ethics, moralities, climax, and both happy and sad ending. The ending of this book can be interpreted as happy or sad depending on a reader’s perspective. Secondary reason for choosing this book is to teach young children being selfless. Each scene of The Giving Tree contains valuable lessons for life.

For artistic part of my project, I drew each scene by hand on a paper, and I scanned the each scene for editing on a computer. Then, I used After Effects and Photoshop to color and animate scenes.

For technical part of my project, I used ARtoolkit library and JMyron web-cam in Processing. I added different patterns of AR codes so the web-cam recognizes each pattern. After storing each pattern on the system, I associated each scene’s image to each pattern.  During the process, I had to compute every AR code’s vertices, so the corresponding image pops up on a right location.


Images


 Video


[youtube=https://www.youtube.com/watch?v=PRoObZQxol0]

KelseyLee – Project 5

by kelsey @ 7:40 am


Paragraph:

Using an Arduino Nano, LEDs and an accelerometer, this wearable bracelet lights up based on the wearer’s movement. Originally envisioned as an anklet, this piece can be worn on the arm as well. The faster the movement detected, the more quickly the cyclic LED pattern blinks. The wearer can then switch through the patterns using a designated pose. The piece is meant to express motion through light, whether the wearer is walking, dancing, or anything in between.

Sam Lavery – Final Project – steelwARks

by sam @ 6:27 am

steelwARks is an exploration of trackerless, large-scale augmented reality. My goal was to create a system that would superimpose 3D models of the Homestead Steelworks on top of the Waterfront (the development that has replaced this former industrial landscape). Instead of attaching the 3D models to printed AR markers, I used landmarks and company logos on-site as reference points to position several simple models of rolling mills. When the models are seen onscreen, overlaid on the environment, it gives the viewer a sense of the massive scale of these now-demolished buildings. As I was testing my system out at the Waterfront, I got a lot of positive feedback from some yinzers who were enjoying the senior special at a nearby restaurant. They told me it was very meaningful for them to be able to experience this lost landscape that once defined their hometown.

1st Test

This project was built using openFrameworks. I combined the Fern and 3DmodelLoader libraries, using videoGrabber to capture a live video feed from an external webcam. The main coding challenges of this project were getting the libraries to talk to each other and projecting the 3D model properly. Fern doesn’t have an easy built-in way to attach 3D models to images it tracks so I had to hack my own. I also had never worked with openGL before so getting the model to render correctly was tricky.

The computer vision from the Fern library worked very well in indoor testing, but when I used it outside, it had some issues. I had to update the images Fern was using as the day went by and lighting changed. This is a tedious process on an old core2duo machine, sometimes this process took 10-20 minutes. When using a large, 3D object as a marker, it was difficult to get the webcam pointed precisely at it to register the image. In the end, the program was only stable when I used logos as the markers.


Final Project: Zack JW: My Digital Romance

by zack @ 3:26 am

Technology for Two: My Digital Romance

//Synopsis

From the exhibition flyer:  Long distance relationships can be approached with new tools in the age of personal computation.  Can interaction design take the love letter closer to its often under-stated yet implicit conclusion? Can emotional connections truly be made over a social network for two?  This project explores new possibilities in “reaching out and touching someone”.

[youtube https://www.youtube.com/watch?v=h_aKZyIaqKg]


[youtube https://www.youtube.com/watch?v=tIT1-bOx5Lw]


//Why

The project began as one-liner, born of a simple and perhaps common frustration.  In v 1.o (see below) the goal was to translate my typical day, typing at a keyboard as I am now, into private time spent with my wife.  The result was a robot penis that became erect only when I was typing at my keyboard.

Her reaction:  “It’s totally idiotic and there’s no way I’d ever use it.”

So we set out to talk about why she felt that way and, if we were to redesign it in any way, how would it be different? The interesting points to come out of the conversation:

  • What makes sex better than masterbation is the emotional connection experienced by one participants ability to respond to the others cues.  It’s a dialogue.
  • Other desirable design features are common to existing devices.

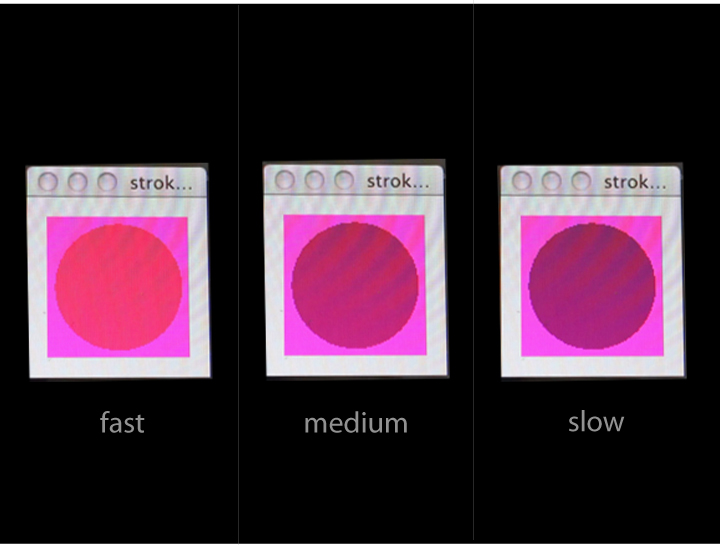
V2 was redesigned so nothing functions without the ‘permission’ of the other.  The physical device is connected to remote computer over wiFi.  The computer has an application that operates the physical device.  Until the device it touched, the application doesn’t have any control.  Once it is activated, keystrokes accumulate to erect it.  Once erect, the device can measure how quickly or aggressively it’s being used and updates the application graphic, changing from cooler to hotter red.  If the color indicates aggressive use, the controller may choose to increase the intensity with a series of vibrations.

While this physically approximates the interactive dance that is sex, the question remains ‘does it make an emotional connection?’. Because the existing version is really only a working prototype that cannot be fully implemented, that question remains unanswered.

//BUT WHY?  and…THE RESULTS OF THE EXIBITION…

What no one wanted to ask was, “Why don’t you just go home and take care of your wife?”  No one did.  The subversive side of the project, which is inherently my main motivation, is offering viewers every opportunity to say ‘I’m an idiot.  Work less.  Get your priorities straight’.

I believe we’ve traded meaningful relationships for technological approximations.  While I would genuinely like to give my wife more physical affection, I don’t actually want to do it with some technological intermediary.  No more than I want “friends” on Facebook.  But many people do want to stay connected in this way. The interesting question is,’ Are we ready for technology to replace even our most meaningful relationships?’.  Is it because the tech revolution has exposed some compulsion to work, or some fear of intimacy?  If not, why did not one of the 30+ people I spoke to in the exhibition question it?  Continuing to explore this question will guide future work.

//Interaction

Inspired by some great conversations with my wife, “Hand Jive” by B.J.Fogg, and the first class erudition of Kyle Machulis, the flow of interaction was redesigned as diagramed here.  It is important to note the “/or not”, following my wife’s sarcastic criticism, “Oh.  So you turn it on and I’m supposed to be ready to use it.”
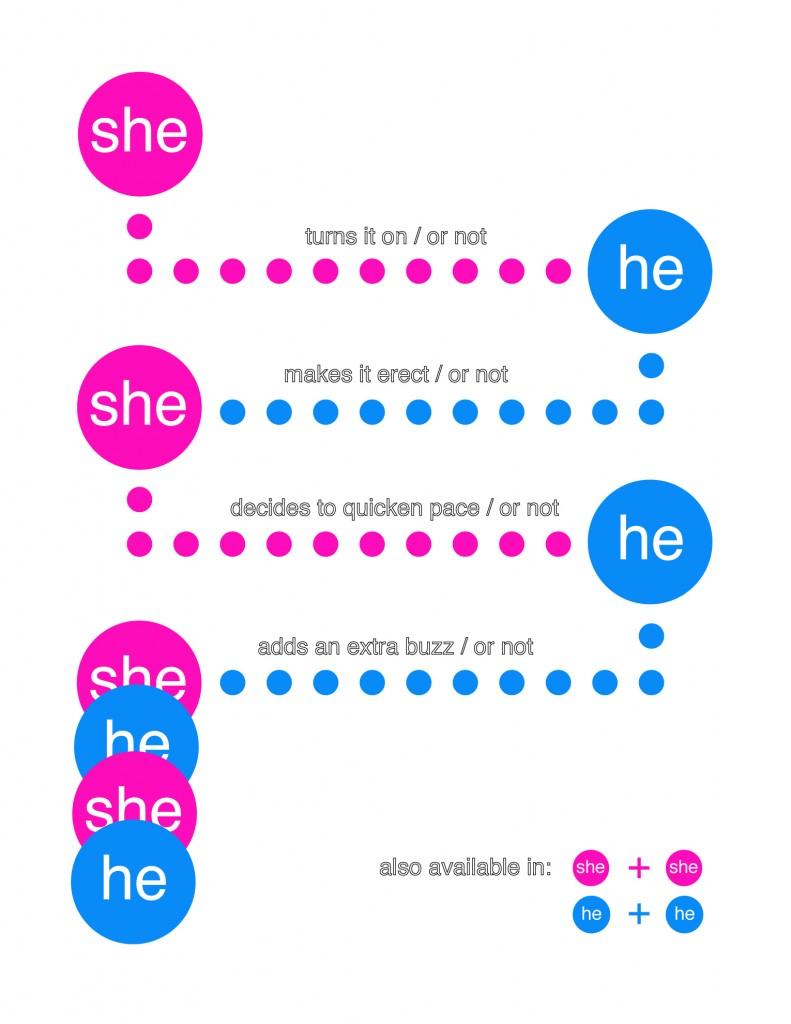
Reciprocity, like Sex

It is turned on by being touched.  This unlocks the control application on the computer.  If not used on the device side, it eventually shuts back down.
Twin Force Resistant Sisters

The application ‘gets aroused’ to notify the controller.  At this point, keystroke logging controls the motor that erects the device.
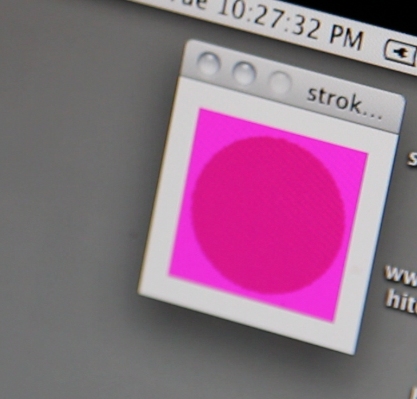
Turned On

The application monitors how quickly the device is being stroked by measuring the input time between two offset sensors.
Faster, Pussycat?

The faster the stroke, the hotter the red circle gets. (Thank you Dan Wilcox for pointing out that is looks like a condom wrapper.  That changed my life.)
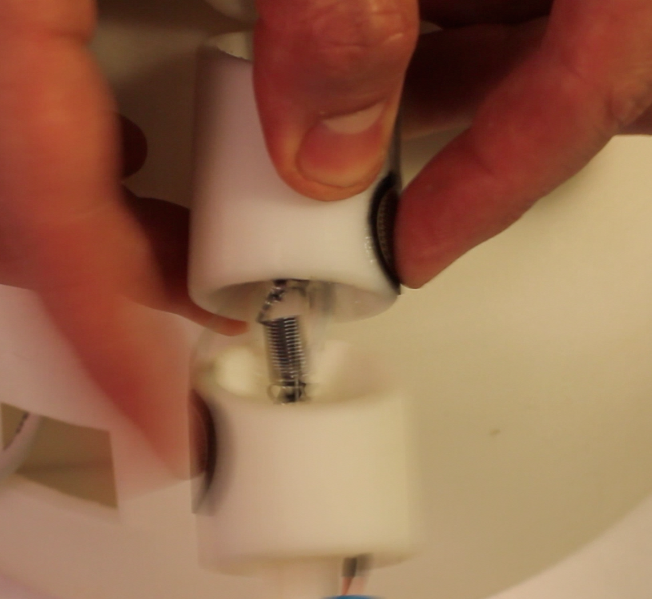
Gooey

Two “pager motors” can then be applied individually or in tandem by pressing the keys “B”, “U”, “Z”.  This feature could be programmed to turn on after reading a certain pace, or unlocked only after reaching a threshold pace.
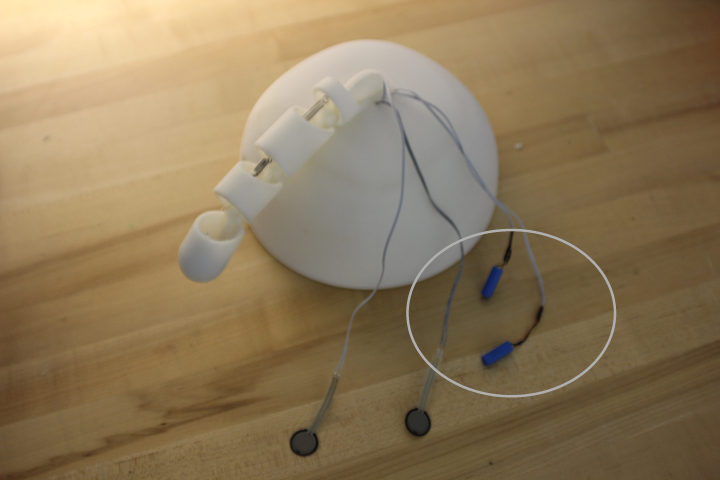
Industry Standard

//Process

This was V1, a.k.a. “My Dick in a Box”.
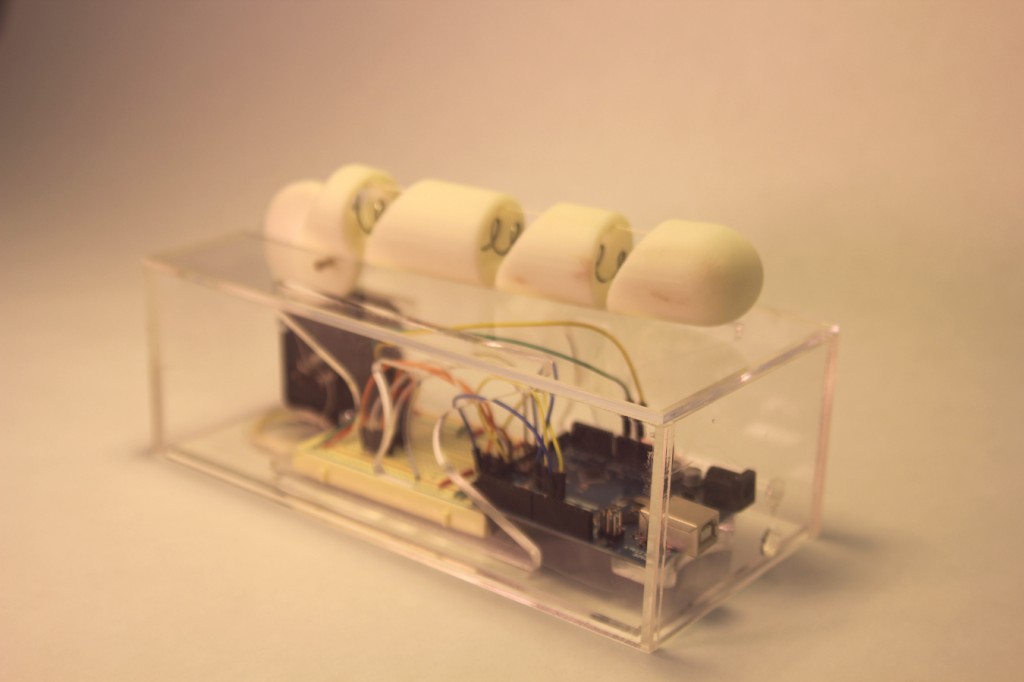
v1.0

The redesign began in CAD.  The base was redesigned to have soft edges and a broad stable base.
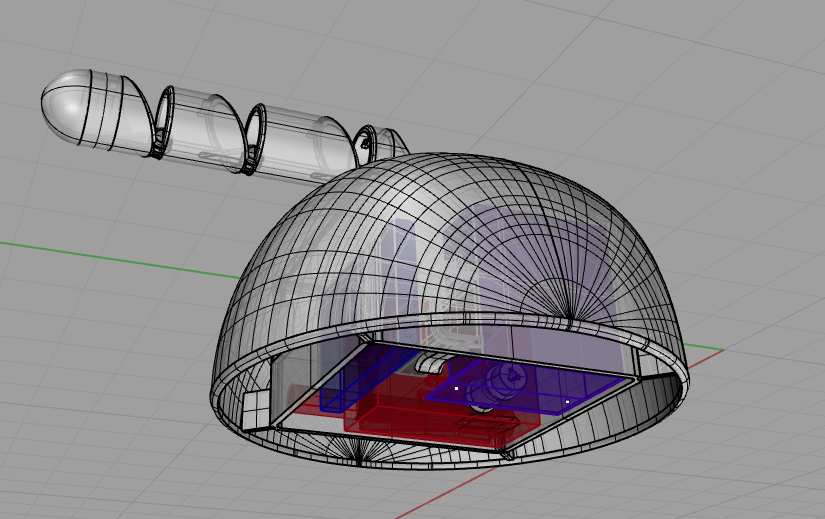
CAD

Much of the size and shape was predicated on the known electronic components including an Arduino with WiFly Shield, a stepper motor, circuit breadboard, and a 9v battery holder.  A window was left open to insert a USB cable for reprogramming the Arduino in place.

Hidden Motivations

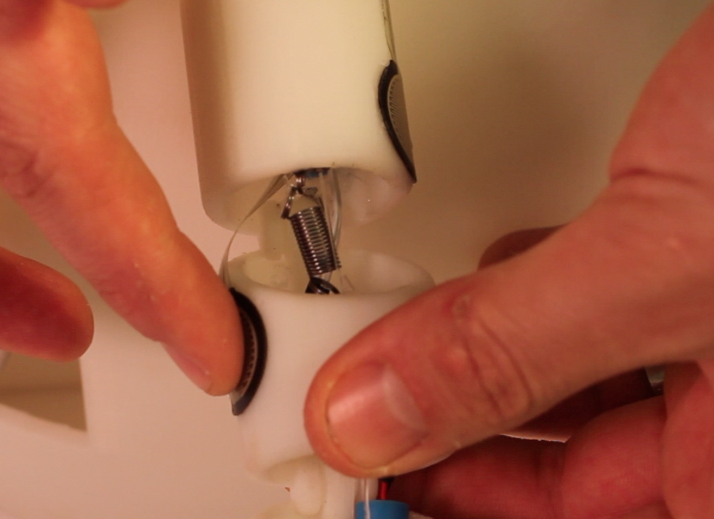
The articulated mechanical phallus operates by winding a monofilament around the shaft of the motor.  The wiring for the force sensors and vibrators is run internally from underneath.
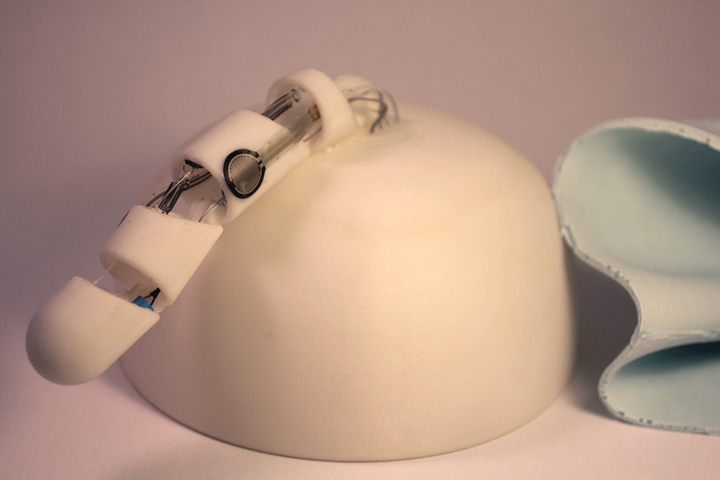
Robot weiner, Redefined

A silicon rubber cover was cast from a three piece mold.
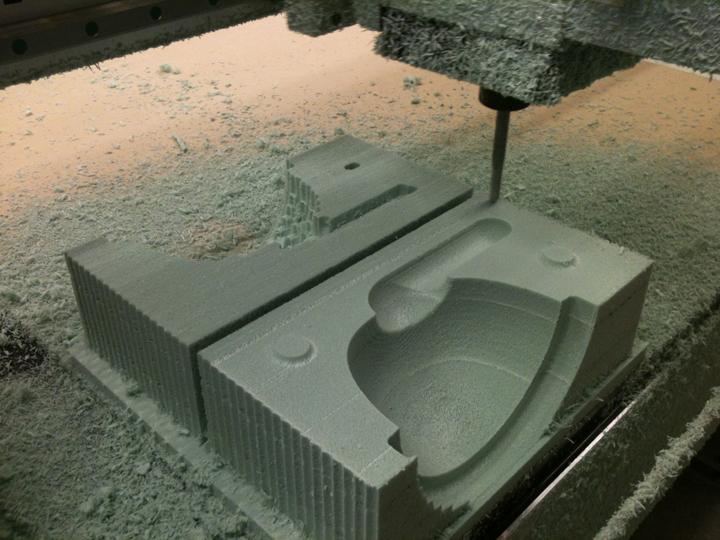
Careful Cut

This process was not ideal and will ultimately be redone with tighter parting lines and with a vacuum to reduce trapped air bubbles.  It is durable, and dish-washer safe.

Put a Hat On It.

While the wireless protocol was a poorly documented pain that works most of the time, it was a necessary learning experience and one I’m glad to have struggled through.  It warrants a top notch “Instructable” to save others from my follies.
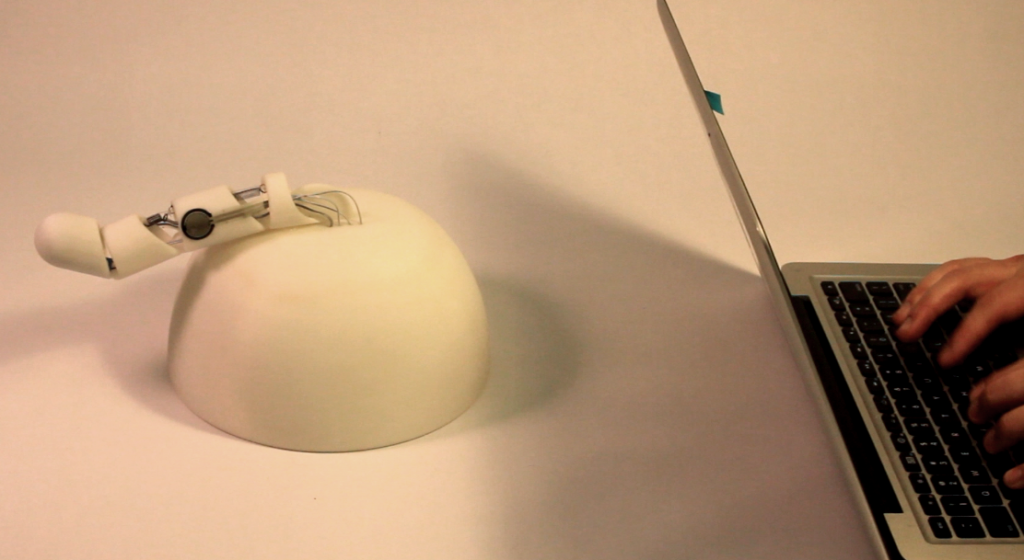
Look, No Wires!

Special thanks to:

  • My wife
  • Golan
  • Kyle
  • Dan
  • Blase
  • Mads
  • Derren
  • Luke


« Previous Page
This work is licensed under a Creative Commons Attribution-Noncommercial-Share Alike 3.0 Unported License.
(c) 2023 Interactive Art and Computational Design, Spring 2012 | powered by WordPress with Barecity